(5 years and 582 days ago)
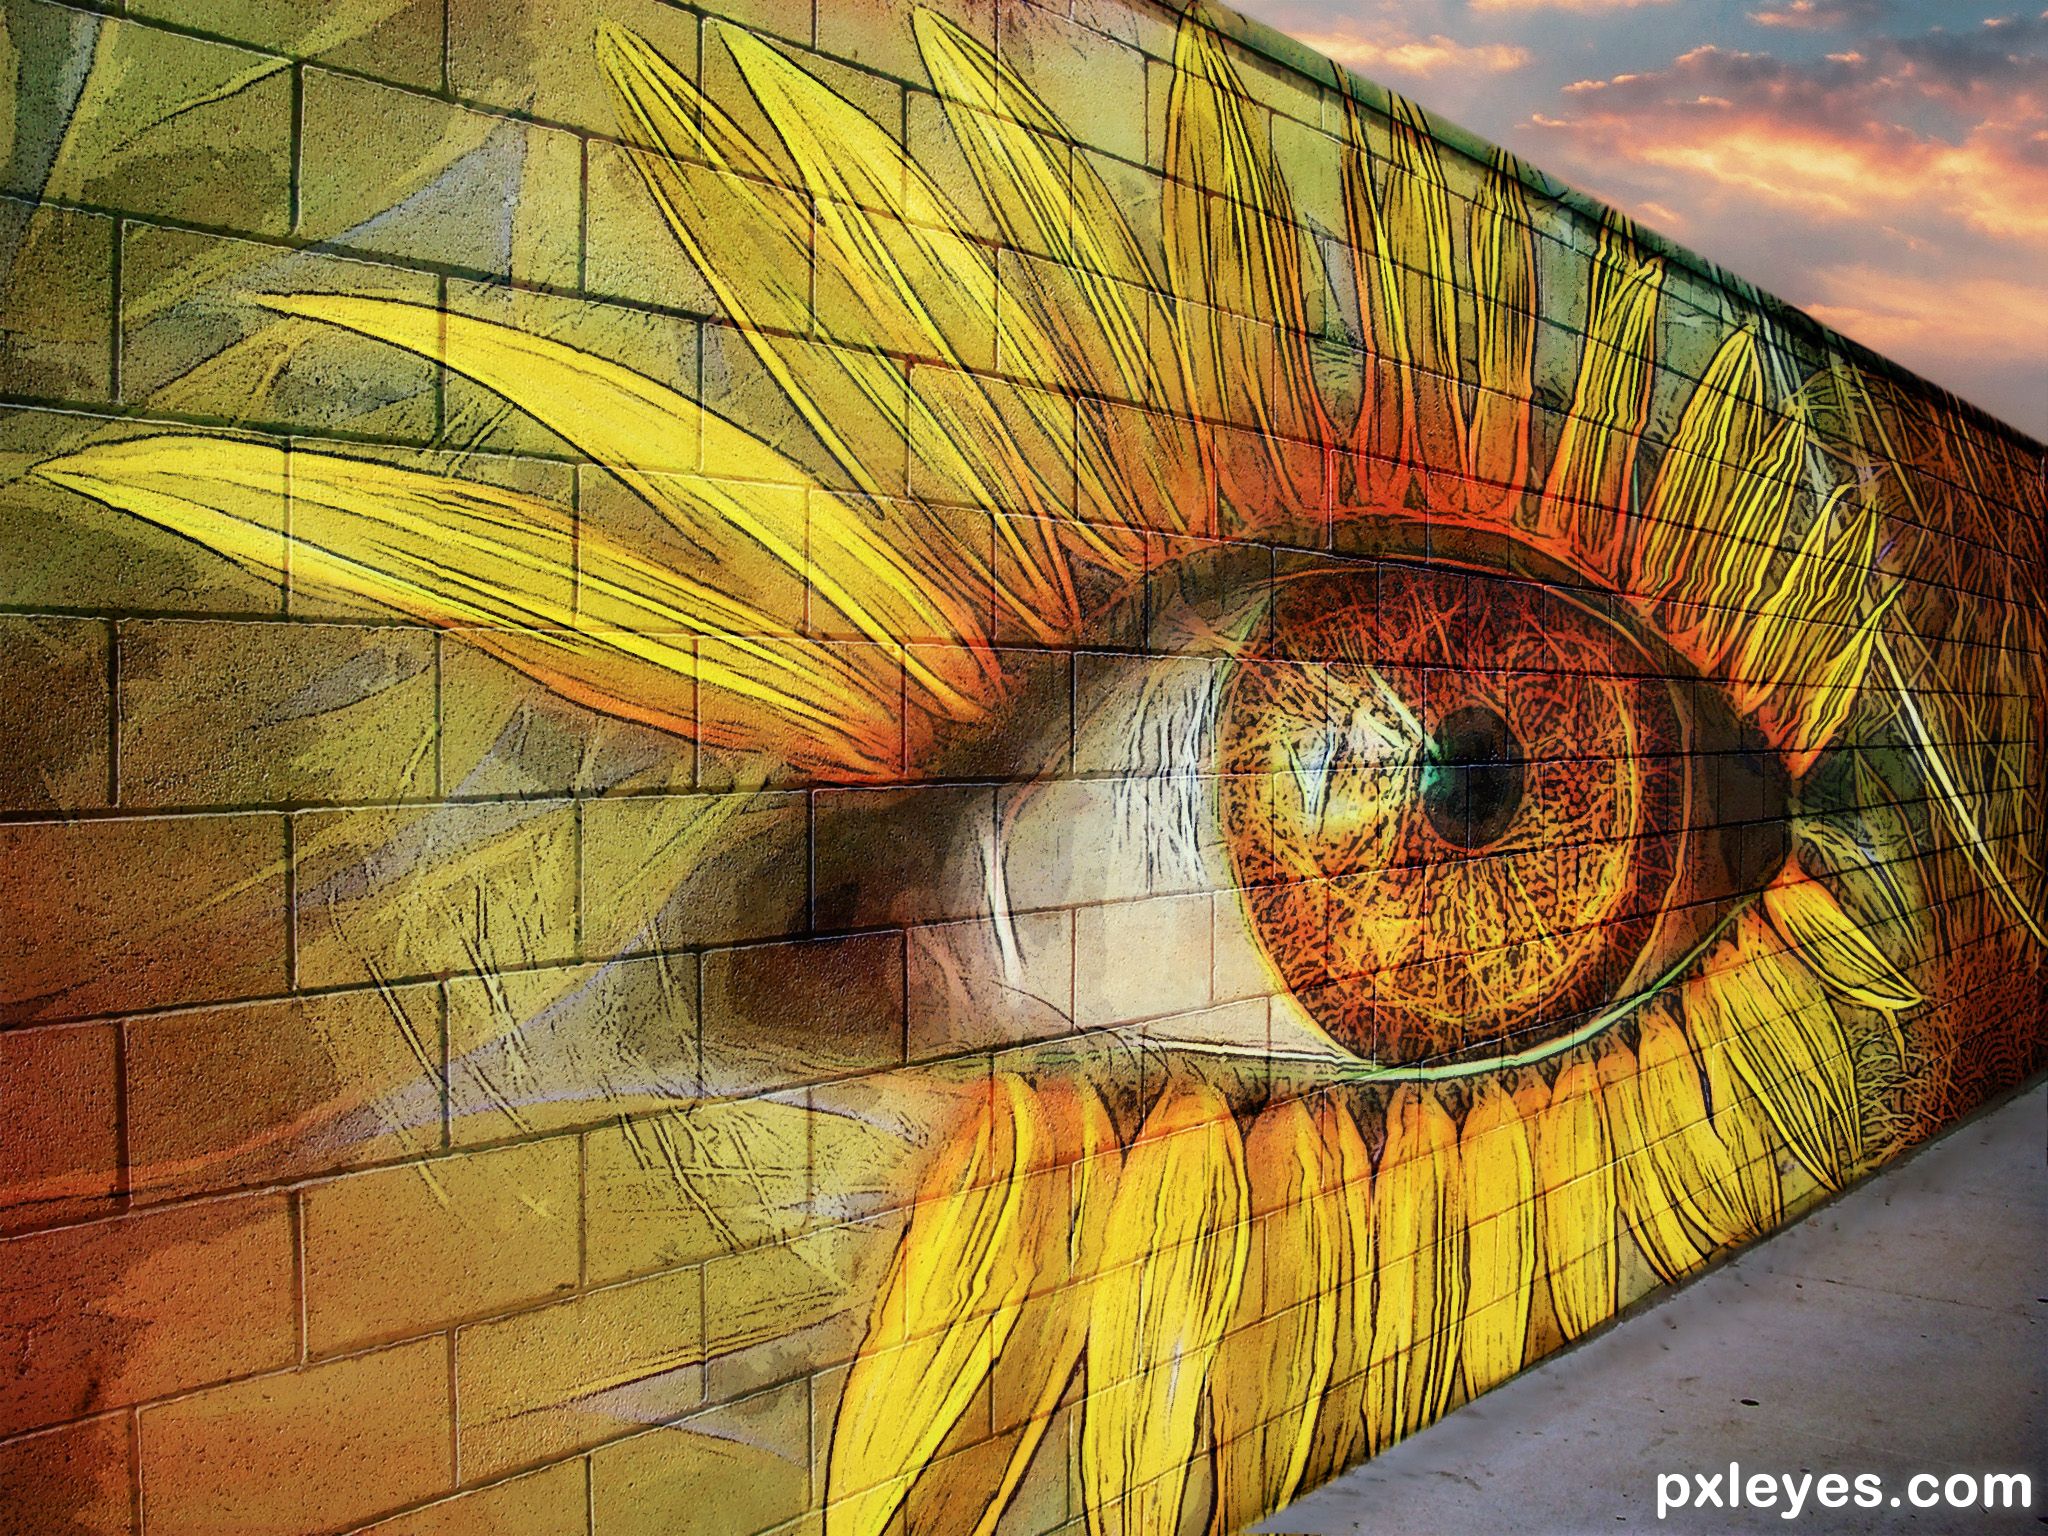
4 Sources:
- 1: Wall
- 2: Sunset
- 3: Sunflower
- 4: Graffiti texture

pxleyes.com collides with a photoshop transparent background.
Method:
- Star background shape for floor made using pen tool.
- Mixed background shapes for back wall using photoshop basic shapes.
- Starburst background shape for sky made using pen tool, duplicate many times, change anchor so when tilted it gives a starburst look.
- Background cut into 2 and converted to 3d and merged with logo in 3d space.
- Photoshop transparent background made using screen capture and capturing photoshop background.
- Patterns made using define pattern tool.
(5 years and 981 days ago)
If no outside sources were used, please add a step by step or a description of how your entry was made.
Thanks for letting me know. I've added in description and hope it is sufficient.
To help you in making a Step by Step for your entry.. it's good to save your progress in a file you can recall later as you go along.. a Screen Capture program is a big help, so you can describe what you've done as you go along. Great to see your entry and good luck 
Thanks for the tip Drivenslush!
Thank you Author.
Howdie stranger!
If you want to rate this picture or participate in this contest, just:
LOGIN HERE or REGISTER FOR FREE

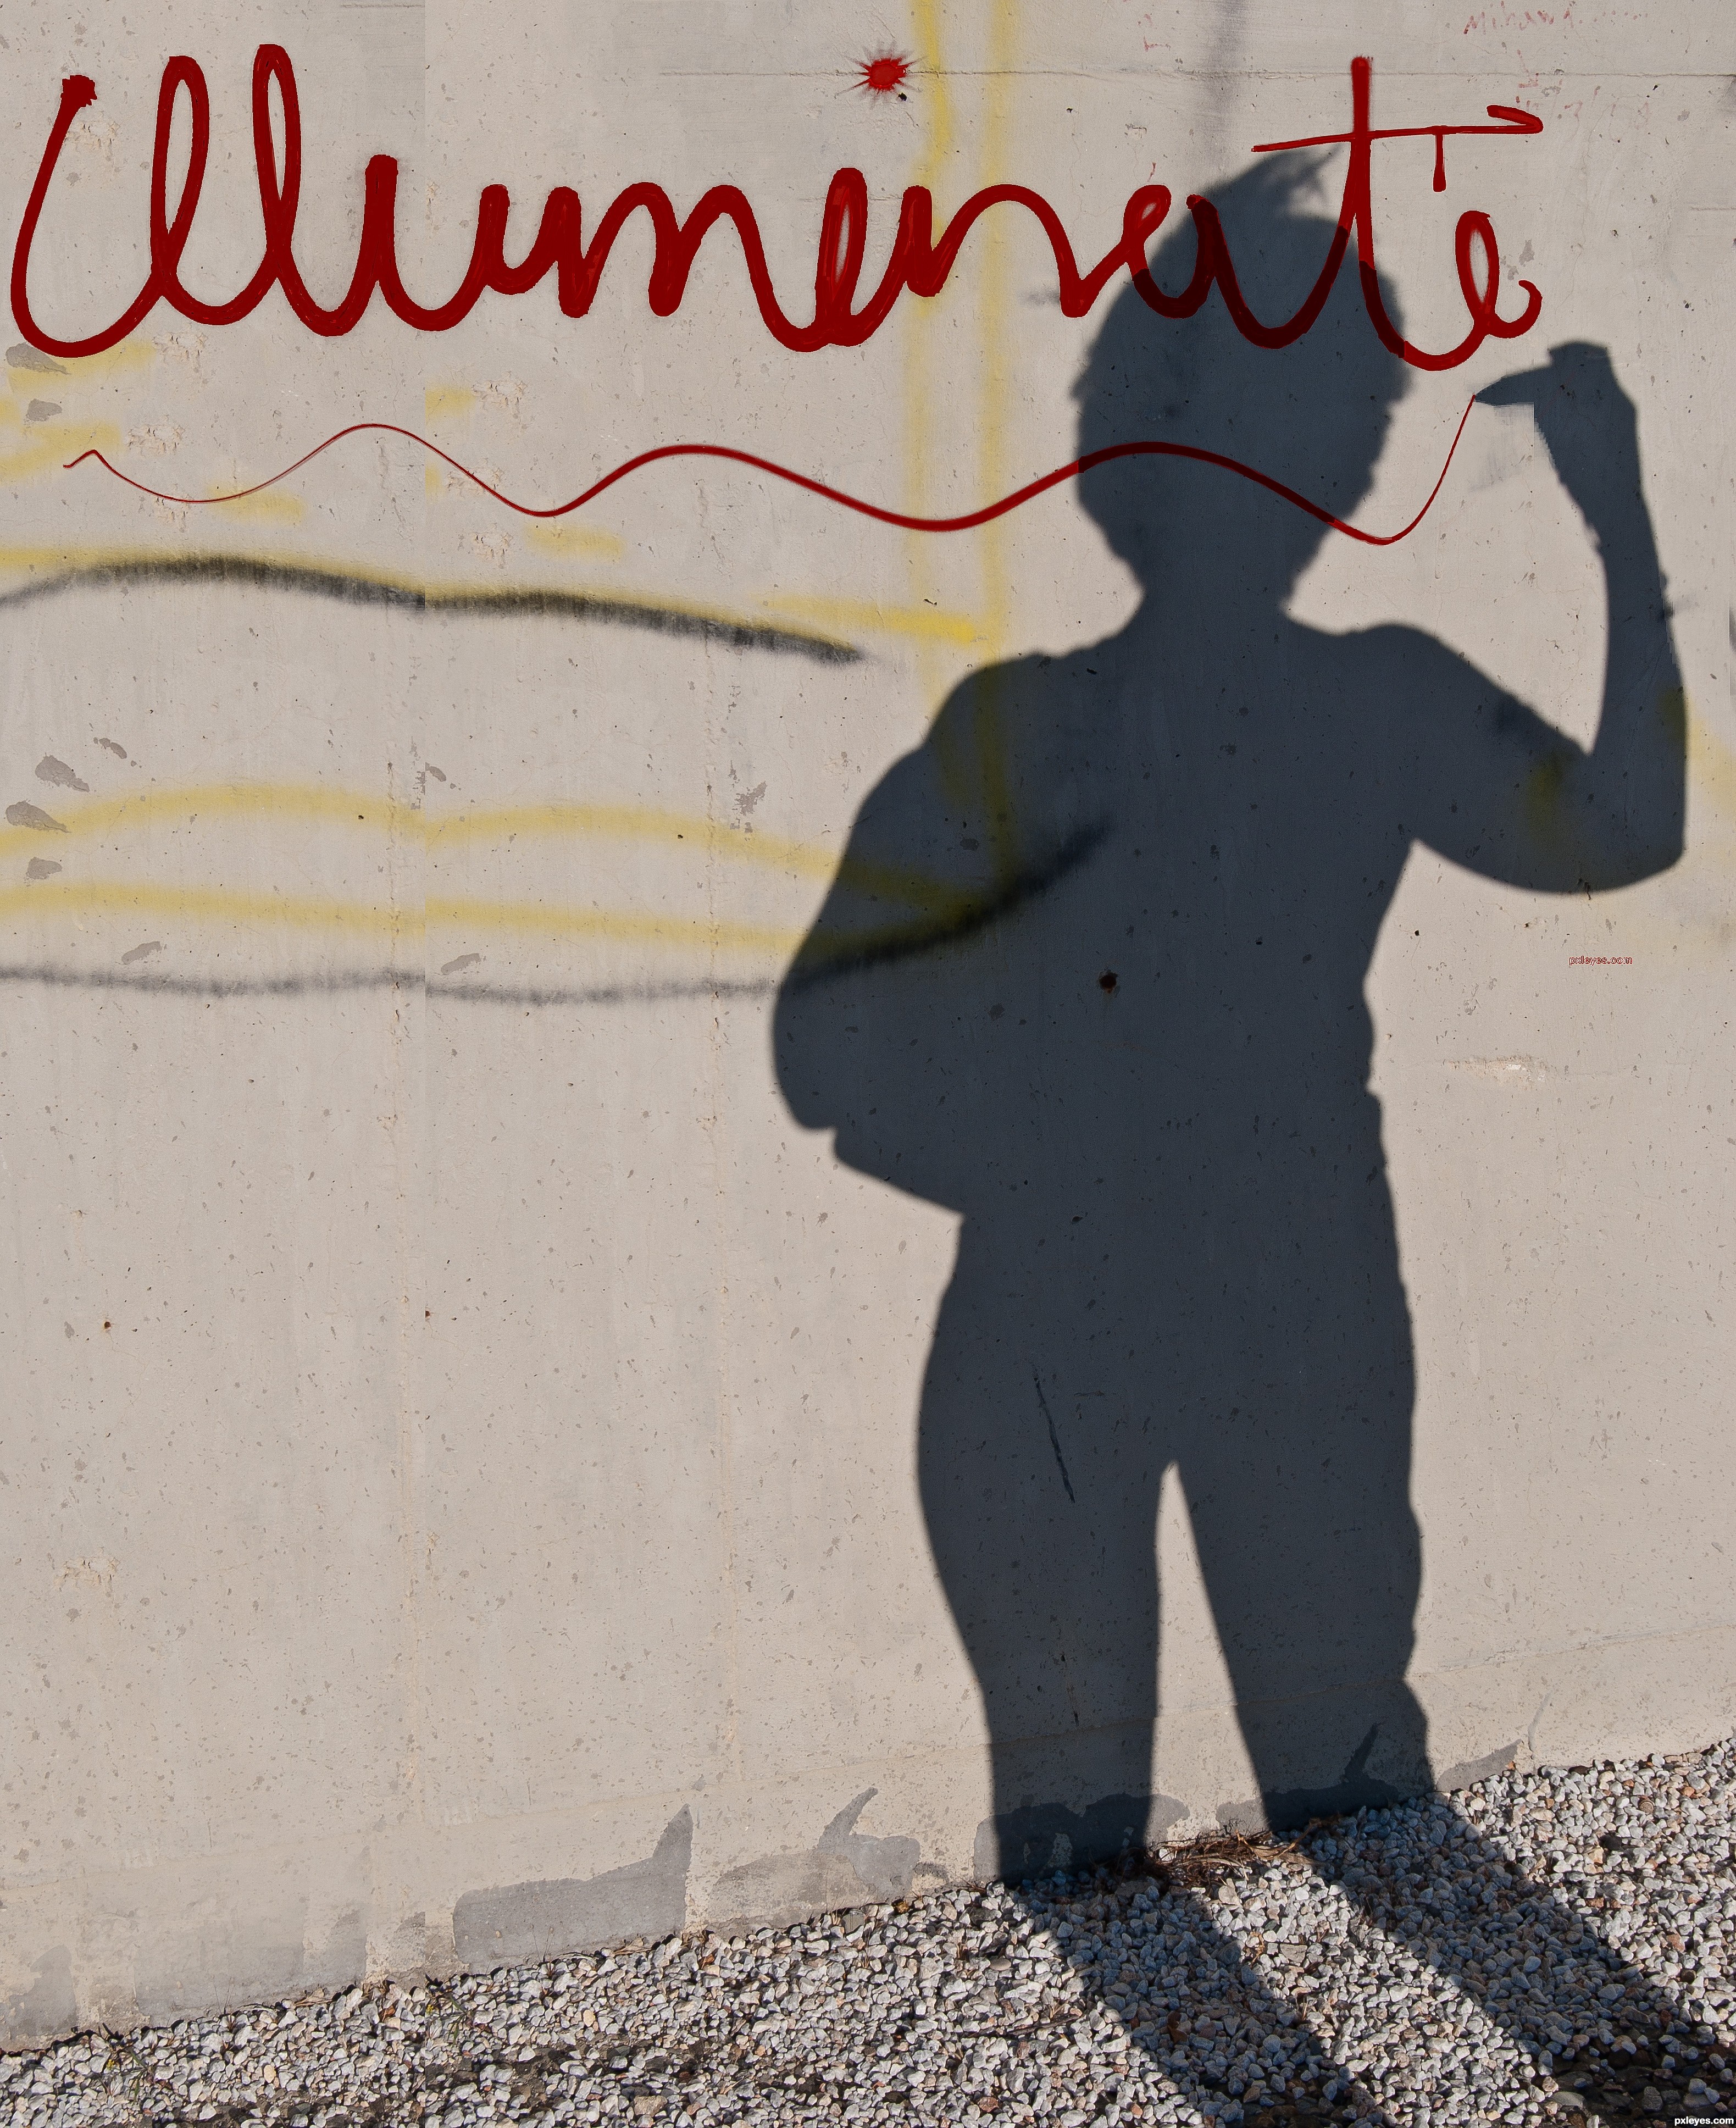
A girl paints a message and a flower.
Lots of masks, overlay, text effects and blending. :-) Enjoy
Step by Step Shows Purchase Receipts. (5 years and 2239 days ago)
Your shadow is way too heavy imo would also be cool if the message and the flower linked somehow, either by bringing them closer or graphically.....
Try making the shadow less opaque.
Okay, that was the natural shadow, so I didn't want to touch it much. I will work on it. Thanks for the tips, everybody!
Congrats nice work
Thank you.
Howdie stranger!
If you want to rate this picture or participate in this contest, just:
LOGIN HERE or REGISTER FOR FREE
(5 years and 2678 days ago)
you need to give the text some tecture like the wall and i suggest that you select the part of the text that u gave a darker color where the shadow is and color it again because the light red is seeing thru as if its badly painted over. holding off my vote for now. edit: perhaps if you select the shadow on the wall and color it in on a new layer with a greyish color simulair to the original shadow and then put that layer with the new shadow on top of all layers its fixed too, just get rid of the darkcolored in part where the shadow is now. It is just a little more work but theres plenty time till contest closes
Great Idea!
Howdie stranger!
If you want to rate this picture or participate in this contest, just:
LOGIN HERE or REGISTER FOR FREE
(5 years and 2720 days ago)
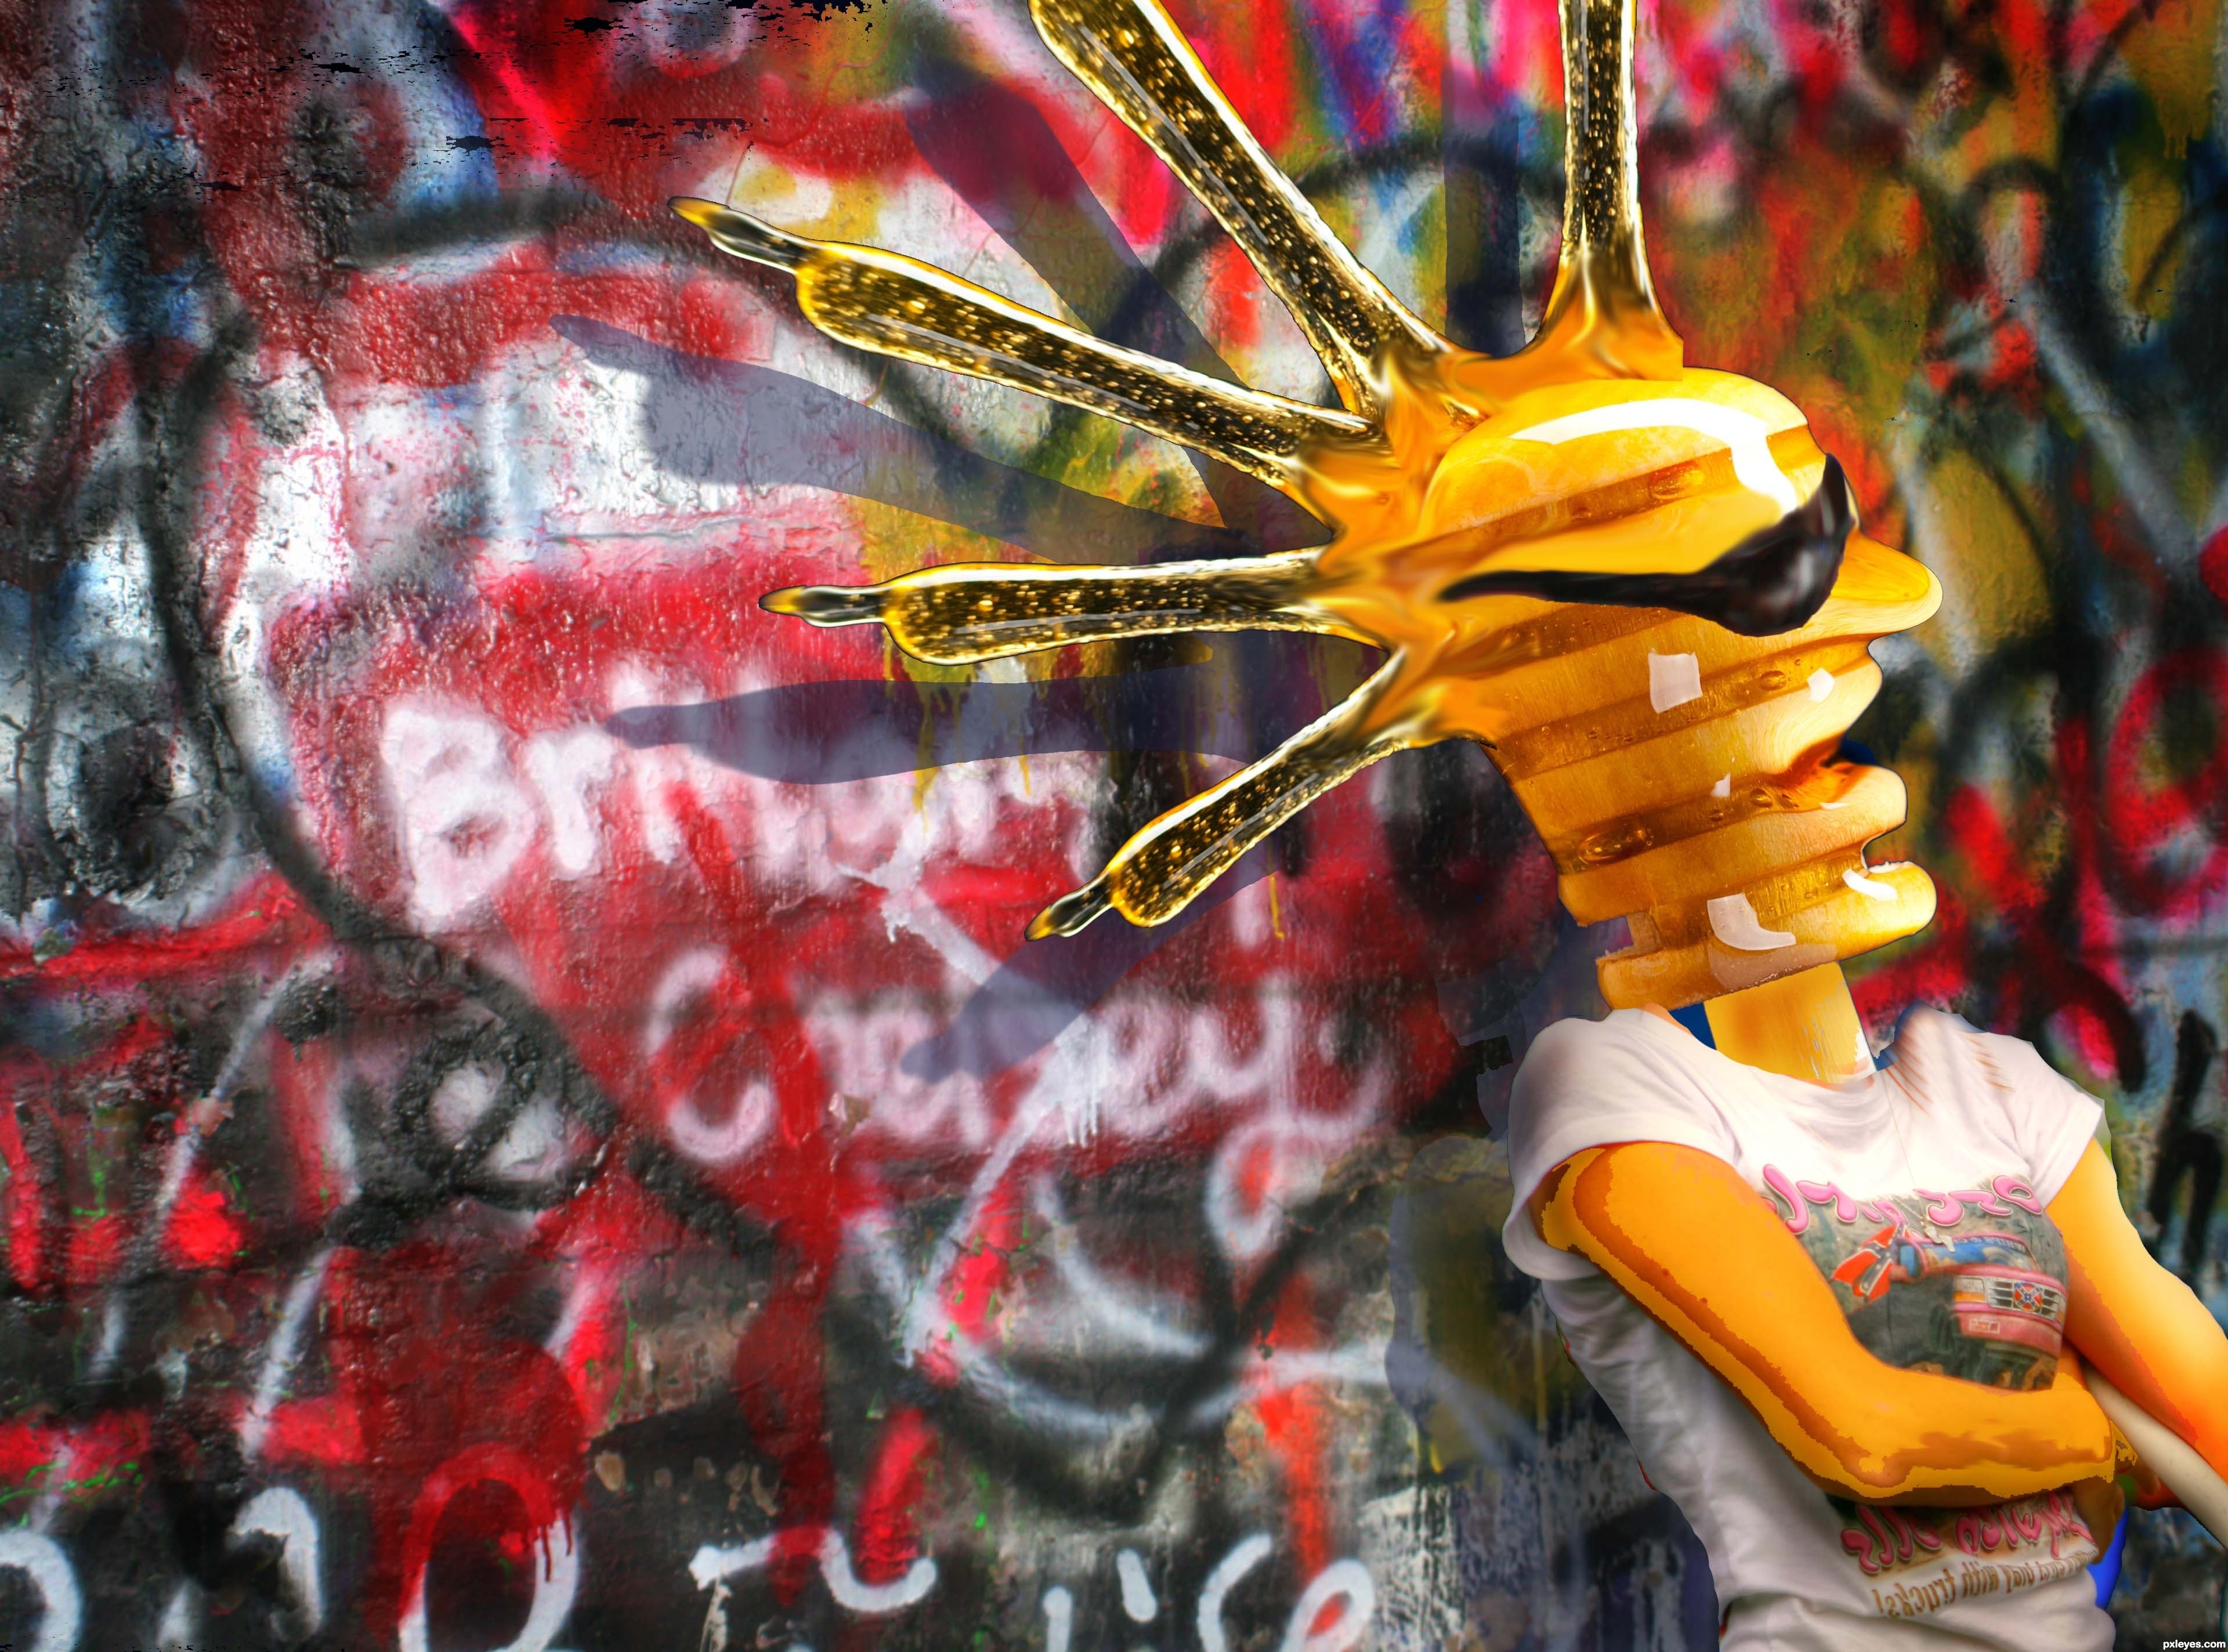
clever and very well done good luck author
That is sooooo cool.
Thanks!
This is so .... punk!
Good idea, author, good job too.
But looking at hi-res, It could take better care of the edges... IMO.
However, your job is pretty cool.
Good luck
Fun job, author! This is really cool. I agree with DanielaOwergoor...she has a good eye!
Another case of a really good composition and idea, needing a few tweaks to take it to a whole other couple of levels: arm is a bit too "cartoony" compared to the rest of the image (needs something like the specular hilites that are present in the face), the blurry top edge of the sunglasses don't match the sharp bottom edge, the character's mohawk kind of ends abruptly in a squared off angle at the very top of his head ... I'll shut up now.
Thanks for the comments. I agree with the edges. Any suggestions to take care of them? What tool would you use?
Author, the CLONE tool works great on finishing edges if the image has been flattened, if not, an erase tool set at 80% in a sharp edge setting can do the trick.. ,you can also use the BLUR tool if the edges are super tiny but have a lot of sharp edges, blur will soften and blend..
to hunt down Outer debris I usually use the STROKE setting and erase the bad stuff and then shut off the Stroke tool after I've cleaned..
Lots of other suggestions may follow I hope.. (I really have never understood photoshop that much, it's all quite Greek to me, but I got the basics).. Good Luck
Thanks! I'll try these. The clone tool for sure.
Howdie stranger!
If you want to rate this picture or participate in this contest, just:
LOGIN HERE or REGISTER FOR FREE
Photography and photoshop contests
We are a community of people with
a passion for photography, graphics and art in general.
Every day new photoshop
and photography contests are posted to compete in. We also have one weekly drawing contest
and one weekly 3D contest!
Participation is 100% free!
Just
register and get
started!
Good luck!
© 2015 Pxleyes.com. All rights reserved.


Hi Author, source 3 the sunflower, can you please link it to the picture and information page.
Done.
Done.
good use of blend modes. looks pretty real.
Thanks BWR.
hippie eye
Congrats skyangel. Nice chop.
job well done.. loved it
Thank you everyone.
YOU ARE BRILLIANT and so is your work.
Thanks Olga.
Yes you are brilliant skyangel. I'm a fan.
Thanks BWR. The feelings mutual. I am a great admirer of your work.
One can learn A LOT from this side of pxleyes thanks to you guys, AND, the best part is you talk to us and guide us....sheesh, how wonderful is that?
I found most people are very helpful and tell you what you want to know if you just ask.
Howdie stranger!
If you want to rate this picture or participate in this contest, just:
LOGIN HERE or REGISTER FOR FREE