
Original image
step 1 of 5
First I took the original image and flipped it around to look at possibilities.
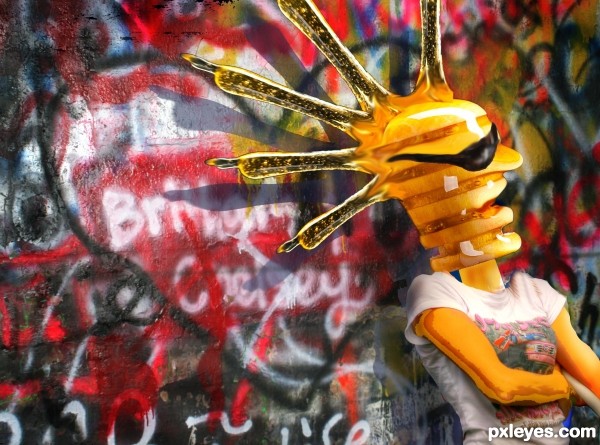
I decided it looked like a figure, so I added a pair of shades.
I decided it looked like a figure, so I added a pair of shades.

step 2 of 5
I took the clothes from a photo that I had taken recently at our school's band rehearsal.

step 3 of 5
I cut and pasted the body of the band student onto the dripper. I was careful to remove all the excess around the shirt to give a clean look. I also copied and pasted a section of the background to stretch the image horizontally.

step 4 of 5
The background is from my own photo taken in Kingsport, Tennessee...taken in he Fall of 2010. I have all rights to the photo and it has never been published.

step 5 of 5
Sorry...left out the source for the sunglasses. This is from a photograph I took at a recent music festival.

Final result
Comments
Pxleyes
Photography and photoshop contests
We are a community of people with
a passion for photography, graphics and art in general.
Every day new photoshop
and photography contests are posted to compete in. We also have one weekly drawing contest
and one weekly 3D contest!
Participation is 100% free!
Just
register and get
started!
Good luck!
Follow us:


© 2015 Pxleyes.com. All rights reserved.
Sorry, I hit the button before I had all the steps finalized. My final step was to add shadow and burn in a few areas to give it a little more of a 3-d effect. I worked this out pretty quickly.
(5 years and 3175 days ago)I realize I need to take a little more time with the step-by-step explainations. I have only used my photographs to complete the image...and of course the source image.
(5 years and 3172 days ago)