
Original image
step 1 of 13
Sources. The picutre of the doll hand was taken by me. The full picture appears in step 13.

step 2 of 13
Cut out Viking Girl

step 3 of 13
Used puppet warp to stand her up.

step 4 of 13
Placed doll arm in pictue, shrunk copy to flp horizontal with texture created for
dress pattern.
dress pattern.

step 5 of 13
Placed arms on girl and textured and expanded dress.

step 6 of 13
Cutout boy and stand him up using puppet warp.Also make him slightly larger and
taller than girl.
taller than girl.

step 7 of 13
Bent boys left arm with puppet warp. then clone stamps some texture from his robe.
Placed behind girls left arm Will put in front of her arm later when adjusting things
Placed behind girls left arm Will put in front of her arm later when adjusting things

step 8 of 13
Bring boys arm over girls shoulder.with clipping mask.

step 9 of 13
texture over boys original left arm and filled in with robe texture using clone
stamp. Textured boys left sleeve. Textured boys belt with clone stamp.
stamp. Textured boys left sleeve. Textured boys belt with clone stamp.

step 10 of 13
select rail from source image and then make rail layer by duplicating seletion

step 11 of 13
touchup rails with eraser tool

step 12 of 13
Place Sunset background . Duplicate rail for back rail. Resize and place in picture.
Front rail is erased where boy and girl will be standing on it
Front rail is erased where boy and girl will be standing on it

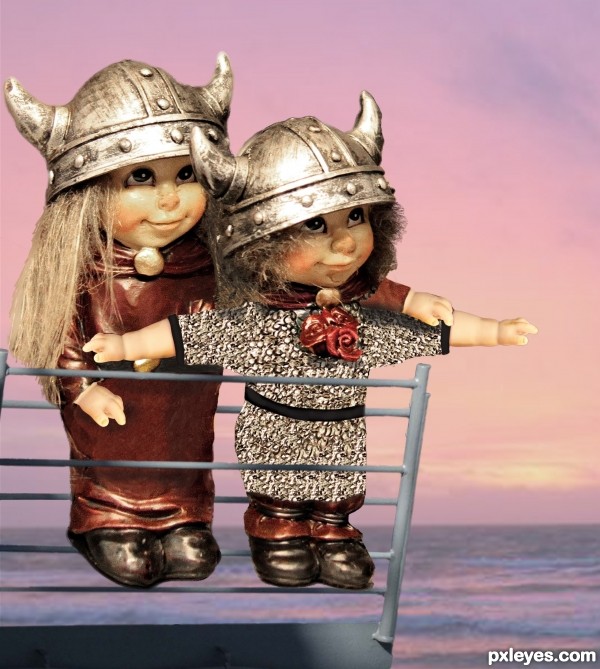
step 13 of 13
Here is the full picture of the doll hand, which is a picture taken by me.

Final result
Pxleyes
Photography and photoshop contests
We are a community of people with
a passion for photography, graphics and art in general.
Every day new photoshop
and photography contests are posted to compete in. We also have one weekly drawing contest
and one weekly 3D contest!
Participation is 100% free!
Just
register and get
started!
Good luck!
Follow us:


© 2015 Pxleyes.com. All rights reserved.