
Original image
step 1 of 1
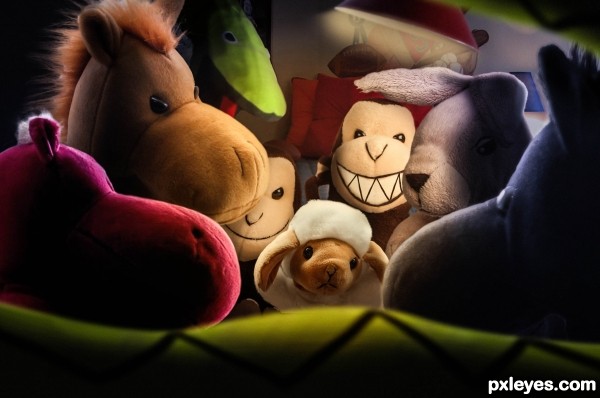
okay so i'll give you a few hints on how i achieved some of the effects here.
all the animals were cut using different techniques, basically depending on the background color or simply how furry they were. i used the pen toon, lasso, color range and channels. not once i erased a part of an image, everything had been masked for further adjustments.
the shadowing has all been done the same way basically. just copy the layer you want shadowed/ highlighted, and add 2 adjustment layers to the newly created layer - exposure and curves. don't forget to check the 'create clipping mask' box. the idea is to drasticly lower brightness using those adjustments. once you've done that, add a mask to the copied layer (not the adjustments) and simply mask the parts you want highlighted again using a soft brush with very low opacity (around 10% is fine).
the snake was painted by moi - i have the same one at home which i used for quick reference and i painted the snake using my wacom tablet. it's quite simple really, 90% of the realism comes from shadows and highlights which i explained earlier in this text.
finally, i created a new layer, painted the center orange and dark blue around it, and set the layer to soft light with reduced opacity. that's how i got the split toning effect (that black donkey on the right is a great example - notice how parts of him are blue and the area around the nostrils is yellowish).
to top it all off i added the image to lightroom 4 and did some final nitpicking.

Final result
Pxleyes
Photography and photoshop contests
We are a community of people with
a passion for photography, graphics and art in general.
Every day new photoshop
and photography contests are posted to compete in. We also have one weekly drawing contest
and one weekly 3D contest!
Participation is 100% free!
Just
register and get
started!
Good luck!
Follow us:


© 2015 Pxleyes.com. All rights reserved.