
Original image
step 1 of 9
Using liquify warp tool, new shapes are created from source rope image. A bird head seems to be there, so it will be used to begin a bird. Black background will be kept, so instead of chopping, a black brush will eliminate areas not needed.

step 2 of 9
Head feathers are begun using the smudge tool, and a portion of the rope is lassoed, duplicated, and rotated to be used as the neck.

step 3 of 9
Body shape is added using the smudge tool, and more feathers are pulled out on head using the smudge tool also.

step 4 of 9
Wings are begun with another section of the rope. Wing is started on side of the bird, but later the position of bird will be changed.

step 5 of 9
Tail section is created with small section of rope being duplicated many times, then merged. The whole tail will be shifted later. I leave it here to show how many times an idea might have to be changed to develop it. The position of bird and legs and feet just didn't seem to work as started.

step 6 of 9
Position of bird is changed now by adding a duplicate of the wing, flipping it, and moving tail into new position. Birds head has been detailed using brush and smudge tool. Highlight (dodge) and shadows (burn) tools add more contrast.

step 7 of 9
Gradient layer is added behind the bird layer and soft eraser tool removes enough of the black layer to see some of the new gradient colors. Color of bird is also enhanced using the color adjustment tools.

step 8 of 9
From a rope section, a limb is created. Smudge tool 'pulls' out leaf and flower images. Highlights and shadows are added with dodge and burn tools.

step 9 of 9
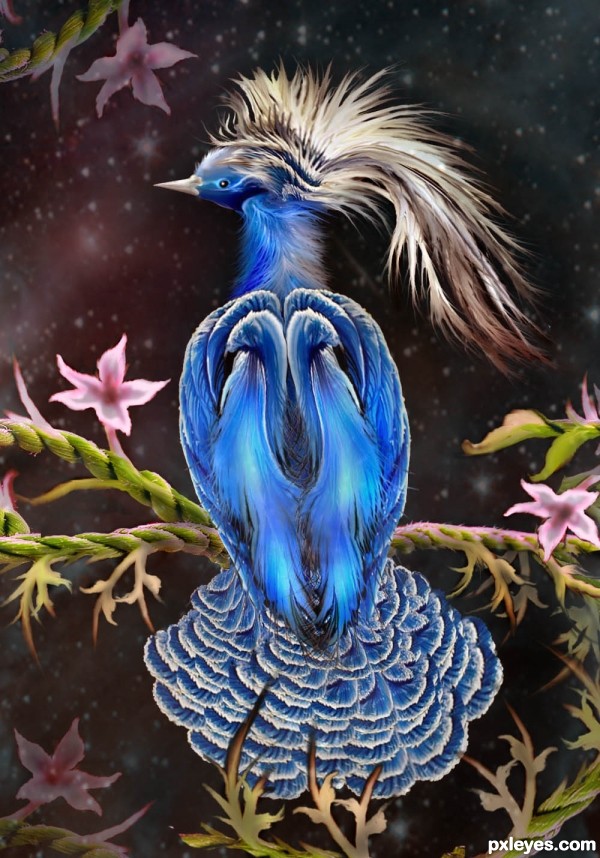
Finally, more flowers/stems are added in varying amounts of contrast, then a layer is added over the entire image with stars and unwanted sections removed using a soft eraser tool.

Final result
Comments
Pxleyes
Photography and photoshop contests
We are a community of people with
a passion for photography, graphics and art in general.
Every day new photoshop
and photography contests are posted to compete in. We also have one weekly drawing contest
and one weekly 3D contest!
Participation is 100% free!
Just
register and get
started!
Good luck!
Follow us:


© 2015 Pxleyes.com. All rights reserved.
It's a very informative SBS, it gives us the idea of creating something like this. Good work on your effort. I know how difficult it is using the smudge tool. Thanks for sharing with us.
(5 years and 3081 days ago)