
Original image
step 1 of 18
Source for old farm machine

step 2 of 18
Tree branches brush (my own)

step 3 of 18
Old Barn source photo

step 4 of 18
Barn own source photo

step 5 of 18
Mountain source photo

step 6 of 18
Barn owl source photo

step 7 of 18
NASA source photo

step 8 of 18
Owl in flight source photo

step 9 of 18
First a pattern layer was made using the cracked earth source. This layer was saved to edit/define pattern.

step 10 of 18
Pattern layer is moved over the mountain background and eraser tool removes unnecessary portions.

step 11 of 18
The pattern layer is now ready for color changes and for adding foreground images. Back portion will be merged into hills with smudge and cloning tools.

step 12 of 18
Edit/perspective tool has been used here to make cracked sections smaller toward back, then yellow/reds are added with color/balance tool.

step 13 of 18
Rocks at left have been brought out with eraser tool, and more color has been introduced and some shadows added w burn tool.

step 14 of 18
An overlay is used now of the nebulae to give more action and interest to the sky. The overlay is added over the entire image, then eraser tool erases unnecessary parts.

step 15 of 18
The barn has been chopped, scaled to size, and burned for shadows. On the left side, the rocks have been cloned up higher to feature one of the owls.

step 16 of 18
Owls are chopped and added. Claws on one in foreground must have smudge tool used to shape to the rock surface after turning it with edit/transform/flip horizontally tool. Other owls will be rescaled several times before final placement to give best balance to the image.

step 17 of 18
Dead tree has been added in the foreground and at much smaller scale, behind the barn. Brush tool was used with a brush I had made previously and saved. The tree shape was desaturated, then brightness and contrast reduced before adding some red/brown color. A texture filter was also added before using burn tool for shaping.

step 18 of 18
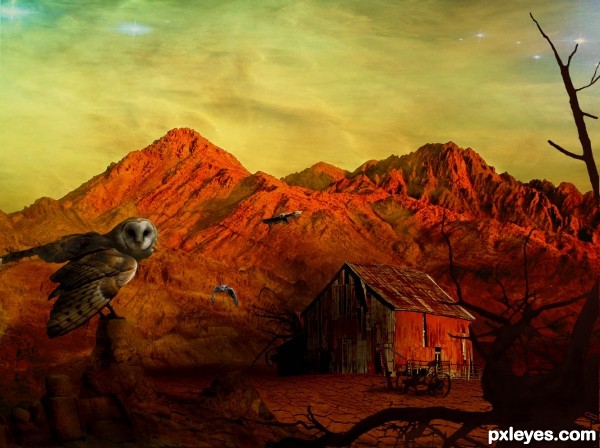
Now the old piece of farm machinery is chopped, scaled down and added near foreground. It is desaturated and treated as was the tree in previous step. Some slight layers of fog are brushed in behind and close to barn. Finally, a yellow/orange filter at 26% is added over the entire merged image.

Final result
Pxleyes
Photography and photoshop contests
We are a community of people with
a passion for photography, graphics and art in general.
Every day new photoshop
and photography contests are posted to compete in. We also have one weekly drawing contest
and one weekly 3D contest!
Participation is 100% free!
Just
register and get
started!
Good luck!
Follow us:


© 2015 Pxleyes.com. All rights reserved.