
Original image
step 1 of 14
Source photo for background by hissi at flickr

step 2 of 14
Knight source by One lucky guy at flickr

step 3 of 14
Starfish is chopped and part selected which will become the dragon.

step 4 of 14
Legs and head have been formed with liquify warp tool, and tail extended, then smudge tool pulls out the spikes down the back and on the head.

step 5 of 14
More details have been added to head and body here using smudge, eraser tool, dodge and burn tools.

step 6 of 14
Dragon has been color changed with hue/saturation tool and moved onto rocks. I decided to move it in next step into foreground and flip him horizontally.

step 7 of 14
Now the dragon is in foreground and the knight has been added onto the rocks.

step 8 of 14
Now I've tried using green on dragon, but will change it again! (Lots of trial and error often happen). Birds have been brushed into the sky, getting smaller as they go into the distance. They will later be softened using a very soft light airbrush.

step 9 of 14
Using brush tools, fire is added to dragon, keeping brush opacity low.

step 10 of 14
It seemed there should be more fire, so here it has been extended closer to knight.

step 11 of 14
After deciding this dragon had to have wings, I've sketched in where wings will go with brush tool.

step 12 of 14
Wings were started by adding a pattern layer over image, then removing with eraser tool all the areas except for the wings. Pattern layer is lowered in opacity to 50% to look more like gossamer-like wings.

step 13 of 14
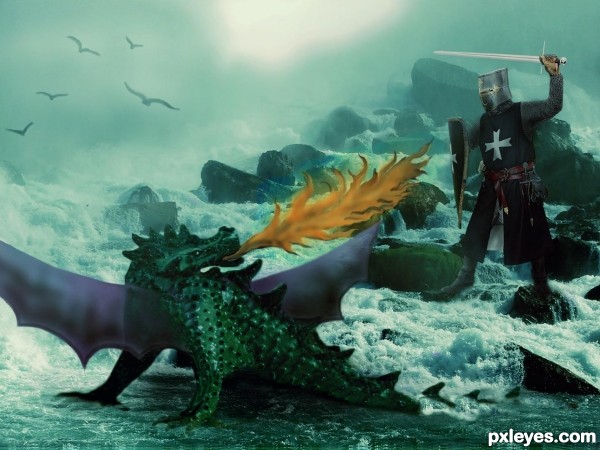
Fine tuning has been done to edges of wings, water is cloned over couple areas of tail, more burning done to wings. Then, a very slight mist of very light blue is airbrushed over some of the knight and dragon.

step 14 of 14
After haze is added with airbrush, a light blue filter is added at 20%.

Final result
Pxleyes
Photography and photoshop contests
We are a community of people with
a passion for photography, graphics and art in general.
Every day new photoshop
and photography contests are posted to compete in. We also have one weekly drawing contest
and one weekly 3D contest!
Participation is 100% free!
Just
register and get
started!
Good luck!
Follow us:


© 2015 Pxleyes.com. All rights reserved.