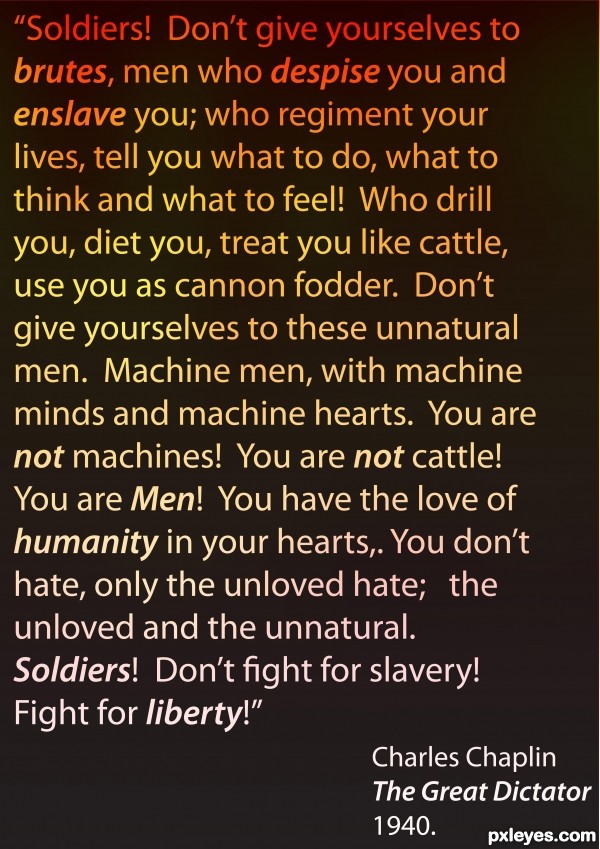
A Work in Progress: The Great Dictator.


This guide was made for entry:
The Great Dictator.
In Contest:
typography


step 1 of 7

I went through the Youtube movi clip slowly and transcribed it, checking each sentence for accuracy and typing it phrase by phrase into Microsoft Word (other word processors are available...) I then moved to Adobe Illustrator where I created an A3 (international paper size) document in RGB as it was for screen.
made a rectangle the same size as the document, filled with black and locked the layer.
I then created a new layer, made a colourless rectangle the size I wanted and used the Area Type Tool and pasted the text into the shape.
Once the text was in (and coloured white with no border colour) I then played around with the size and layout. I decided on Myriad Pro at 50points and justified to the left. I added spaces to lines where words were broken by line endings and emphasis to what I felt were the imprtant words in the text. I used Semibold Italic as the emphasis is it wasnt as intrusive as Bold or as weedy as Italic... Then saved the document in Illustrator .ai format for the next step...

Creation of The Great Dictator.: Step 1

step 2 of 7

Moving to Photoshop I created a new document (A3 again, 300dpi, RGB colour format) and imported the saved .ai file from Step One. I then rasterised (R click/Rasterize over the layer)the imported image.

I usualy draw with a Wacom Intuos tablet but I wanted to keep this as un-drawn as possible (a personal challenge I set myself...) so I created a layer under the imported image and divided it into three flame colours which would blur nicely. I used the Brush tool (B) and my mouse to draw in the lines and filled using the Paint Bucket (G) tool to fill the areas.

Creation of The Great Dictator.: Step 2

step 3 of 7

I now applied my favourite Filter, the Gaussian Blur (Filters/Blur/Gaussian Blur...) globally to the whole layer which did away with the shabby mouse lines and gave the image a softer, more flame like feel.

Creation of The Great Dictator.: Step 3

step 4 of 7

The flame colours were still too bright though so I switched on Quick Mask Mode (Q) and applied a vertical Gradient (G - under the Paint Bucket Tool, hold the key pressed to see the option), exited Quick Mask Mode (Q again) and the applied a mask over the layer (Layer/Layer Mask/Reveal Selection) which knocked the colours back just as I wanted.

Creation of The Great Dictator.: Step 4

step 5 of 7

On a new layer, and again using the mouse, I drew in simple flame shapes coming down from the top of the drawing.

Creation of The Great Dictator.: Step 5

step 6 of 7

I once again applied a global Gaussian Blur but this time fiddled with the amount of blur (about 125 this time) until I felt the effect was right.

Creation of The Great Dictator.: Step 6

step 7 of 7

Finally, I went back to my top layer (the imported text image) and made it visible again and changed the Layer Mode to Multiply in the Layers menu. This makes any areas of 100% white totally transparent to the layers below and allowed my dying flames to be seen through the text.

All of these steps are pretty basic and simple, but I feel they meet my initial concept for this brief pretty exactly.

_Phill_

Creation of The Great Dictator.: Step 7

Final result

Creation of The Great Dictator.: Final Result

LOGIN or REGISTER FOR FREE
to rate this guide and create your own guides.

Votes


uservoted
Disco
Score:
8