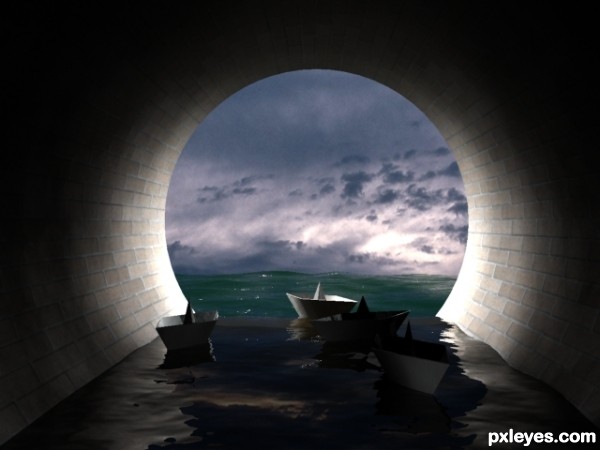
A Work in Progress: Flow away


This guide was made for entry:
Flow away
In Contest:
tunnel vision


step 1 of 10

- Creating Tunnel -

Front viewport selected, create tube : Standard Primitives  Tube, with parameter:
Radius 1: 40;
Radius 2: 38;
Height: -260;
Heigh segments: 5;
Cap segments: 1;
Side: 64;

Creation of Flow away: Step 1

step 2 of 10

- Creating the Ocean -

Top viewport selected, create plane: Standard Primitives  Plane, and give the name “Ocean”.
Set the parameter:
Length: 500;
Width: 500;
Length Segs: 50;
Width Segs: 50;

Apply noise modifier with parameter:
Fractal: On;
Roughness: 1;
Iterations: 6;
Strength, X: 0 ; Y: 0 ; Z: 7;

Apply turbo smooth modifier.
Drag alittle bit under the tube (tunnel).

Creation of Flow away: Step 2

step 3 of 10

- Creating Water in Tunnel -

Top viewport selected, create plane and give the name “WaterFlow”, with parameter:
Length: 300;
Width: 80;
Length Segs: 20;
Width Segs: 50;
Place it to the tube (see the picture)

Convert to editable poly. Select front line vertices, then activated Used soft selection, after that change soft selection parameter; pinch: 1. Drag the vertice down.

Creation of Flow away: Step 3

step 4 of 10

WaterFlow still selected, then Apply noise modifier with parameter:
Fractal: On;
Roughness: 1;
Iterations: 6;
Strength, X: 0 ; Y: 0 ; Z: 2;

Apply turbo smooth modifier.

Creation of Flow away: Step 4

step 5 of 10

- Add the Paper Boat -

Creating low poly boat from box and place it to the tunnel. Clone it and adjust.

Creation of Flow away: Step 5

step 6 of 10

- Texturing -

For water texture I used Arch and Design (this texture will active if you use mental ray renderer).
For Tunnel texture I used brick texture that included in the program (C:\ Program File\ Autodesk\ 3ds max 2008\ Maps\).
For the boat texture I used white blinn.

Creation of Flow away: Step 6

step 7 of 10

- Creating Sky -

Rendering / Environtment / Environtment Map / Bitmap.
I used sky map that included in the program (C:\ Program File\ Autodesk\ 3ds max 2008\ Maps\ Skies\).

Creation of Flow away: Step 7

step 8 of 10

- The Sun Light -

Light / Photometric / IES Sky, then change the parameter:
Multiplier : 1;
Coverage: Clear;

Light / Photometric / IES Sun, then change the parameter:
Intensity: 3000;
Shadows: On; Raytraced Shadows
Shadow density: 0.8;

Creation of Flow away: Step 8

step 9 of 10

Place target camera like showing in the picture.

Creation of Flow away: Step 9

step 10 of 10

- Rendering -

Render using mental ray renderer. After that makes many adjustment to texture, camera, IES Sky, and IES Sun, until it has a good result (trial and error method). And this is the final result.

Creation of Flow away: Step 10

Final result

Creation of Flow away: Final Result

LOGIN or REGISTER FOR FREE
to rate this guide and create your own guides.

Votes


uservoted
Toothpick134
Score:
10