
Original image
step 1 of 13
Using my pen and tablet, I first drew the basic design on the source photo, using the rock shape to begin my design. It really resembled a dragon to me, so just needed to add the tail, head and wings basically.

step 2 of 13
Now the cloning tool is used to fill in the body parts, and wings are begun as one color.

step 3 of 13
A tooth has been added here and more facial features using the brush tools.

step 4 of 13
Some burning is done here to begin shaping body, then wings are cut out with eraser tool and a pattern layer added behind dragon layer. (the pattern layer was one I made myself and saved to pattern file)

step 5 of 13
Dragon was color changed by duplicating the scene, erasing everything but the dragon, then color/hue adjusting to the desired color. I changed it several times before settling on lavendar. Toward the end, I also hue adjusted the pattern layer on the wings to better match the dragon color.

step 6 of 13
More work is done on wing design using brush tool at hard setting. I wanted the wings to look as if light is filtering through them. Some burning will add needed shading of wings.

step 7 of 13
Smoke is added here using brush and airbrush blending several different strokes - all at softer settings. Burn tool helps bring out darker areas later. I also allowed just a little 'smoke' to filter over the wing.

step 8 of 13
Toe nails were added here using brush tool. Burn tool will help shape feet, nails, and underbody. Also, the grass where it meets the body.

step 9 of 13
Here on a new canvas, I have sketched in the pirate ship. Hadn't planned to do this, as it took a long time, but couldn't find a source ship that I could be sure was open stock. I duplicated the ship, then cut it out using the magic eraser tool.

step 10 of 13
Details are being added to sails the masts here using the brush tools. Many of the straight lines were done using the shift key with the brush and burn tools.

step 11 of 13
Ship has been finished, then duplicated. I wanted to put a canvas filter over sails, so that will be done on the duplicate, all but sails to be erased, then placed over the original sails. To make sails in back look different, I then duplicated sails again, putting a slightly smaller filter over back sails, erasing the large one.

step 12 of 13
Now I decided to keep the dragon wings in same color pallette with his body by using 'layer options' and 'difference option', then burned more shape and finished up reflections in water with smudge and burn tools. Finished unless I decide to add some seagulls.

step 13 of 13
Seagulls have been added with smaller ones in far away sky, and others a little larger as they get nearer the foreground. I tried to keep them in scale with the dragon and the boat.

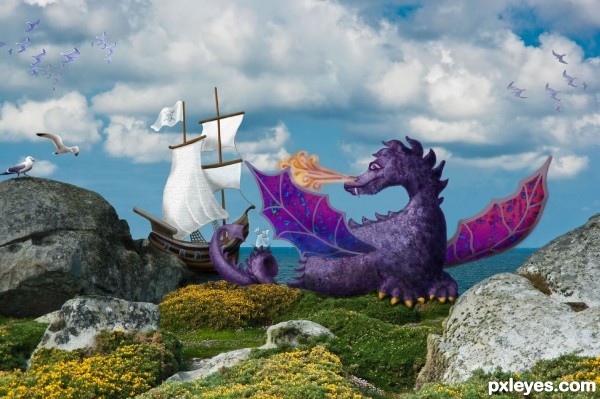
Final result
Pxleyes
Photography and photoshop contests
We are a community of people with
a passion for photography, graphics and art in general.
Every day new photoshop
and photography contests are posted to compete in. We also have one weekly drawing contest
and one weekly 3D contest!
Participation is 100% free!
Just
register and get
started!
Good luck!
Follow us:


© 2015 Pxleyes.com. All rights reserved.