
Original image
step 1 of 17
Dogwood source photo

step 2 of 17
butterfly source photo

step 3 of 17
garden steps source photo

step 4 of 17
Original painting of mine used as reference.

step 5 of 17
First the structure of the window is painted in with the brush tool. I painted the background of the new canvas first with a darker color so that the white would show up.

step 6 of 17
Here the window design has been finished using the brush tool at a hard setting.

step 7 of 17
Here, the butterfly and flower design is painted into the top corners using the brush tool. Colors needed to be changed later and for that I used the hue/saturation tool.

step 8 of 17
Areas of the stained glass have been started here using the airbrush with a soft setting and two colors in each box. They are swirled together using the smudge tool.

step 9 of 17
Stained glass areas are complete now except for an area where dogwood will be inserted.

step 10 of 17
Stained glass has had a filter placed over those sections just painted. Glass filter is found in filter/distort tool section.

step 11 of 17
Background of garden steps is now inserted behind the layer of the window and sized with scale tool to fit opening.

step 12 of 17
Now 2 tulips have been brought in from source photo and have been duplicated and changed here and there with scale and liquify tools. Stems have been extended using the clone tool. The leaves were started with the liquify tool to make leaf shape from green area of stems in source. The leaves are also changed with scale tool and color change tools. Both flowers and leaves are also turned opposite direction using the edit/transform/flip horizontally tool.

step 13 of 17
Here is shown the process of creating leaf shape with liquify warp tool.

step 14 of 17
Leaves are put into place first, then tulips will be added.

step 15 of 17
Tulips and leaves are all in place, then shadows have been added on sides away from light source. Dogwood has been chopped from source photo, scaled to fit half of the section where it will go, then duplicated and flipped horizontally for other side. I am allowing the leaves at the bottom to overlap window trim to add to the design.

step 16 of 17
Ends of leaves which go behind stained glass panels are finished with the glass filter. To do this, I duplicated the leaf, used the glass filter, then erased the part which did not need the filter. Butterfly is chopped and added to a layer behind white window trim. Finally, the entire piece is merged visibly.

step 17 of 17
To finish up, a brown filter is placed over entire merged piece and opacity is reduced to 35%.

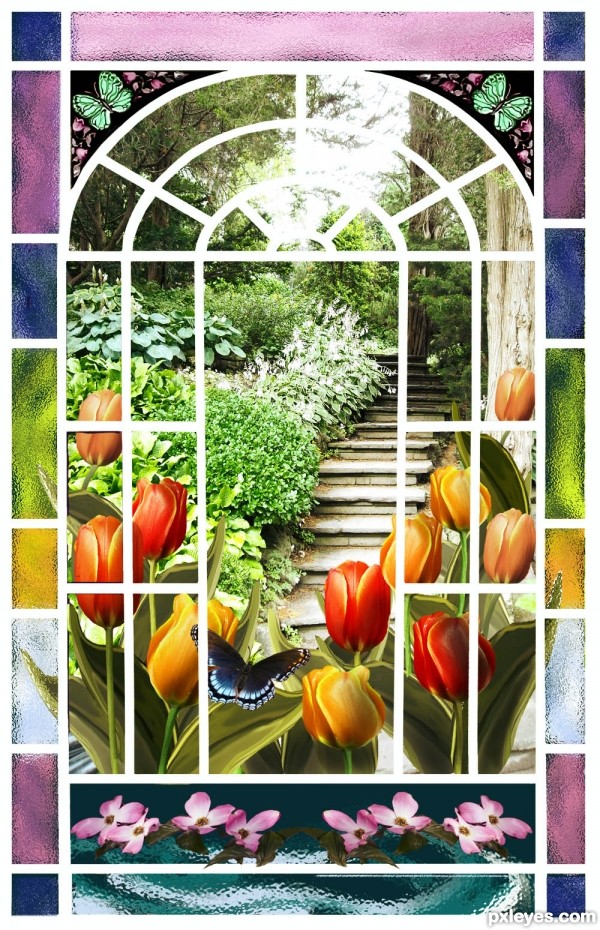
Final result
Pxleyes
Photography and photoshop contests
We are a community of people with
a passion for photography, graphics and art in general.
Every day new photoshop
and photography contests are posted to compete in. We also have one weekly drawing contest
and one weekly 3D contest!
Participation is 100% free!
Just
register and get
started!
Good luck!
Follow us:


© 2015 Pxleyes.com. All rights reserved.