
Original image
step 1 of 15
I found a background that i wanted to use, the only problem was. It was a black and white image.

step 2 of 15
I created a new layer and changed it to colour.
I then picked a colour for the sky and filled the image with that colour using the paint bucket tool.
I then picked a colour for the sky and filled the image with that colour using the paint bucket tool.

step 3 of 15
I then made a new layer and changed it to colour.
I picked the colour I wanted for the ground and used the brush tool to colour the area.
I picked the colour I wanted for the ground and used the brush tool to colour the area.

step 4 of 15
I then used the same process for the rest of the areas I wanted to change the colours of.
after all my sections had colour, I went to each layer and used hue/saturation (ctrl + U or cmnd + U on a mac) to change the selections colours slightly, the saturation and the lightness, helping them blend better.
after all my sections had colour, I went to each layer and used hue/saturation (ctrl + U or cmnd + U on a mac) to change the selections colours slightly, the saturation and the lightness, helping them blend better.

step 5 of 15
I then combined the layers by selecting them all and merged them together (ctrl,shift,alt,E or cmd,shift,alt,E on a mac)
Using a vibrance layer I boosted the colours that my image now had.
Using a vibrance layer I boosted the colours that my image now had.

step 6 of 15
This is the girl i cut out.

step 7 of 15
I then moved her into my image and used free transform to resize her.

step 8 of 15
I then added a shadow to her by duplicating her layer, then making my forground colour black, I ctrl clicked on her thumbnail in the layers pallet to select her.
I then pressed alt+backspace to fill the selection with black.
Using freetransform and distort i moved her new "shadow" into place, setting the layer to soft light gave a good effect.
I then pressed alt+backspace to fill the selection with black.
Using freetransform and distort i moved her new "shadow" into place, setting the layer to soft light gave a good effect.

step 9 of 15
I then duplicated that layer and added a blur to give the shadow more substance.

step 10 of 15
I then used burn to add some darkness over the girl.

step 11 of 15
this is the swan I modified.

step 12 of 15
I cut out the head of the source image and moved it into position.

step 13 of 15
I then sampled a section of the source image and made a pattern.
using the pattern stamp tool I went over the areas of my flying swan.
using the pattern stamp tool I went over the areas of my flying swan.

step 14 of 15
with a few more sections covered I changed the layer mode and I was happy with how the swan looked.
(I liked the black and white look)
(I liked the black and white look)

step 15 of 15
I then moved the swan into position and added a shadow, using the same method as with the girl.
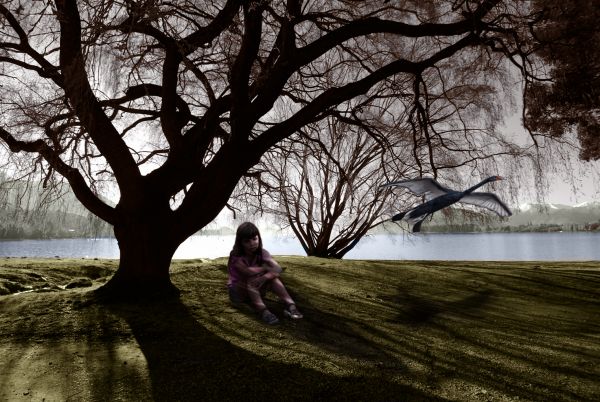
I then added a motion blur to the swan to make it look as if it was flying away.
I then added a motion blur to the swan to make it look as if it was flying away.

Final result
Pxleyes
Photography and photoshop contests
We are a community of people with
a passion for photography, graphics and art in general.
Every day new photoshop
and photography contests are posted to compete in. We also have one weekly drawing contest
and one weekly 3D contest!
Participation is 100% free!
Just
register and get
started!
Good luck!
Follow us:


© 2015 Pxleyes.com. All rights reserved.