
Original image
step 1 of 7
1. The entire image was made from only the source photo. I chose the parts of the original picture I would use. (I chose to include the "200" in the rocker arm to provide detail for the bike frame.)

step 2 of 7
2. a. The spokes. I duplicated the spoke set, flipped it both ways, and aligned them and merged them.
b. I duplicated the layer and rotated it 90 degrees, then merged with the other spoke layer.
c. I then duplicated the 4-spoke layer twice, rotated one 30 degrees clockwise, the other 30 degrees counterclockwise and merged all the spoke layers.
b. I duplicated the layer and rotated it 90 degrees, then merged with the other spoke layer.
c. I then duplicated the 4-spoke layer twice, rotated one 30 degrees clockwise, the other 30 degrees counterclockwise and merged all the spoke layers.

step 3 of 7
3. The Wheels. I created the rim out of a piece of the weight pan that I edited (1) and stretched (2). I then applied Polar Coordinates (3) and used transform and warp (4) to make it round and fit it to the spokes. I flipped a copy to make a whole rim and joined and merged them. Finally I used standard brushes and burn and dodge to higlight them.
4. The tires: I stacked the layers: rim on top, spokes, tire. I centered the knob in the spokes, transformed it as shown, cut out the center.
5. To make the hub I cut a piece of the rim blank and applied a large radial blur.
6. I put the hub on top of the stack, and again used burn and dodge to adjiust the lighting - especially on the tire. (6)
I grouped the layers as "Front Tire" and duplicated the group as "Read Tire"

step 4 of 7
7. I put the wheels in position to size the frame. I then built the frame from the rocker arm piece using transform - mostly rotate, stretch and skew. I assembled the frame and used the eraser to clean up the joints. I merged the layers and used the smudge tool to clean up the transition under the seat. Notice that the bottom of the frame isn't as clean... I will be covered by the gear and pedals. Finally I applied a gradient layer to the frame clipping it only to the frame layer.

step 5 of 7
8. The gears were made from the large knob on the front. I copied, rotated and merged the layers. I adjusted the curves and used standard brushes to make the gear look like metal not bakelite. I resized it for the front gear and made a copy with a center cut out for the rear tire.
9. The chain was made from a piece of threading that was duplicated, then transformed using stretch and warp.
9. The chain was made from a piece of threading that was duplicated, then transformed using stretch and warp.

step 6 of 7
10. The chrome parts were made from the a section of th emain scale support. I transformed and rotated them to make the seat riser, handlebar riser and fork. I used warp to make the handlebar halves and joined them. The collars at the joint of the handlebars and the seat were made by rotating and matching the collar piece.
11. I warped the pedal sections as shown. The felt pad under the scale pan became the pedal. I rounded the corners and darked them. I attached the pedal to the front side of the front pedal, and the rear side of the rear pedal.
12. Using the hexagonal shape tool, I made the nuts. I gave them a gradient to look metalic and a slight drop shadow. I put nuts on the axles and sized them down slightly for the pedals
13. The seat was made by flipping the rubber foot and warping it.

step 7 of 7
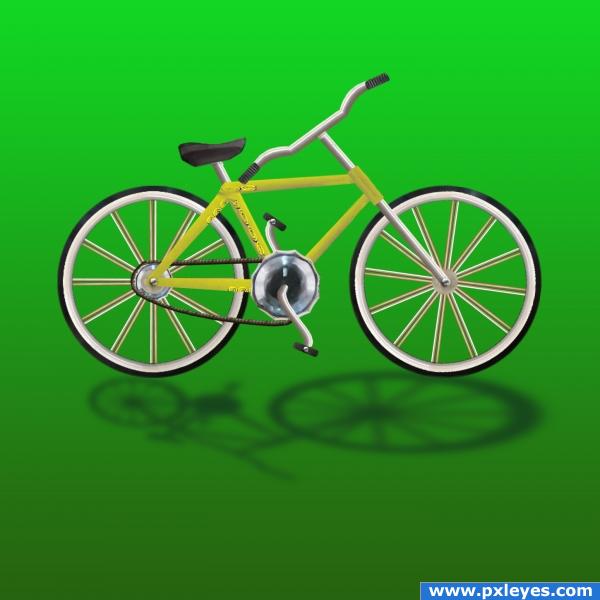
14. The final touches were to add a background gradient. (If I could resubmit I would use the wood grain instead), create a composite layer of all the bicycle parts, control-click the layer and fill with black for the shadow. I gave it a gaussian blur of 7 and used transform distort to flip it. Why the small back tire? I thought it looked cool... a shadow of the bicycles of old.

Final result
Pxleyes
Photography and photoshop contests
We are a community of people with
a passion for photography, graphics and art in general.
Every day new photoshop
and photography contests are posted to compete in. We also have one weekly drawing contest
and one weekly 3D contest!
Participation is 100% free!
Just
register and get
started!
Good luck!
Follow us:


© 2015 Pxleyes.com. All rights reserved.