A Work in Progress: Rejuvenated


This guide was made for entry:
Rejuvenated
In Contest:
beauty pageant


step 1 of 4

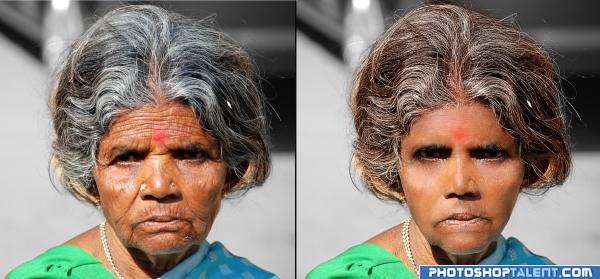
First of all, duplicated the original layer and started using mostly the spot healing brush tool, but also the healing brush and the patch tool. I removed all of the wrinkles and the end result was quite rough. So I lowered the opacity to 43% and duplicated the background layer again.

Creation of Rejuvenated: Step 1

step 2 of 4

I duplicated the original layer 3 more times and each time I removed wrinkles over and over again and lowered the opacity of each layer to 45-55%, depending on what fits best. All blending modes are set to Normal. I did this to keep the texture of the skin as best as I can, but it still doesn't look that good.

Creation of Rejuvenated: Step 2

step 3 of 4

Now, the face looks kinda blurry and plastic. So, I duplicated the base layer 2 more times and used high pass filter on both with radius of about 4-5. I set both layers on overlay and lowered the opycity to 60 and 85%. It brought back a lot of skin definition.

Creation of Rejuvenated: Step 3

step 4 of 4

Now, the liquify tool. Her skin was hanging too much to just leave it like this so i pushed it in a bit and tried to shape her face a bit differently. I lost the red dot on her forehead with all the healing, so i drew another. Also, with the lasso tool I selected her left eye, copied it and placed it over her right eye and masked it a bit to blend in correctly. The final step was selecting her hair with the quick mask mode using the brush and changed the color using the color balance and a bit of channel mixer.
That's it I hope you find this useful!

Creation of Rejuvenated: Step 4

Final result

Creation of Rejuvenated: Final Result

LOGIN or REGISTER FOR FREE
to rate this guide and create your own guides.