A Work in Progress: Water Shark


This guide was made for entry:
Water Shark
In Contest:
made out of water


step 1 of 3

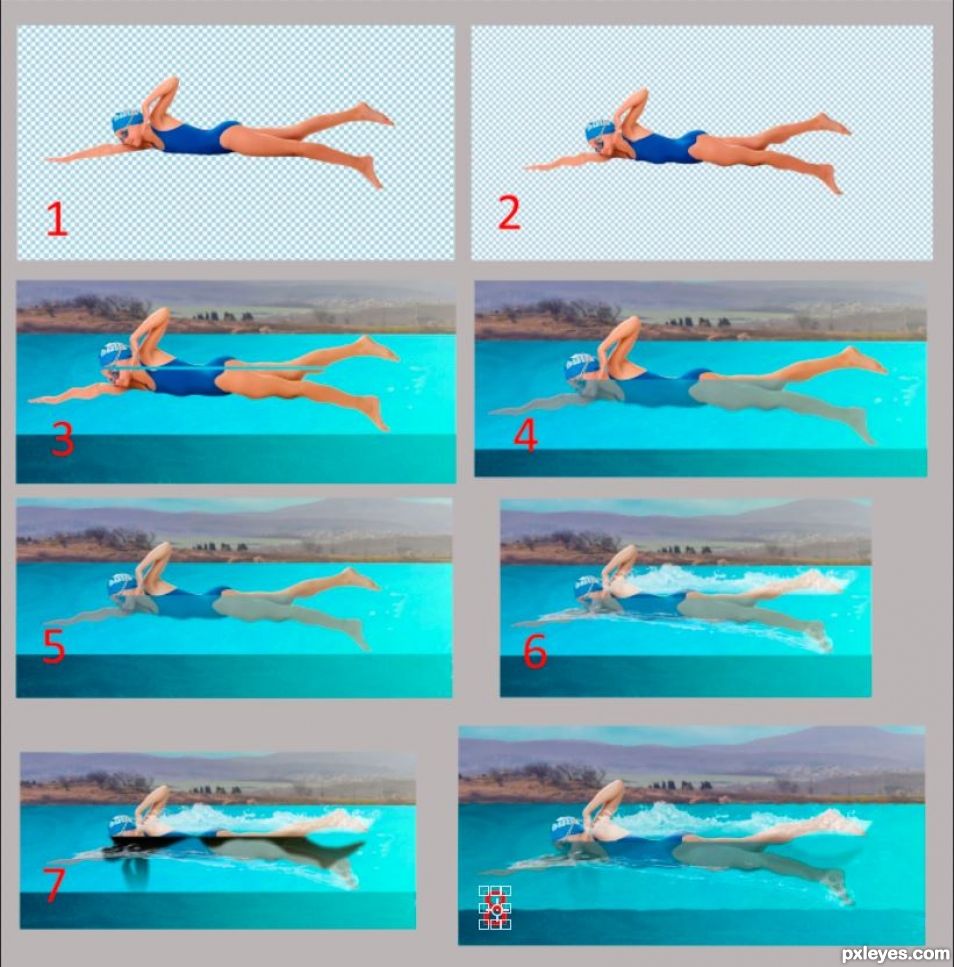
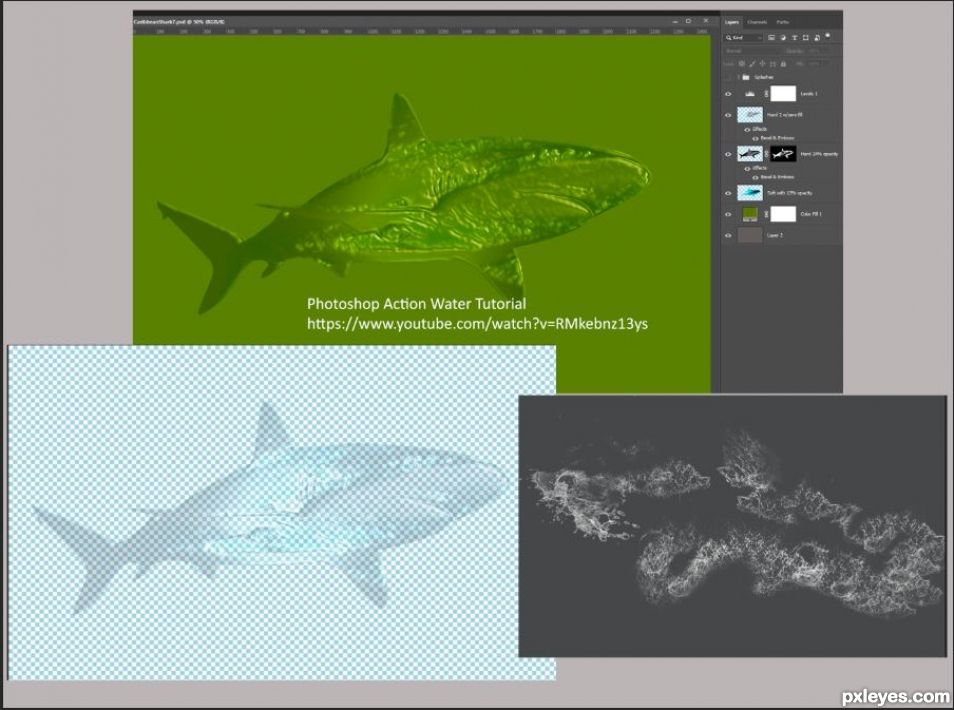
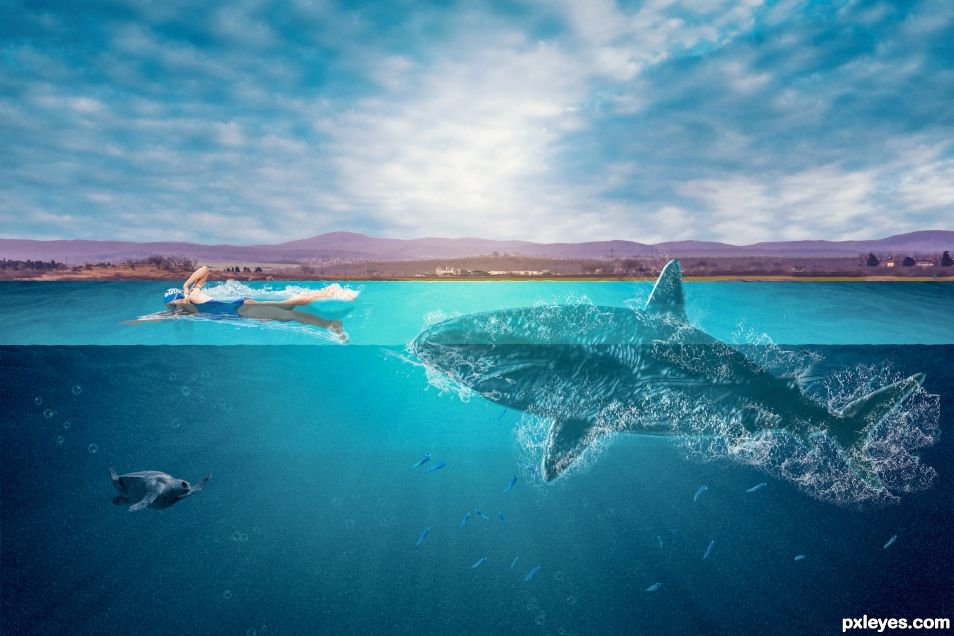
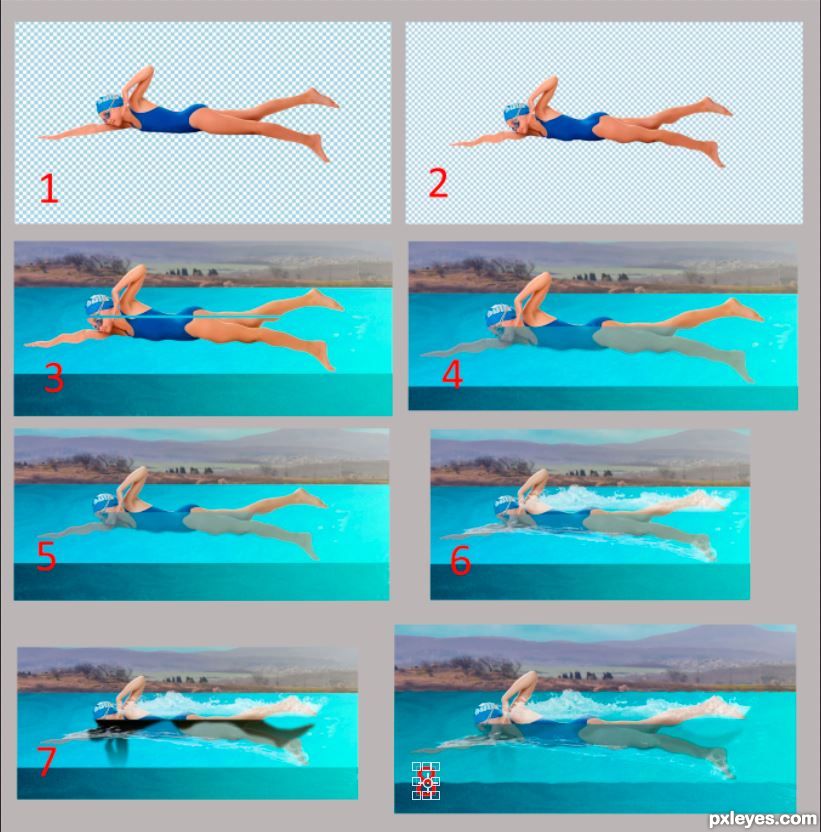
Used YouTube tutorial for Water Shark see 3rd SBS page. Also the underwater effect was from another YouTube tutorial that I use as a starting point for underwater scenes. Most of the splash work was from the waters splash brushes source listed. The swimmer was the most difficult part of the image for me, See the 2nd SBS page

Creation of Water Shark: Step 1
( hi-res )

step 2 of 3

1-Original
2-Wobble bottom half of swimmer with Zig Zag filter Amt -14 Ridges 12 pond ripples
3-Divide swimmer into top half and bottom half
4-Bottom half Levels and HueSat and reduce fill also Slight Motion blur
5-Layer with overall average color with color blend clipped to top half swimmer reduce opacity 20%
6-Swimmer splashes applied
7-Apply blurred shadow on top half only
8-Reduced shadow opacity and smudged water line

Creation of Water Shark: Step 2
( hi-res )

step 3 of 3

While following the tutorial, you end up with 3 layers.
The Hard2 layer basically uses the highlights to create a bevel and emboss, then the fill is reduced to zero, leaving you with just the glowing highlights
The Hard layer is the darker tones with opacity reduced to 24%
The Soft layer is just the coloring reduced to 13% opacity.
When I placed Water Shark in image, I duplicated it twice to make it richer.

Creation of Water Shark: Step 3
( hi-res )

Final result

Creation of Water Shark: Final Result

LOGIN or REGISTER FOR FREE
to rate this guide and create your own guides.