A Work in Progress: Baby T.


This guide was made for entry:
Baby T.
In Contest:
where do babies


step 1 of 13

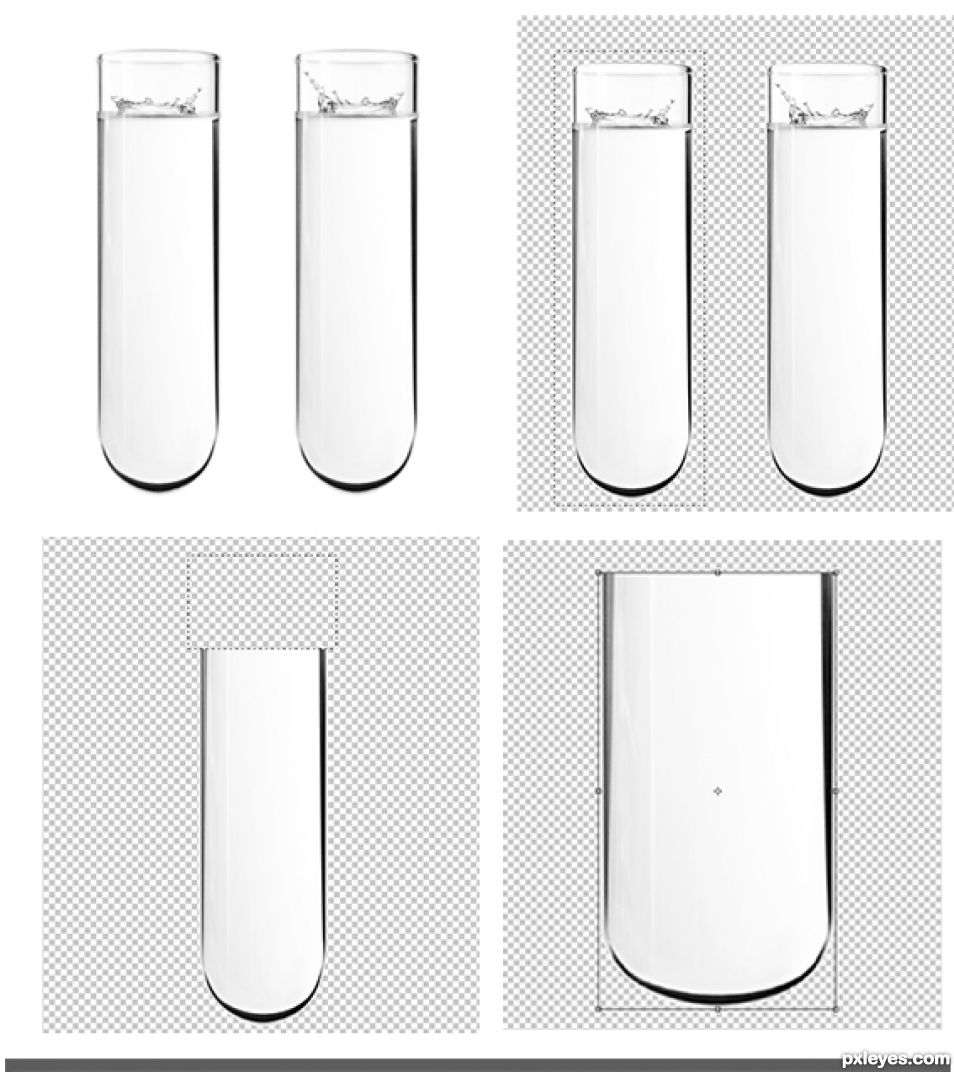
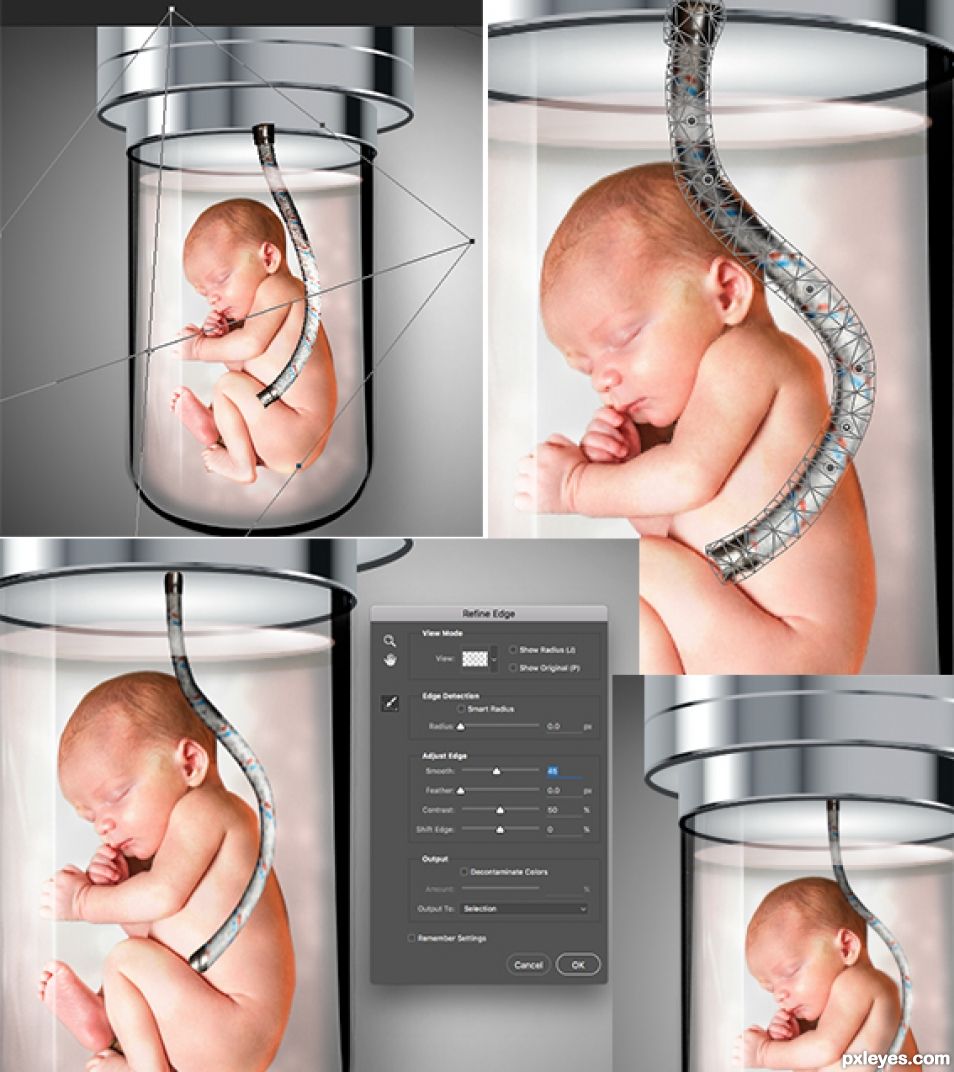
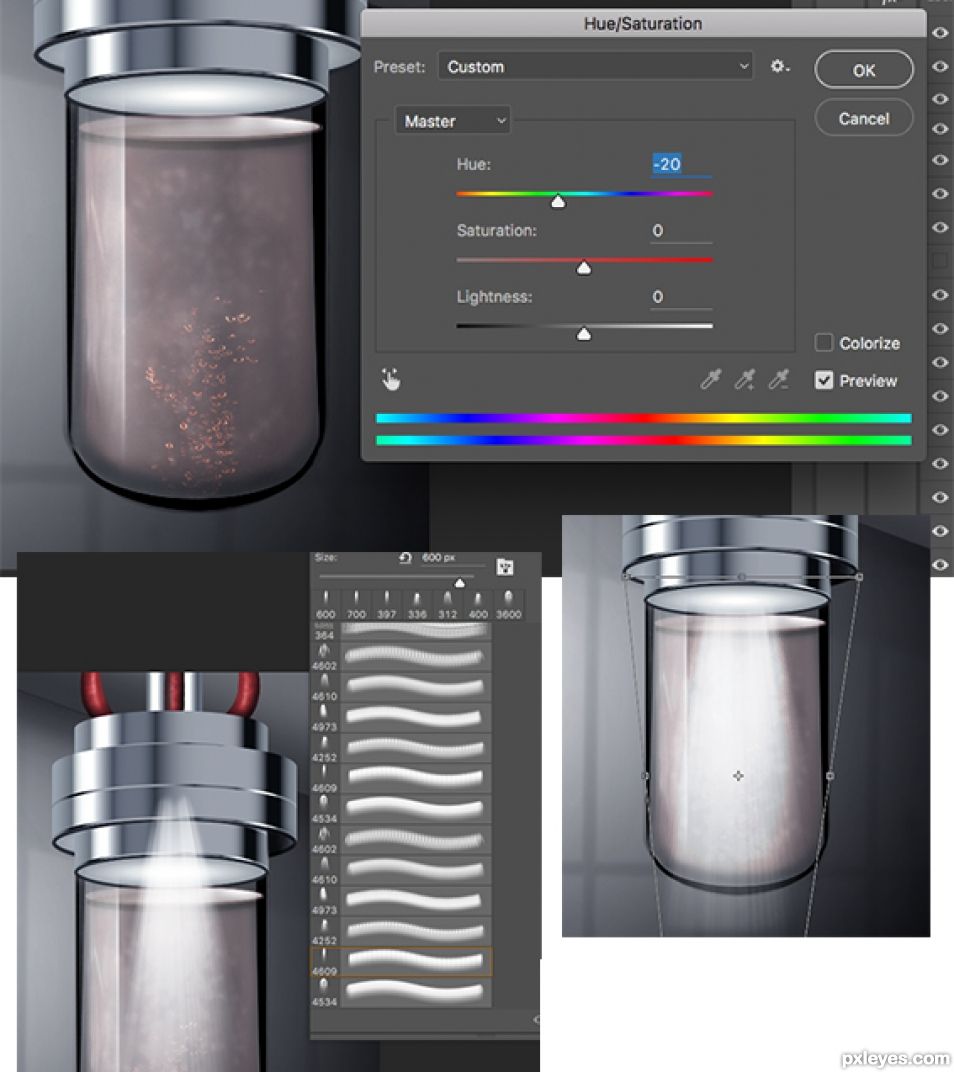
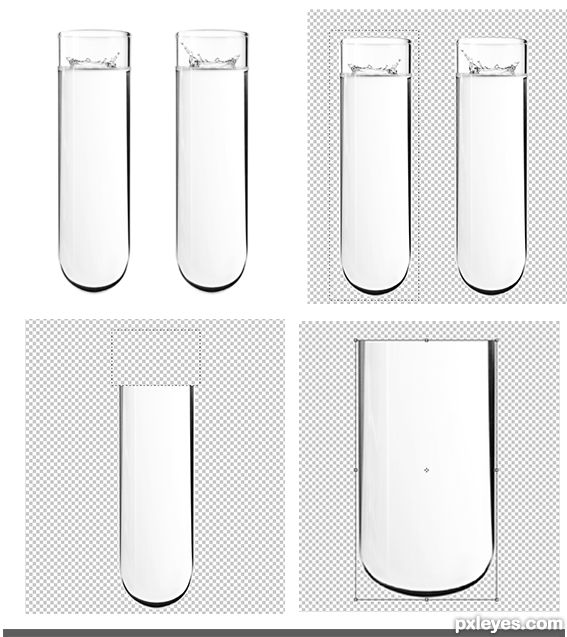
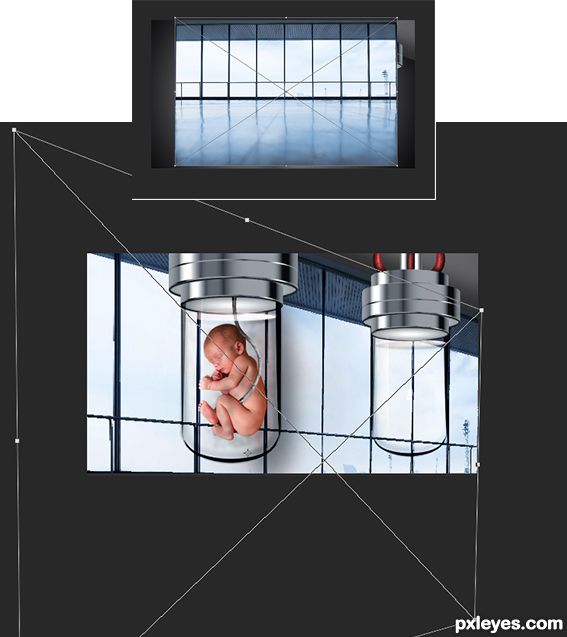
Take the picture of the test-tubes.
remove the background.
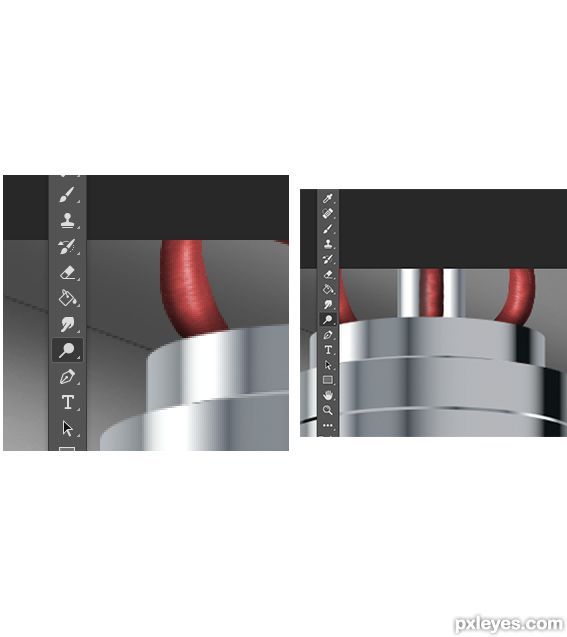
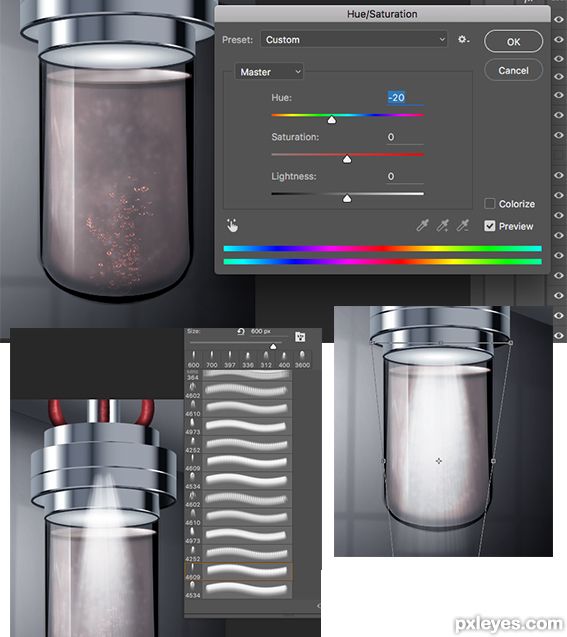
Remove the top part of the test tube.
Using the transform tool, widen the test tube.
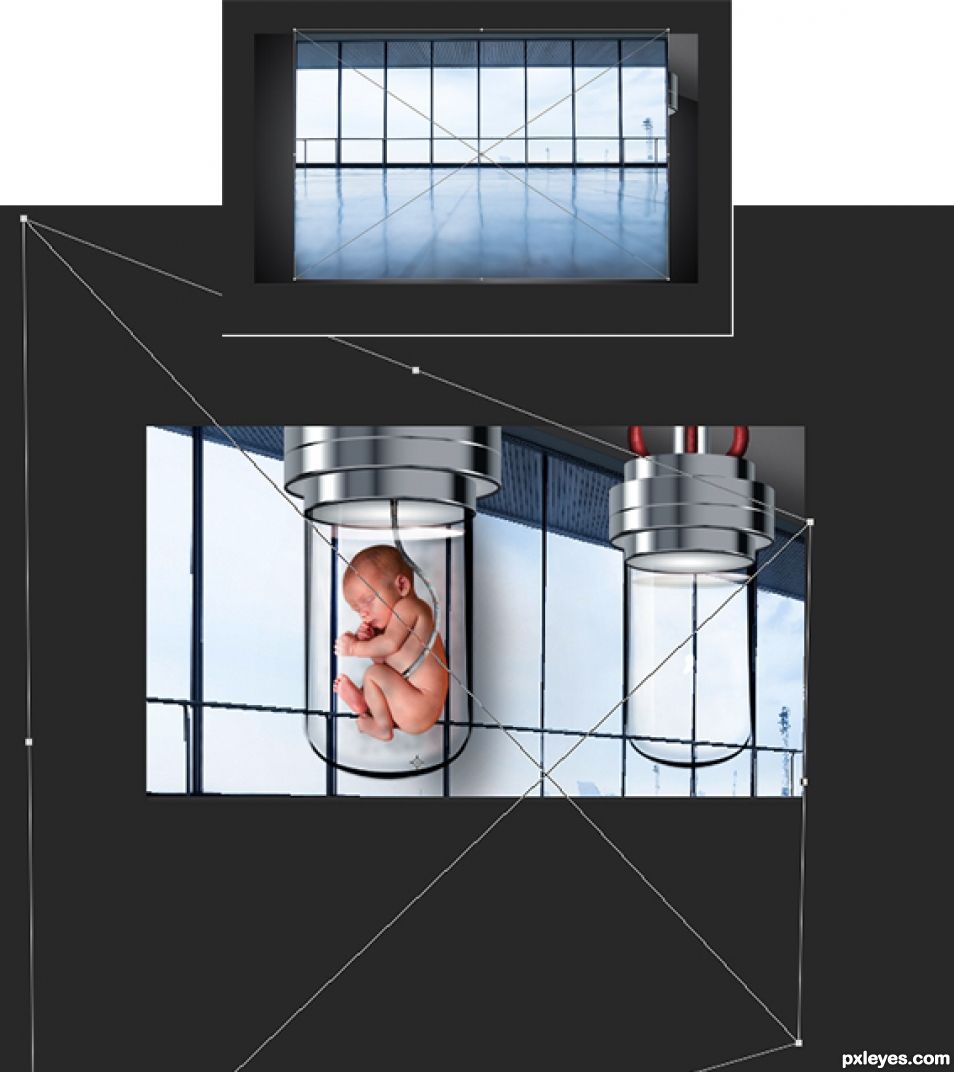
Creation of Baby T.: Step 1
( hi-res )

step 2 of 13

Open illustrator.
Create a new document.
Using the pen tool, draw a circle outline.
Then create an inner circle and another circle outline.
I used a basic metallic gradient.
Fill the circle with the metallic gradient.
Fill the inner circle with the black gradient.
Add all together.
Duplicate.
Crate two metal pipes using the Rectangle tool and fill with the metallic gradient.

Creation of Baby T.: Step 2
( hi-res )

step 3 of 13

Take the picture of the baby and remove the background using the pen tool.
Add the baby to the test tube and flip him and transform.

Creation of Baby T.: Step 3
( hi-res )

step 4 of 13

Add some fluid by using the pen to create a layer then fill with orange colour.
Use curves to adjust the colour.
Set layer to soft light.
(assembly test tube to the lid part | forgot to mention that earlier- and take the image of the rubber tubes, remove from background and add to the lid , transform into place by using warp and puppet warp)

Creation of Baby T.: Step 4
( hi-res )

step 5 of 13

Using the brush tool, fill in with a nude colour and blur.
Add the picture with the bubbles in , blur and set the layer to divide.
Duplicate the glass section of the test tube, add it to the front left of the test tube and set layer to screen.

Creation of Baby T.: Step 5
( hi-res )

step 6 of 13

Take the picture of the "Plumbing tube" remove it from the background and add it to our baby.
Using the puppet tool, warp the tube into place.
Duplicate the tube and fill that duplicate with black, add a blur, transform it to create the shadow.

Creation of Baby T.: Step 6
( hi-res )

step 7 of 13

Add a colour overlay on the rubber tubes, play with the saturation to make them stand out.
Using the dodge tool, add some highlights to make the rubber texture stand out a little.

Creation of Baby T.: Step 7
( hi-res )

step 8 of 13

Take the image of the windows and distort using the Transform tool.
Fix the perspective and add to our image, setting layer to the back and set to overlay.

Creation of Baby T.: Step 8
( hi-res )

step 9 of 13

Add a slight blur to the background and reduce the opacity.

Creation of Baby T.: Step 9
( hi-res )

step 10 of 13

Using the Lasso Tool, outline the test tube.
In the background window layer, add a box blur to the outlined section, to create a distortion of the background through the glass.
Do the same for the second test Tube.

Creation of Baby T.: Step 10
( hi-res )

step 11 of 13

Take the "Bubbles in water" image and desaturate.
Add this to both test tubes and set layer to divide.
Set opacity to 45%.
Using the Brush set, Take brush "Light Ray 3" and add it to both test-tubes.
Set layer to vivid light and opacity to 20%.

Creation of Baby T.: Step 11
( hi-res )

step 12 of 13

Add a blue tint layer to create some cold tones.

Creation of Baby T.: Step 12
( hi-res )

step 13 of 13

For the final step, Select the full image, copy merged and paste in front of the existing image.
Add a Gaussian blur to the op image and set the layer to overlay and to 32%.
This gives a slight dreamy glow.

:)

Creation of Baby T.: Step 13
( hi-res )

Final result

Creation of Baby T.: Final Result

LOGIN or REGISTER FOR FREE
to rate this guide and create your own guides.