
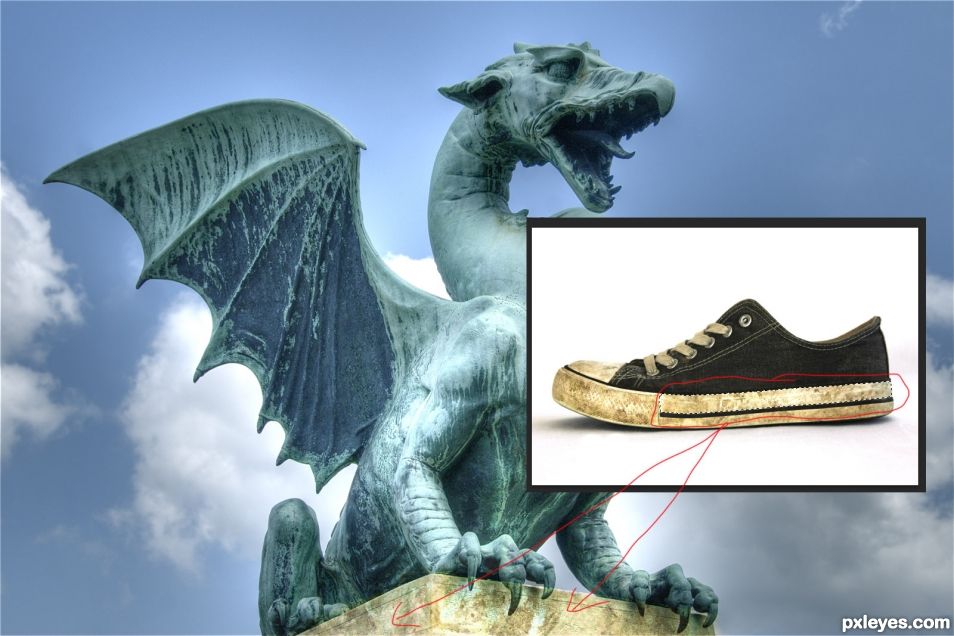
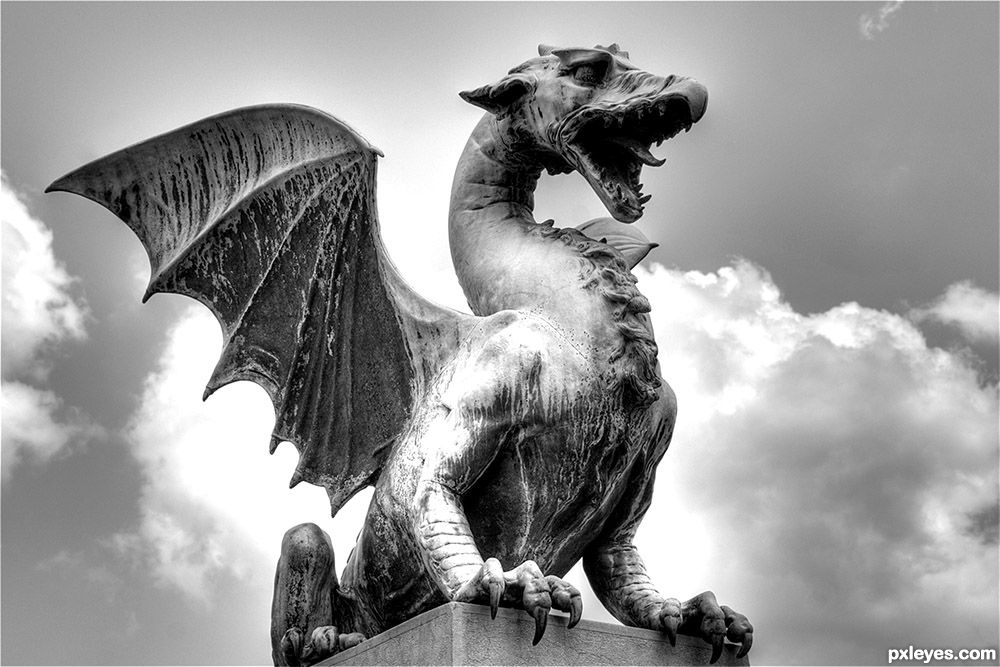
Original image
step 1 of 6
Make a displacement map by desaturating the image and increasing contrast. Save as a PNG. We will use this later to add some shape to the denim.

step 2 of 6
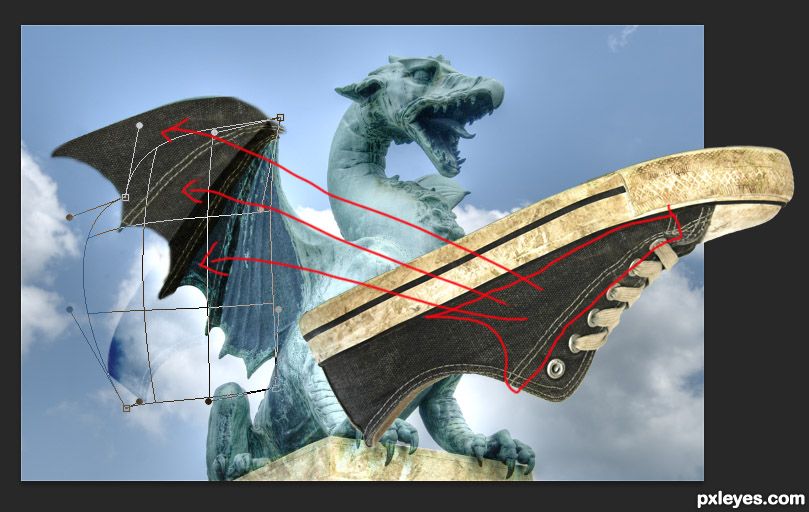
Use the original dragon as a guide and start chopping bits from the shoe to cover various areas.
step 3 of 6
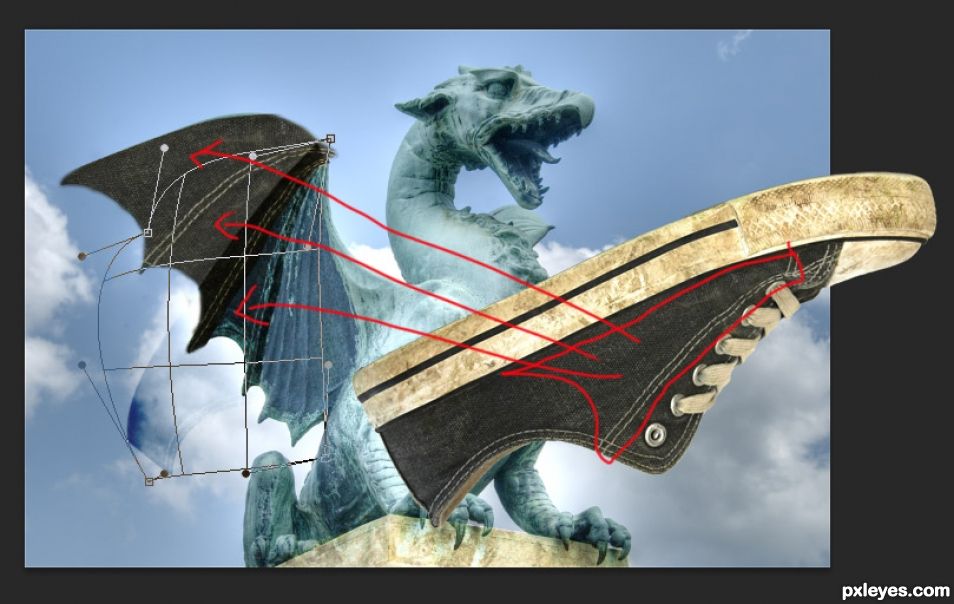
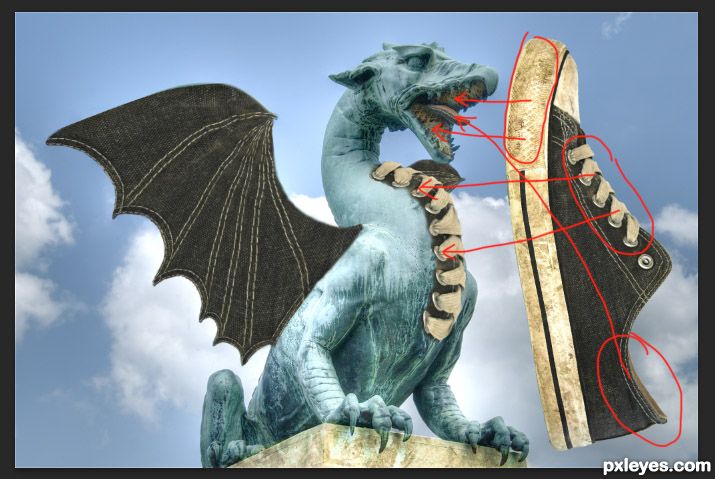
step 4 of 6
Continue to use the shoe sections to make the body parts of the dragon.
The denim parts were used for the main body and the sole was used for the stand, teeth, and claws. Laces were used for the chest and the heel section was used for the tongue.
The denim parts were used for the main body and the sole was used for the stand, teeth, and claws. Laces were used for the chest and the heel section was used for the tongue.

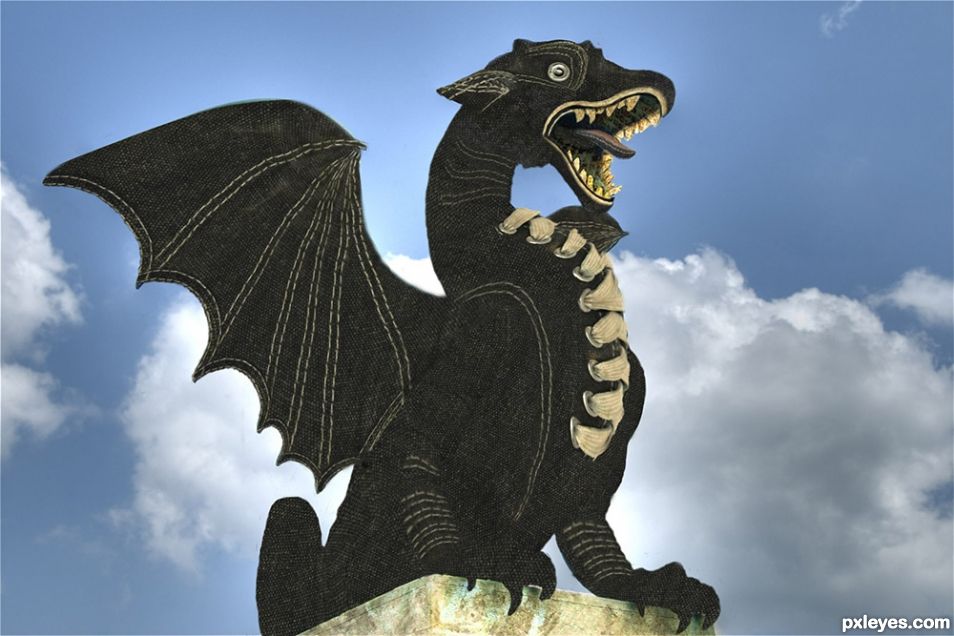
step 5 of 6
This is what the image looked like before the claw color and displacement filter were added.
step 6 of 6
Use the displacement filter to add some shape to the flat dragon image.
Go to filter > Distort > Displace. A new window will pop up where you need to insert the horizontal and vertical scale. I used 10 pixels on both. Click OK and a new window will pop up where you can choose the displacement image to use.
I also used the desaturated image as a soft light overlay and used the dodge and burn tool to increase the shadows and highlights where necessary.
Then I played around with colors, hues and saturation and added more yellow and orange tones to get a warmer looking image.
I added a thin border...Select all > modify > border.
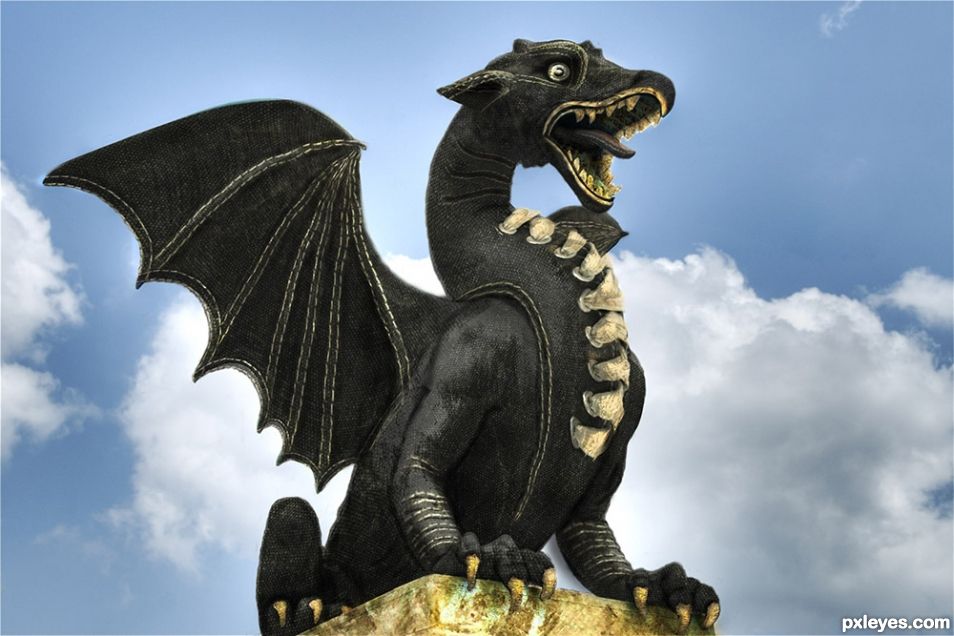
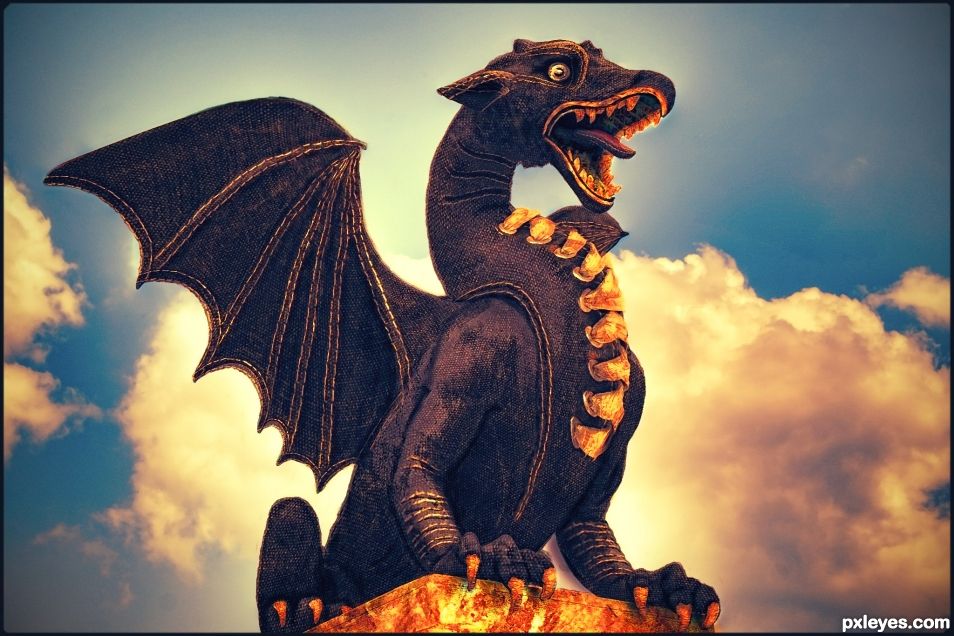
Final result
Pxleyes
Photography and photoshop contests
We are a community of people with
a passion for photography, graphics and art in general.
Every day new photoshop
and photography contests are posted to compete in. We also have one weekly drawing contest
and one weekly 3D contest!
Participation is 100% free!
Just
register and get
started!
Good luck!
Follow us:


© 2015 Pxleyes.com. All rights reserved.