
Original image
step 1 of 2
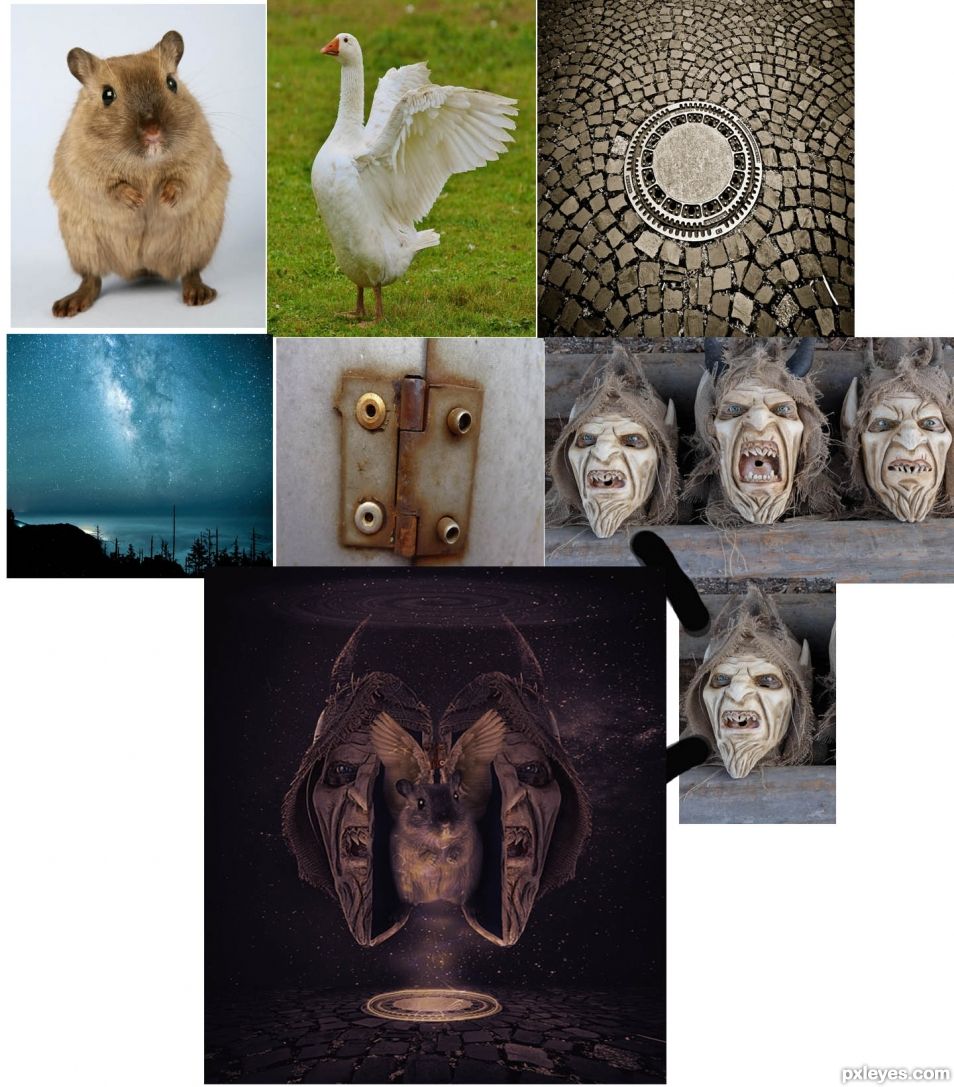
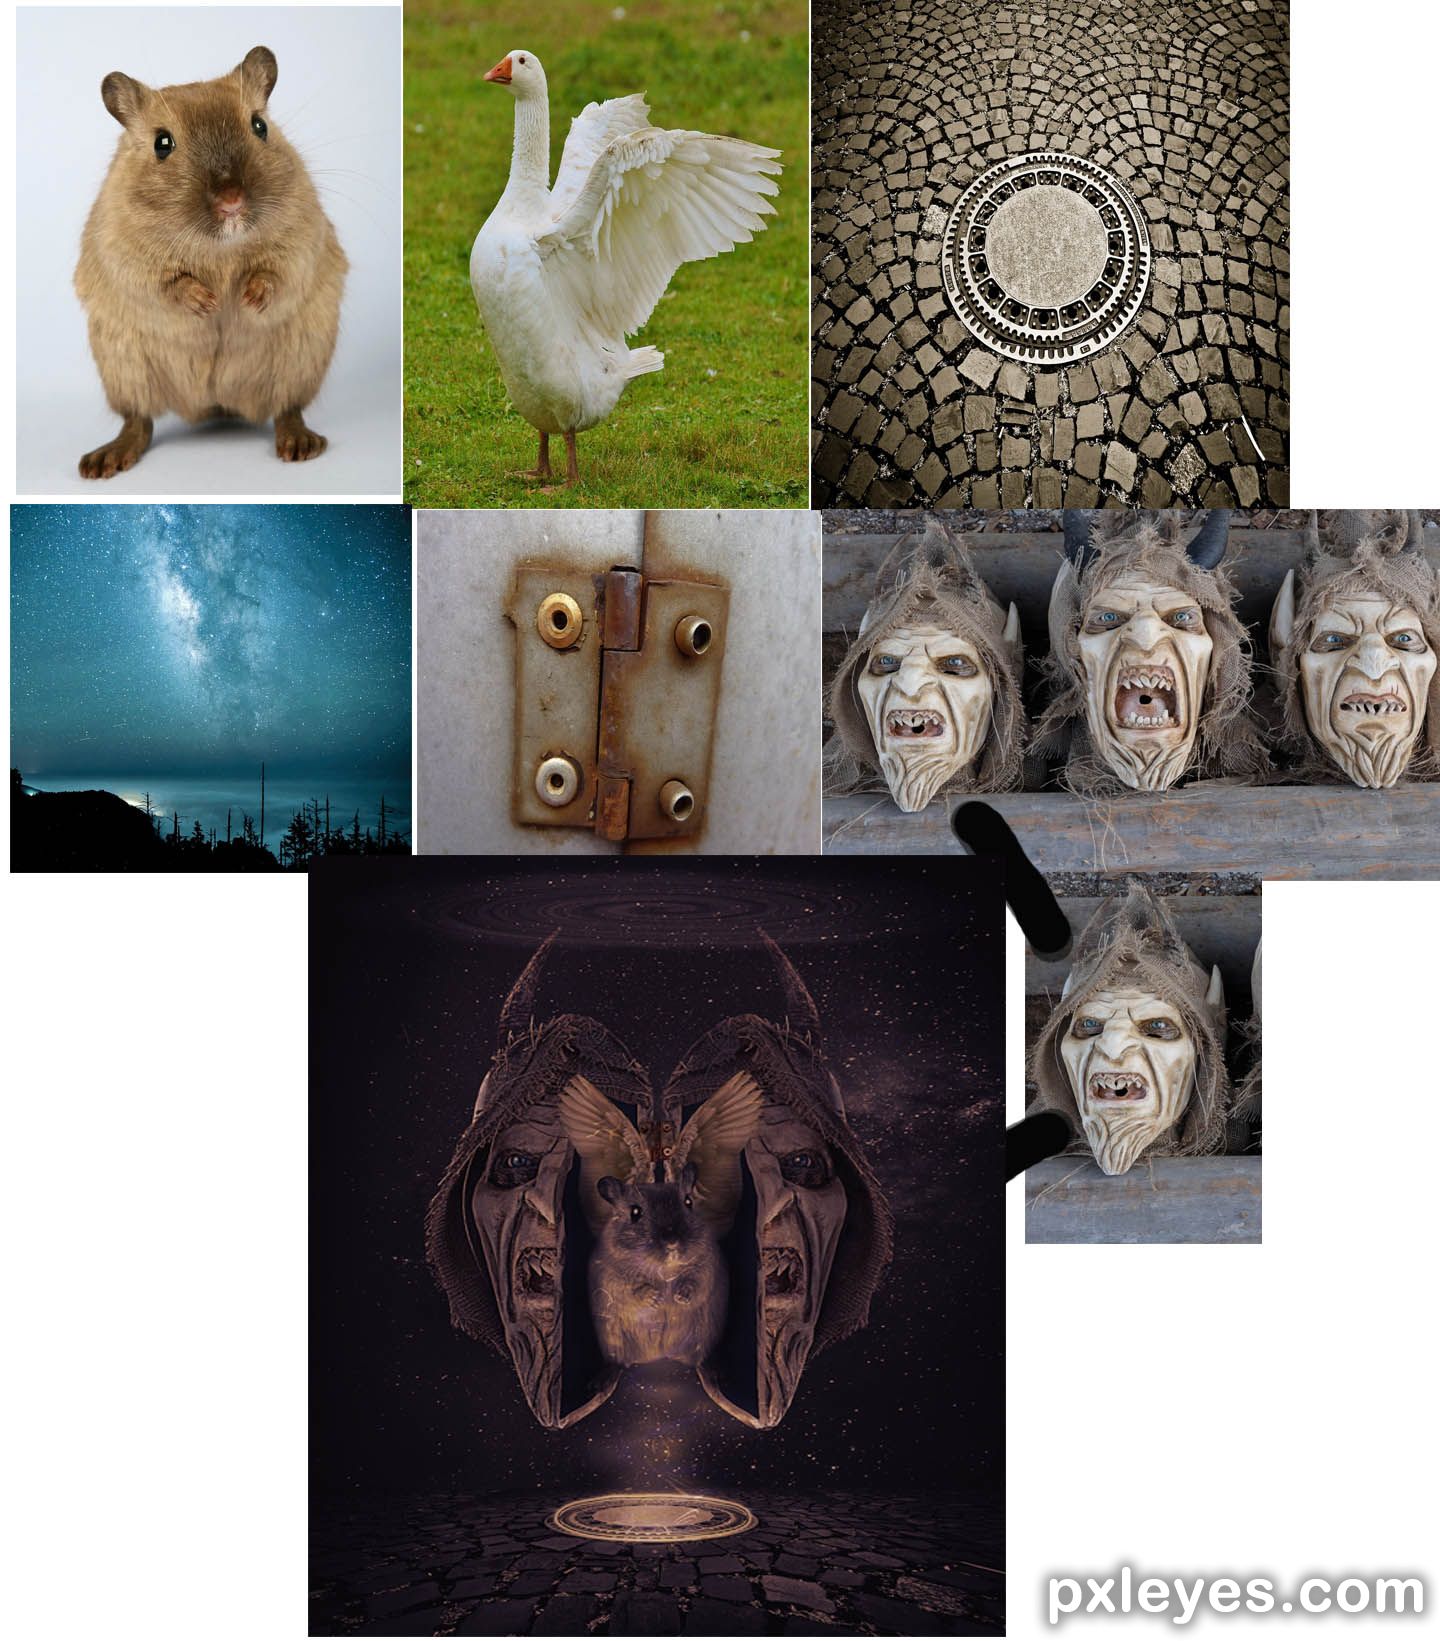
Gather 5 resource images and source mask image .
Cut out mouse, wing from goose, and hinge.
layer one , star background, layer two cobblestone , layer three cobblestone warped.
Cut out mouse, wing from goose, and hinge.
layer one , star background, layer two cobblestone , layer three cobblestone warped.
step 2 of 2
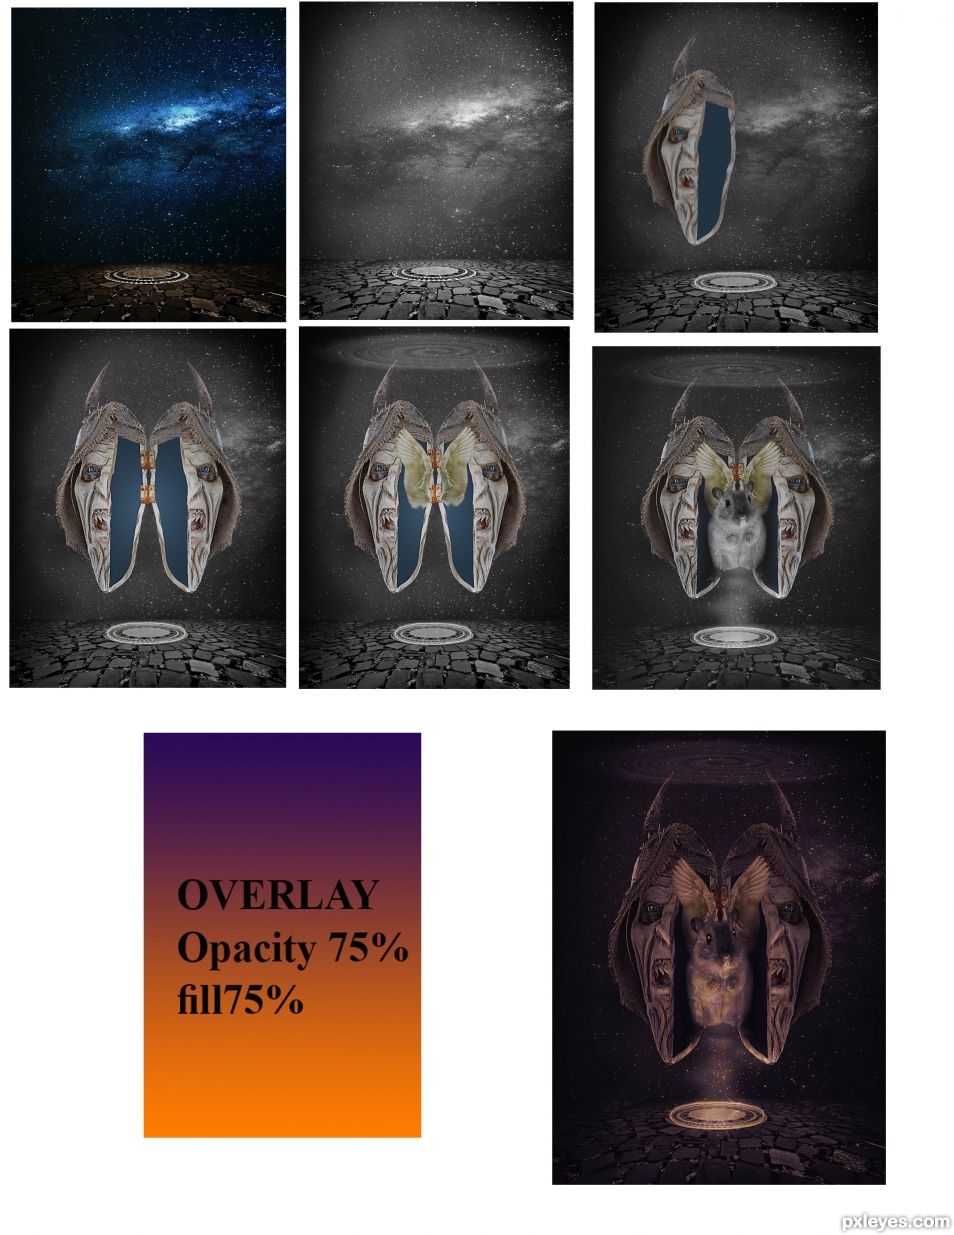
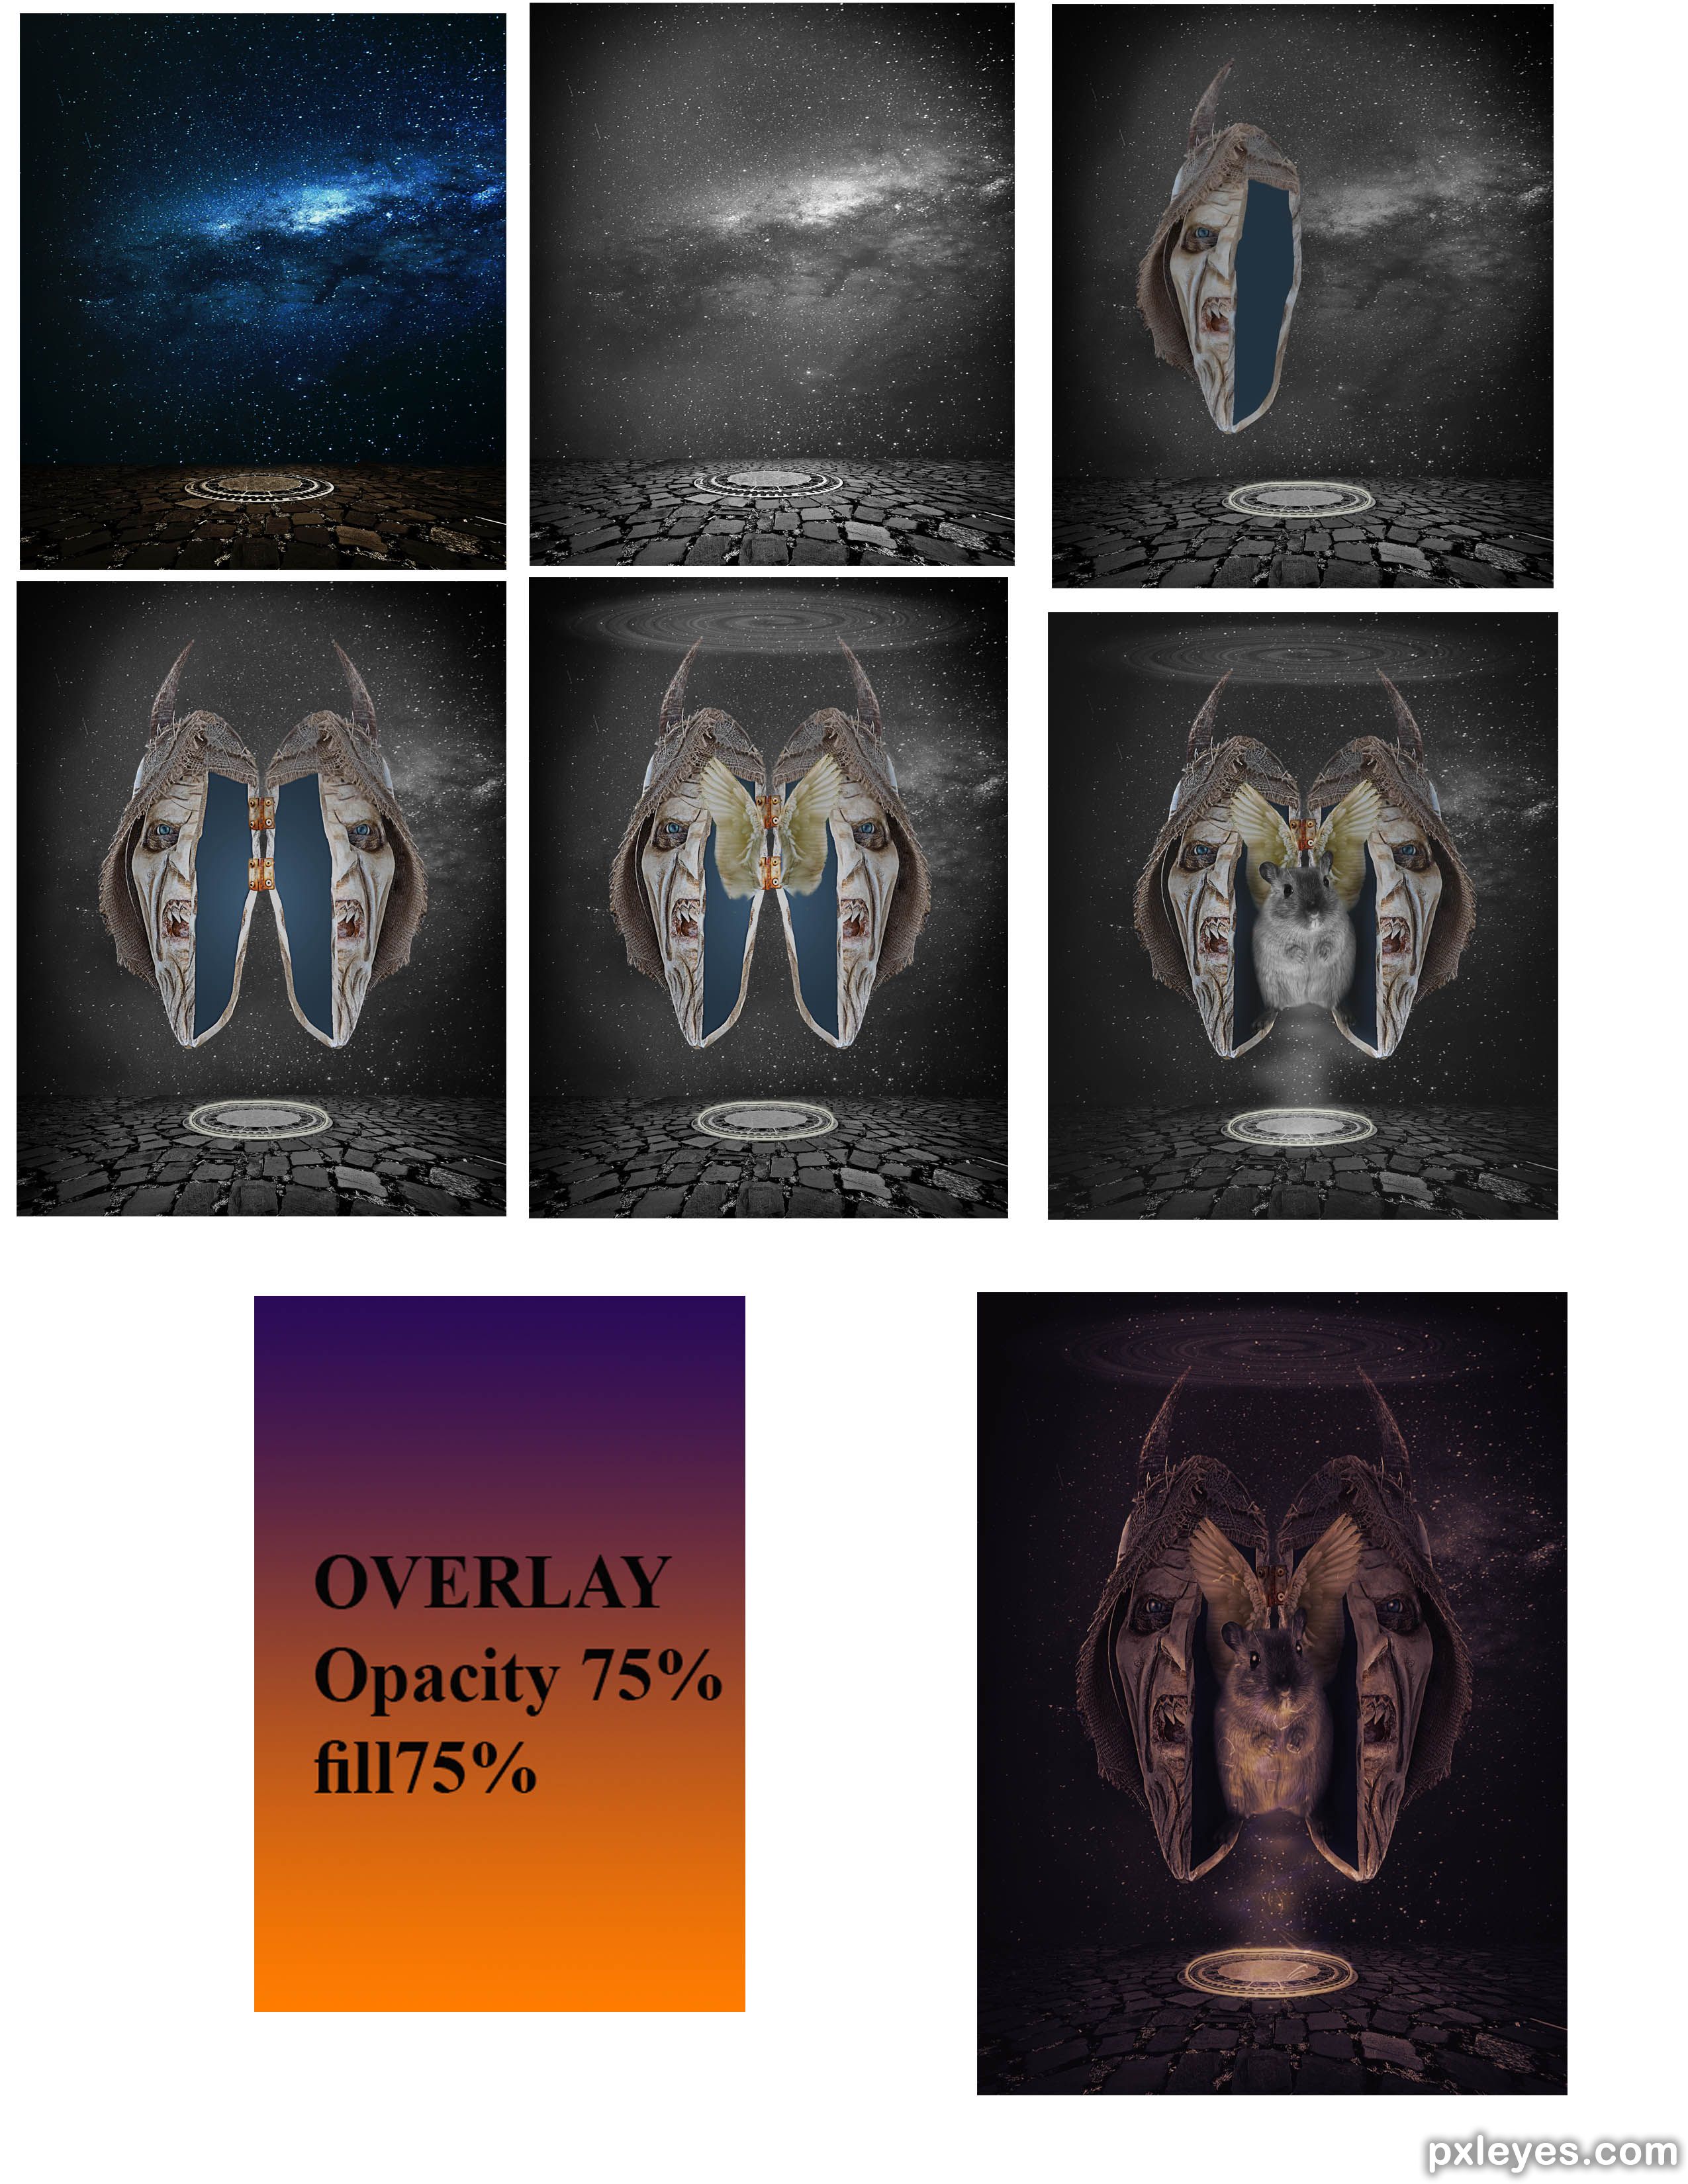
desaturate first layers
Cut out Mask. Select left side of mask. copy and paste into new layer.
new layer paint side of head. new layer paint side of head again but smaller.
copy side cheek of mask. clip it to the first side layer create a border around the side of head.
now copy some of the mesh, cut,warp and position mesh for top side of head .
duplicate head and flip . I do not merge the layers incase I want to make changes at a further stage.
New layer. pic a blue colour and paint over the mask eyes. set layer mode to multiply or overlay and adjust opacity and fill to get a nice blue shade to the eyes. ( this will vary depending on the shade you use)
cut out hinge. Play with warp and dodge to adjust hinge for correct perspective.
add wings. add mouse.
Mouse feet were a little wide. use warp or puppet warp to reposition feet of mouse to sit on side of mask.
Twirl above head.. new layer. paint a white spot. then use the following FILTER > DISTORT _TWIRL. then WARP .. if the edges are a little intense add a LAYER MASK and using a soft brush with paint flow 35% , paint the edges softer.
adding light..
NEW LAYER.. set blending mode LAYER - COLOUR DODGE. fill with black. use white paint and paint dabs where you want light. these will look very bright and intense.
then use, FILTER>DESTORT_WAVE .. then FILTER>BLUR_Gus' play with the settings to get desired effect. you may like to add wave a few times to keep changing the wave.
for more intense and layered light. add other layers of white paint setting each added layer with layers blended from normal and soft light ( I just play with this as I am still learning) . Use Pen tool with "stroke" it get finer shapes.
more lights and darks. . go to the little half circle at the bottom of layers .. add . hue /saturation layer.. play with adjustments.
add a gradient overlay ,colour used here is purple and orange. layer mode, overlay, opacity 75, fill 75.. - (top layer)
* I also selected individual images, using magic wand, leaving them selected add gradient overlays .. colour . black to white, layer blend OVERLAY, TYPE> RADIAL or LINIAR. , adjust colour opacity as required... used this for darkening and lightening areas.
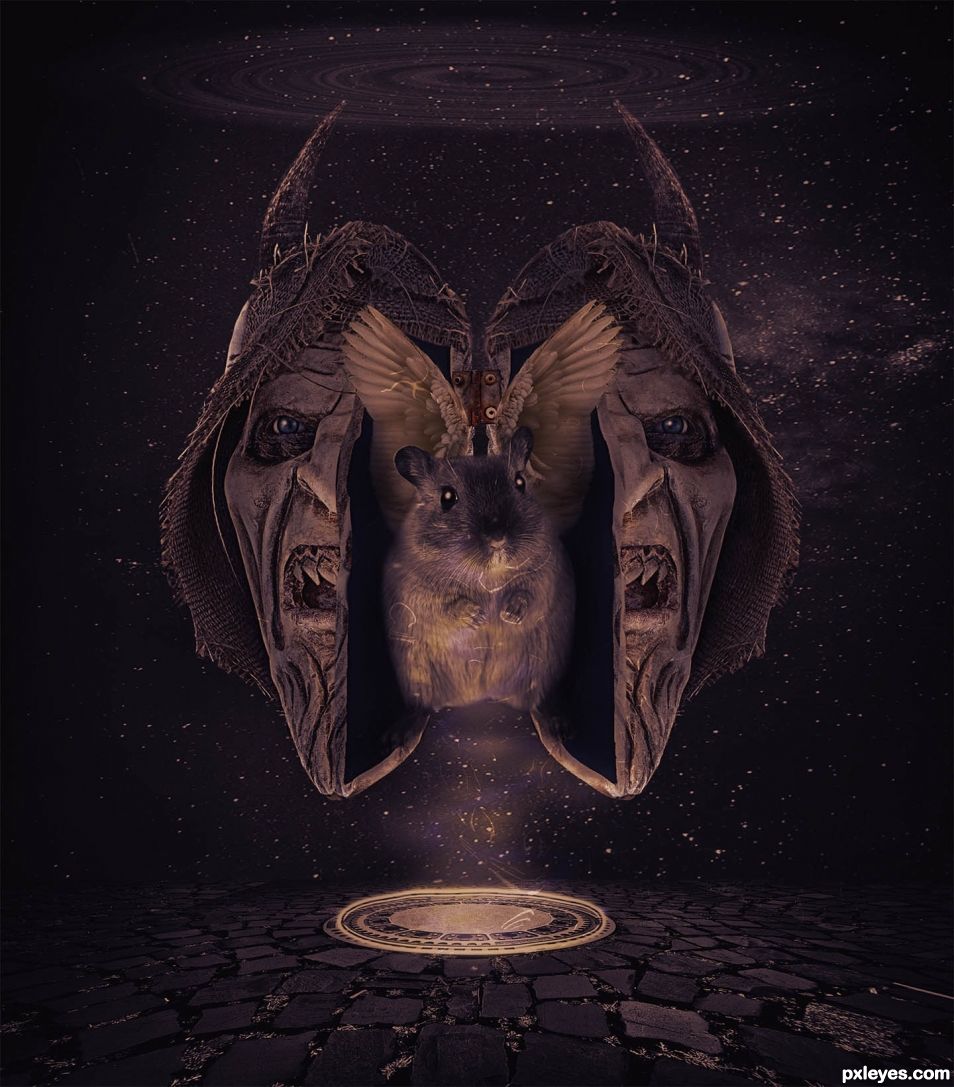
Final result
Pxleyes
Photography and photoshop contests
We are a community of people with
a passion for photography, graphics and art in general.
Every day new photoshop
and photography contests are posted to compete in. We also have one weekly drawing contest
and one weekly 3D contest!
Participation is 100% free!
Just
register and get
started!
Good luck!
Follow us:


© 2015 Pxleyes.com. All rights reserved.