
Original image
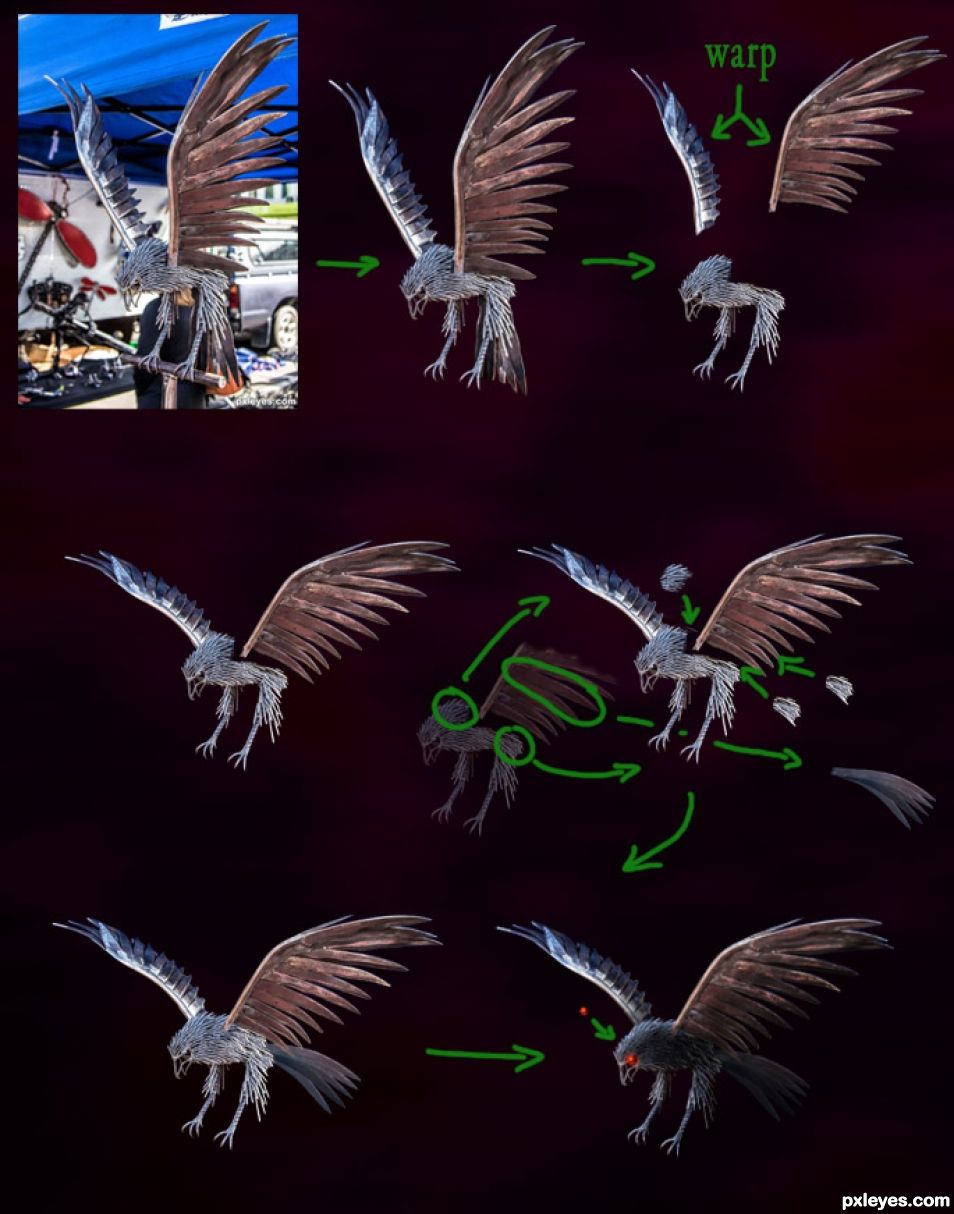
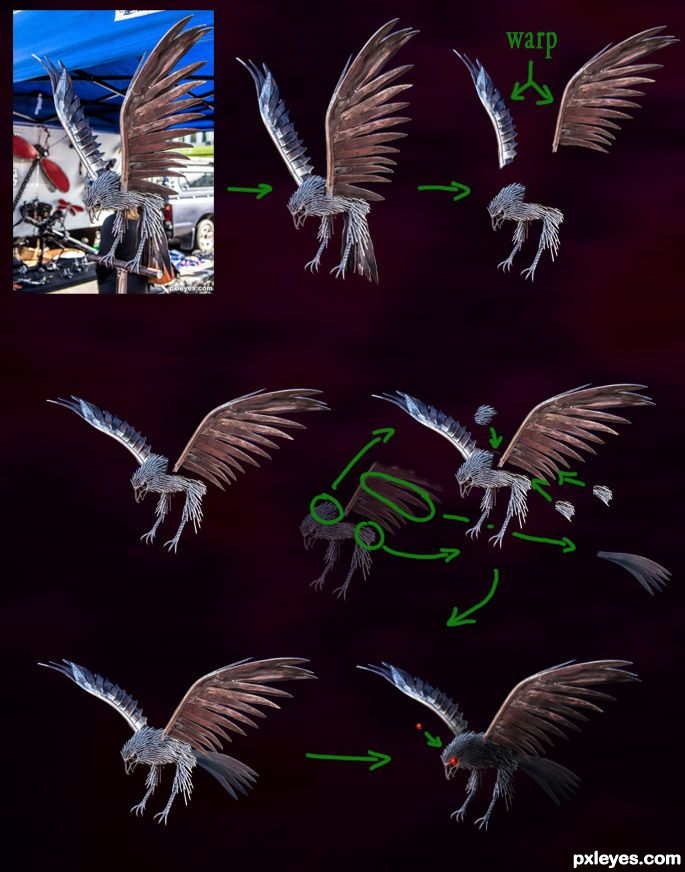
step 1 of 4
I cut out the bird using a mask and a brush.
Than separated the wings from the body, warped and rotated them so they fit better in a landing position. I refilled the body with parts taken from the body. The tail was made with a part of the wing, duplicated and warped in place. The glowing eye was made with a simple brush (red and a yellow one) with a reduced opacity. Finally some dodge and burn on the bird.
Than separated the wings from the body, warped and rotated them so they fit better in a landing position. I refilled the body with parts taken from the body. The tail was made with a part of the wing, duplicated and warped in place. The glowing eye was made with a simple brush (red and a yellow one) with a reduced opacity. Finally some dodge and burn on the bird.
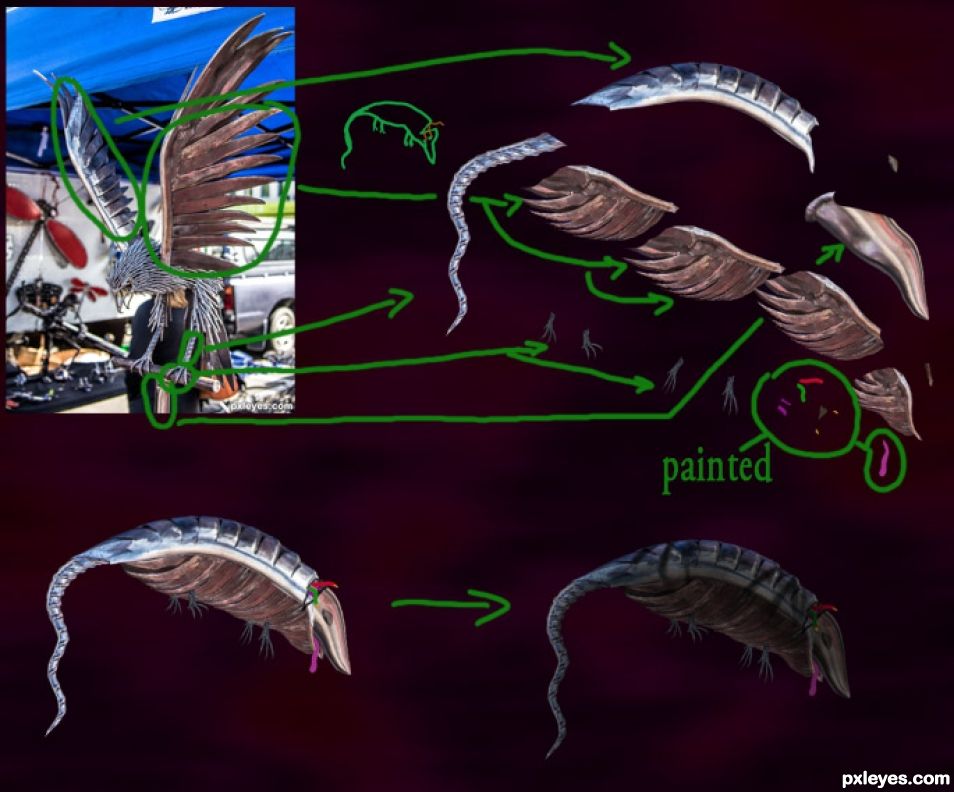
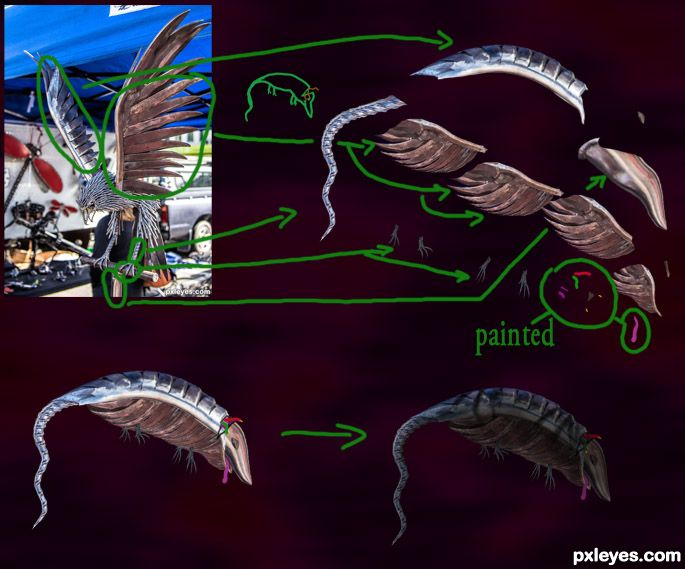
step 2 of 4
For the "Bait" I made a rough sketch and used the shown parts to build it up.
I extended the birds leg and liquifyed it to create the tail.
The back was maid using the silver wing warped in place.
To create the belly I used the copper wing, witch I also warped in place.
The feet where made using the birds feet with a little bit liquify.
To create the wires I painted some lines with a simple brush (red, green, purple, yellow)
and put them together. The toung was also painted with Photoshop.
Finally some dodge and burn.
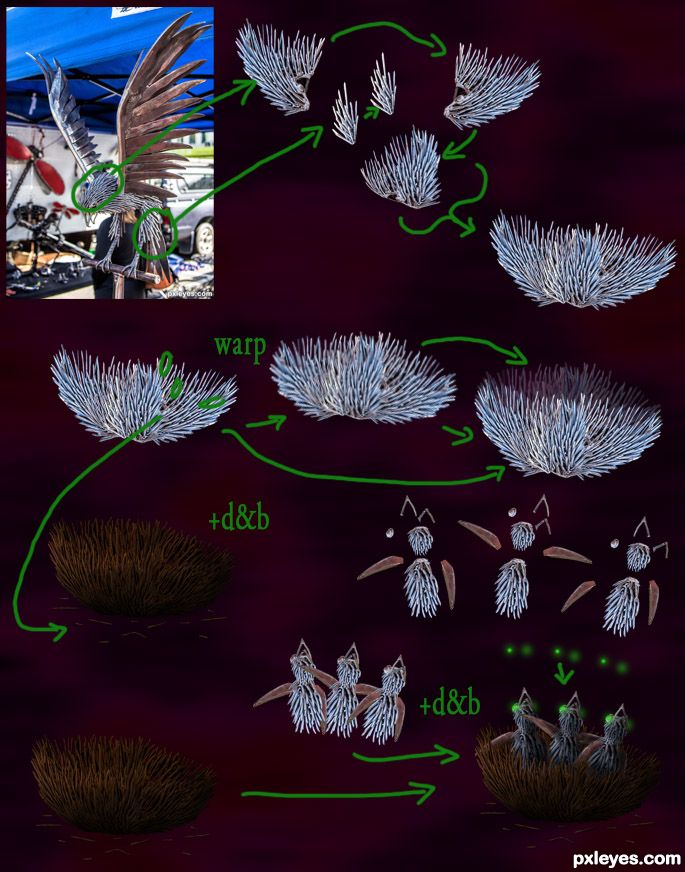
step 3 of 4
To create the nest and the bird kids I used parts of the birds body. warped, mirrored and blended together. Finally a hue/saturation adjustment (colorize checked) to change the colour to brown and dodge and burn. The bird kids where made using parts from the bird as well.
Some small changes to them to not let them look to similar. And of course some dodge and burn.
Some small changes to them to not let them look to similar. And of course some dodge and burn.

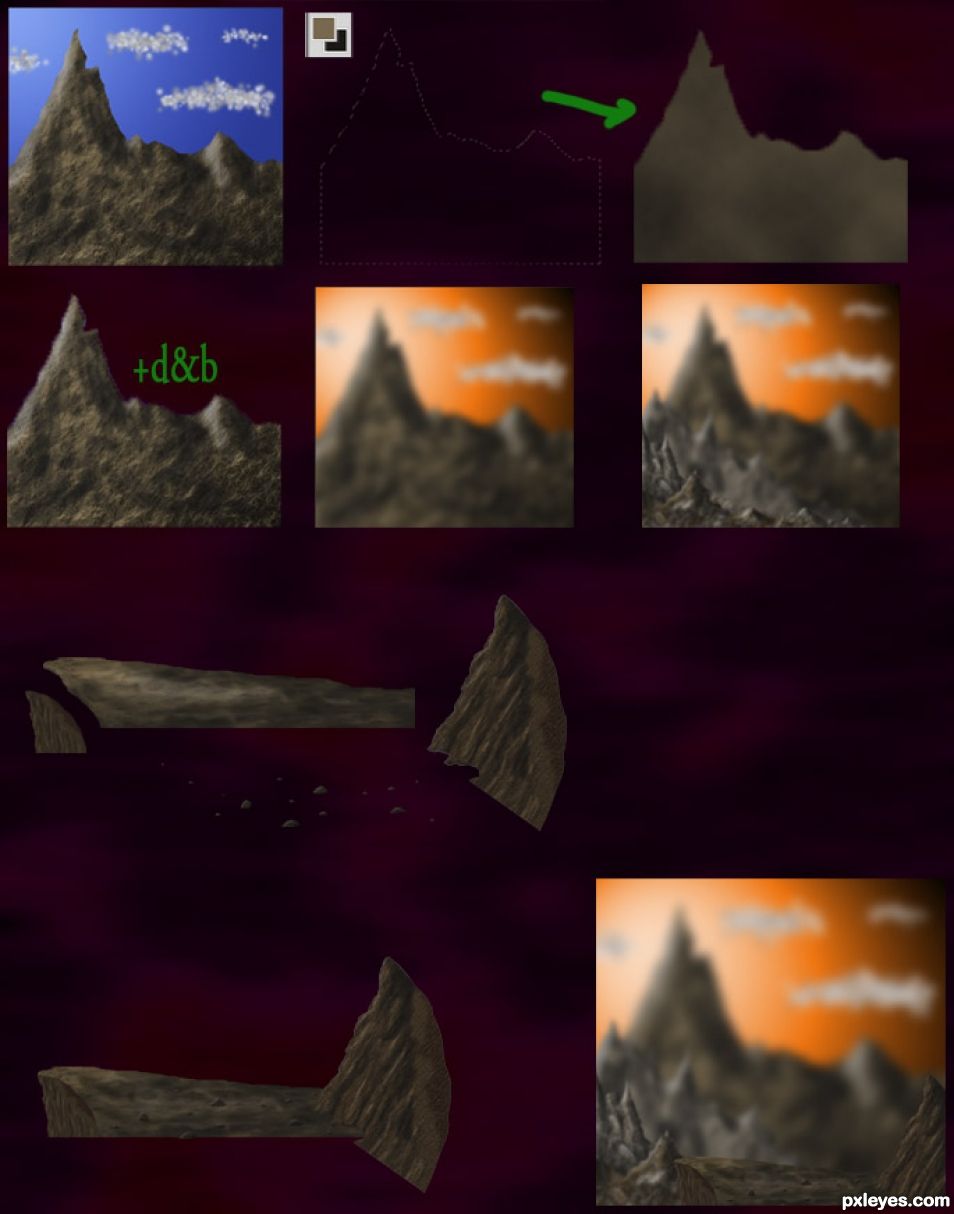
step 4 of 4
The Background and the rocks where made entirely with Ps.
I used the select tool to select a mountain shape. With a light brown and dark brown
for foreground/background colour I used the render clouds filter to fill the selection.
I duplicated the layer and used the sketch filter bas relief (detail 15, smoothness around 2)
to give it a stone look. I set the layer to overlay with a reduced opacity. To fit the light I used dodge and burn.
The Clouds where made with a brush (with shape dynamics, scattering and colour dynamics)
Than I merged the layers together and blurred them.
To create the other mountain layers I used the same method. (less blurred)
Nearly the same for the cliff and rock unless I also used some small motion blur and the texture filter sandstone.
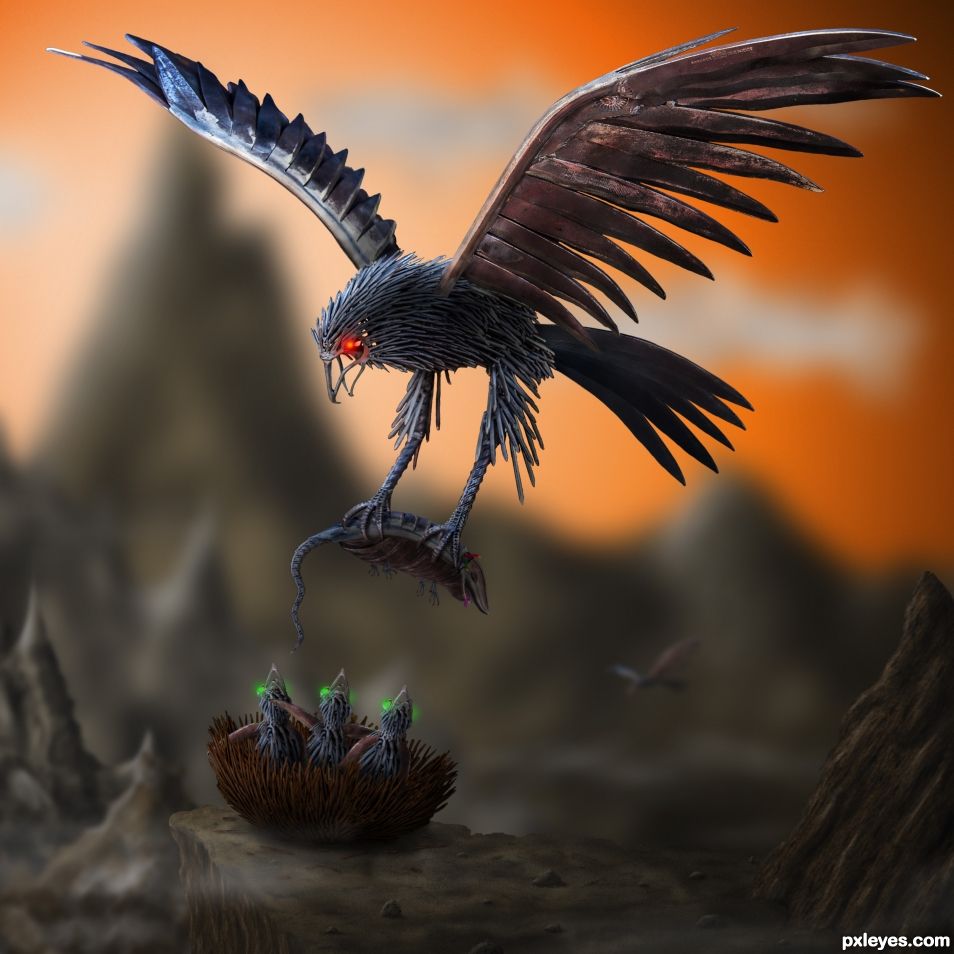
Final result
Pxleyes
Photography and photoshop contests
We are a community of people with
a passion for photography, graphics and art in general.
Every day new photoshop
and photography contests are posted to compete in. We also have one weekly drawing contest
and one weekly 3D contest!
Participation is 100% free!
Just
register and get
started!
Good luck!
Follow us:


© 2015 Pxleyes.com. All rights reserved.