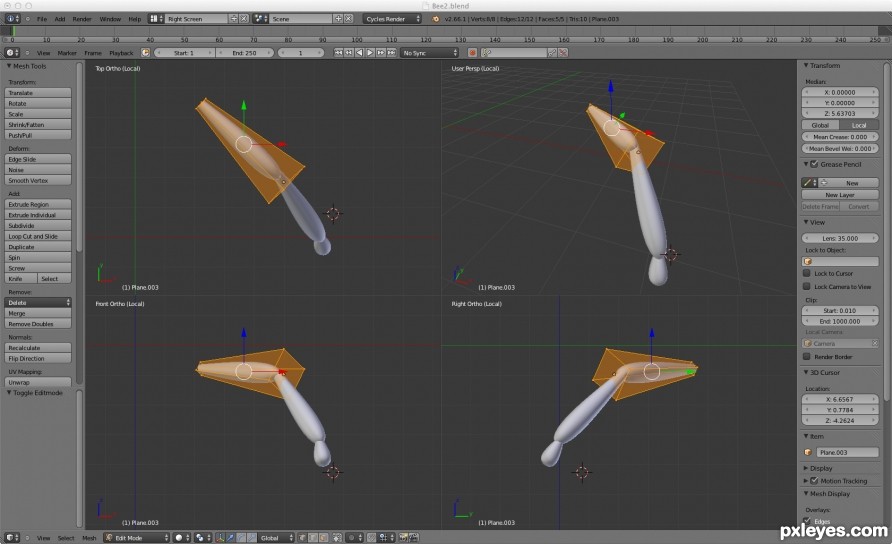
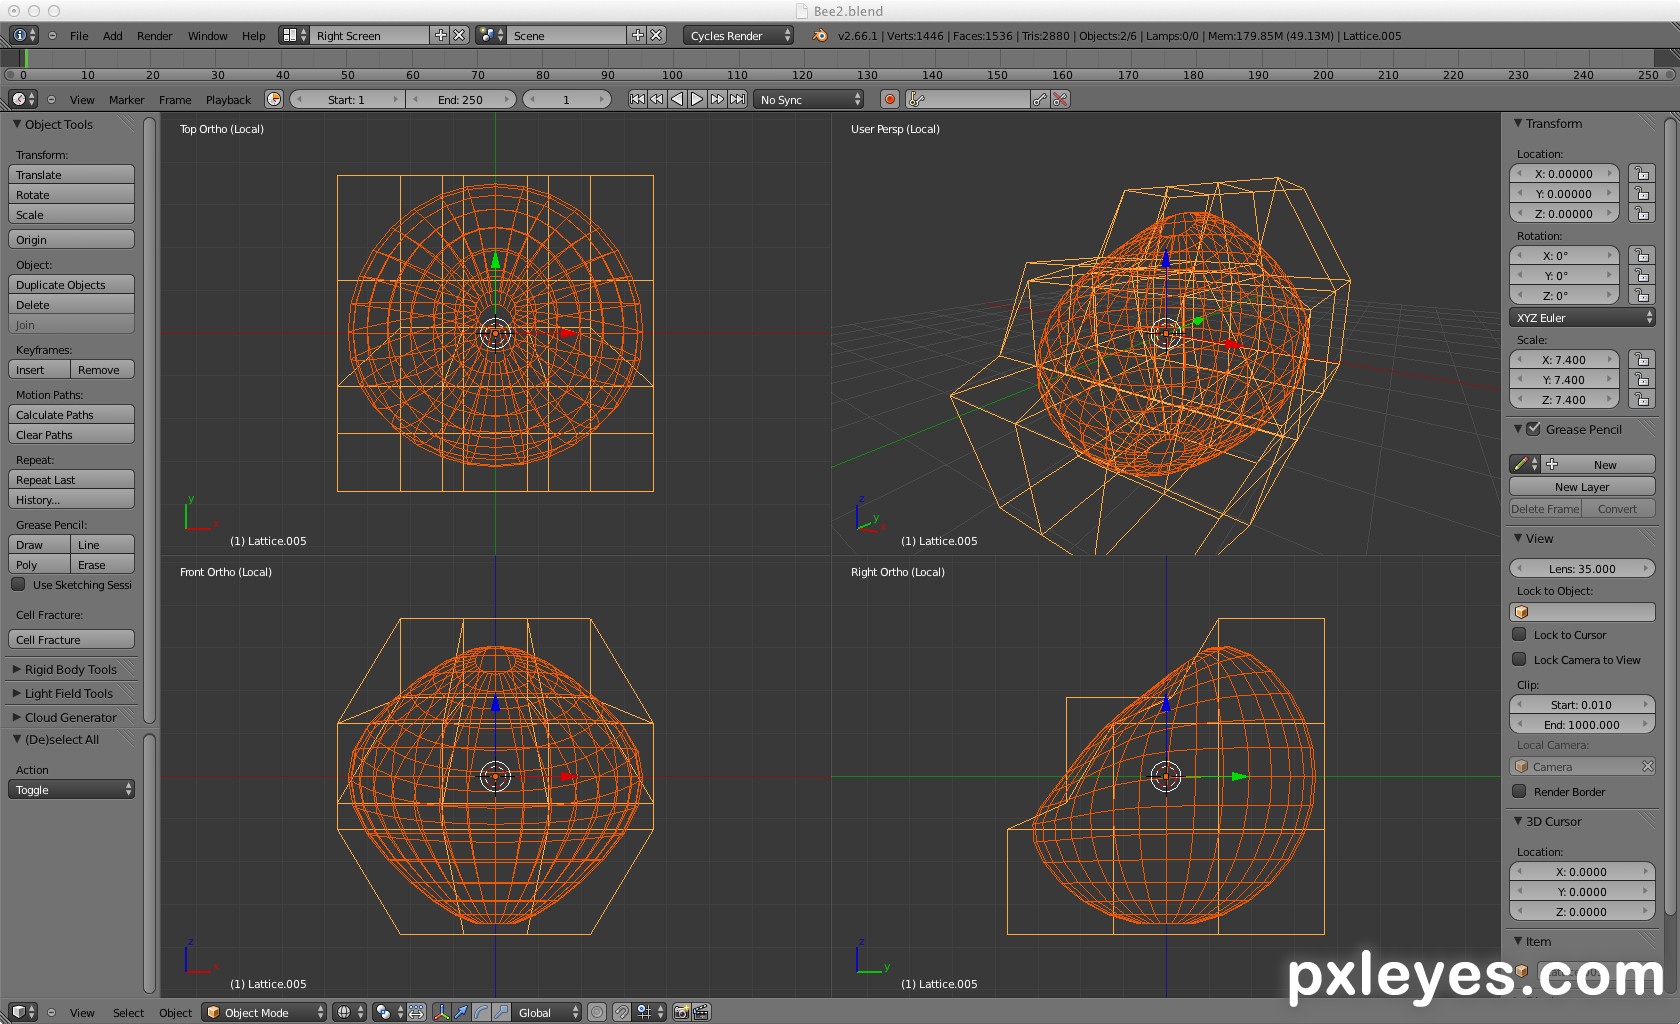
A Work in Progress: The Bee


This guide was made for entry:
The Bee
In Contest:
insect heads


step 1 of 7

Head & Body:
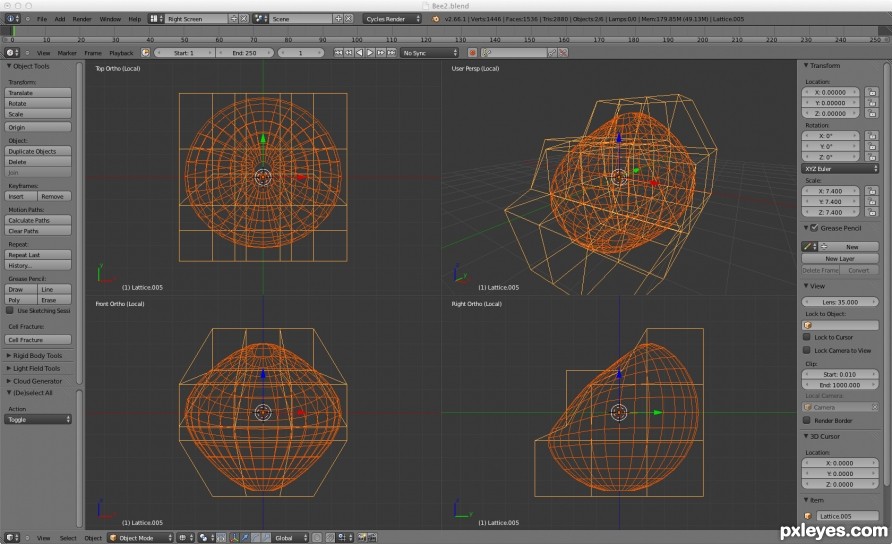
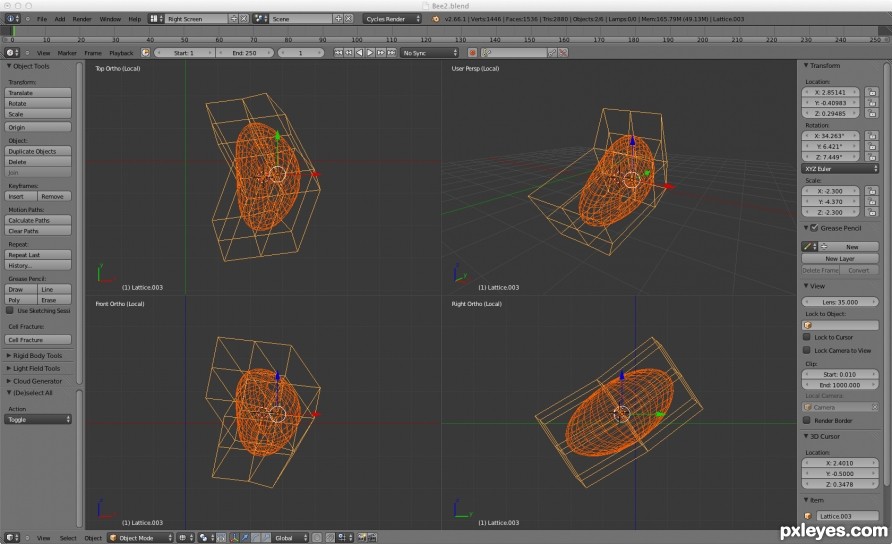
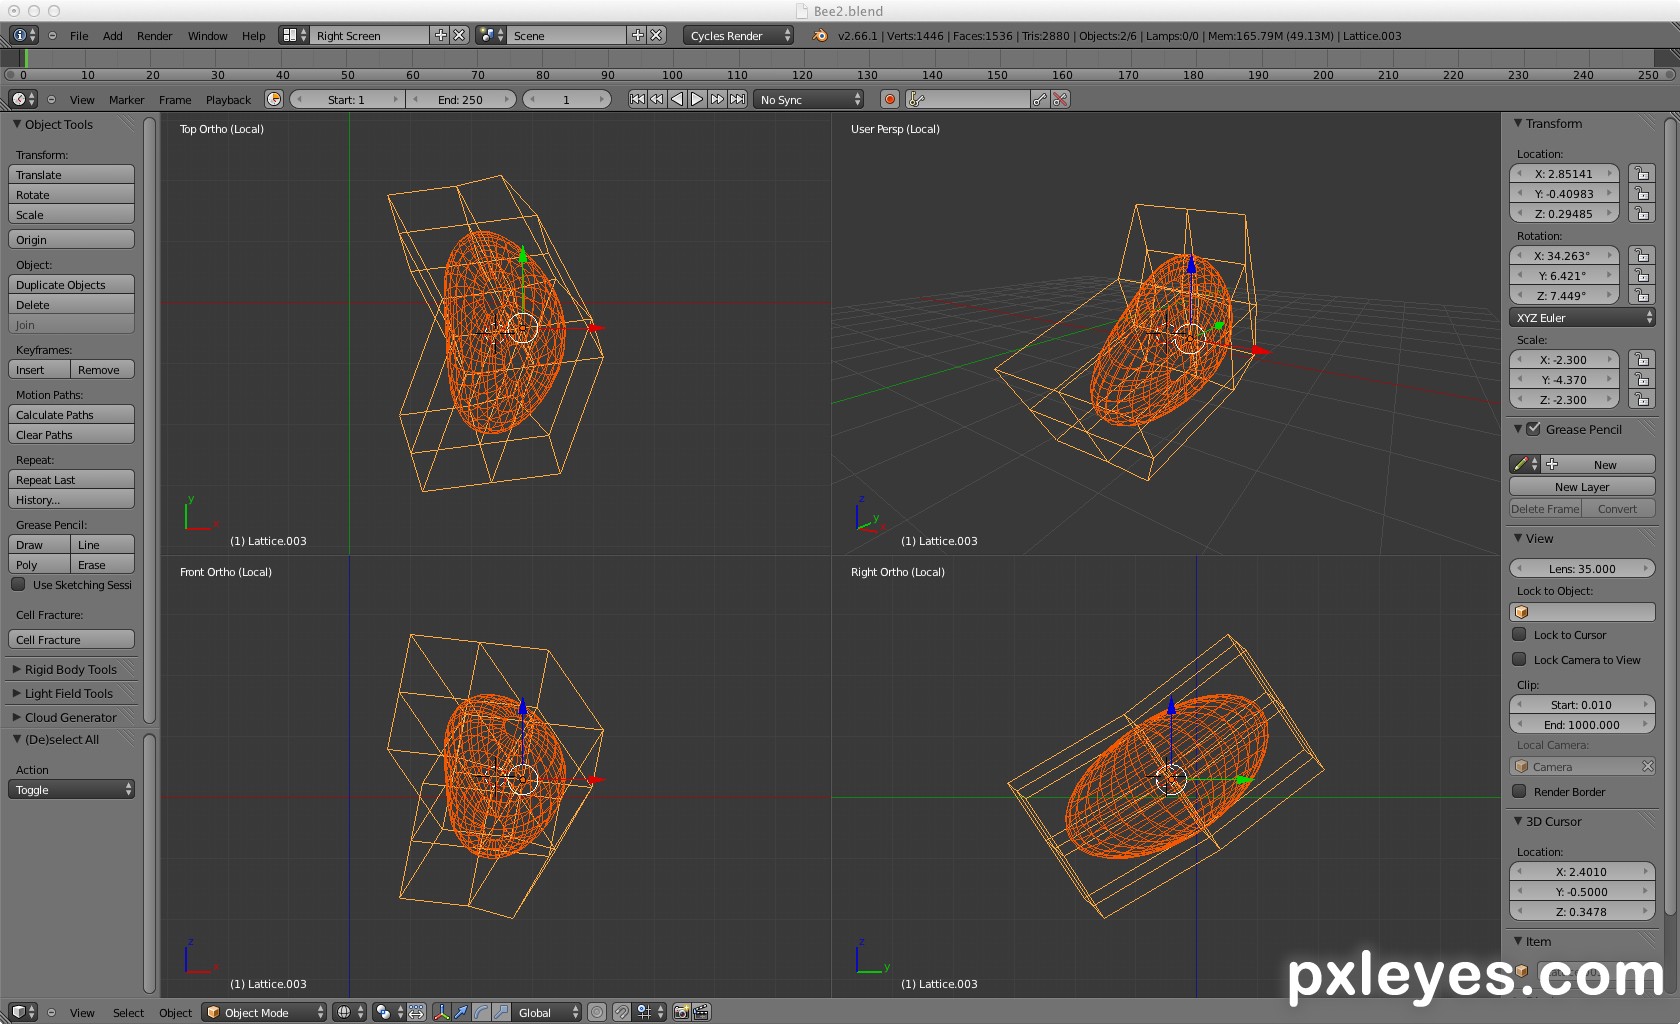
Add a sphere and a lattice. Select the sphere and put the Lattice-modifier on it. This allows you to reshape the sphere by deforming the lattice.
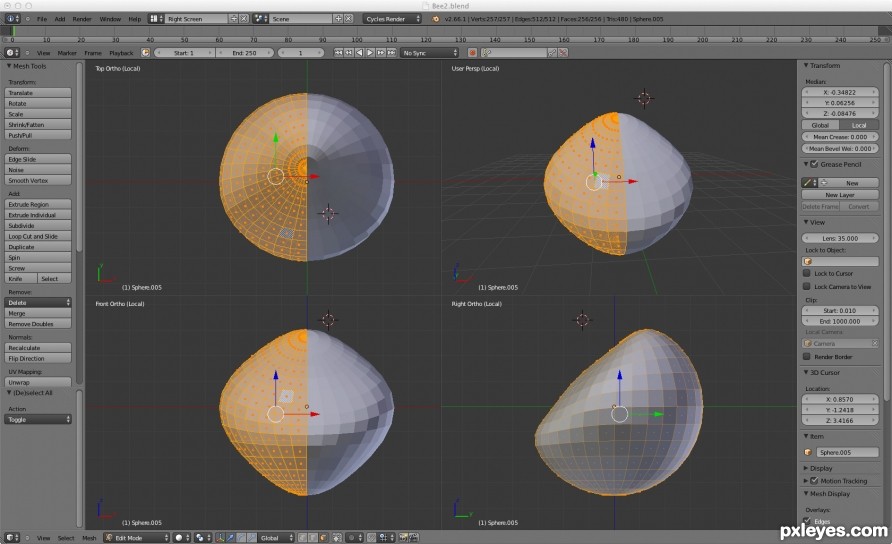
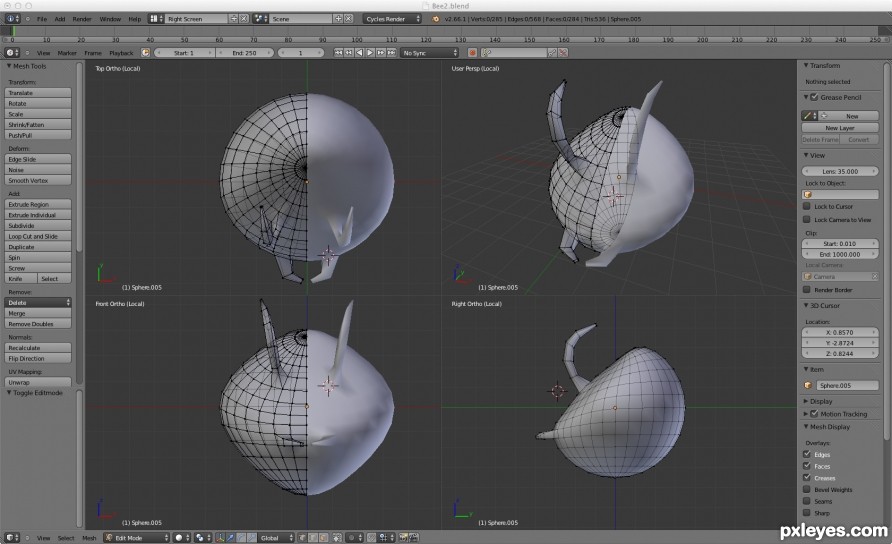
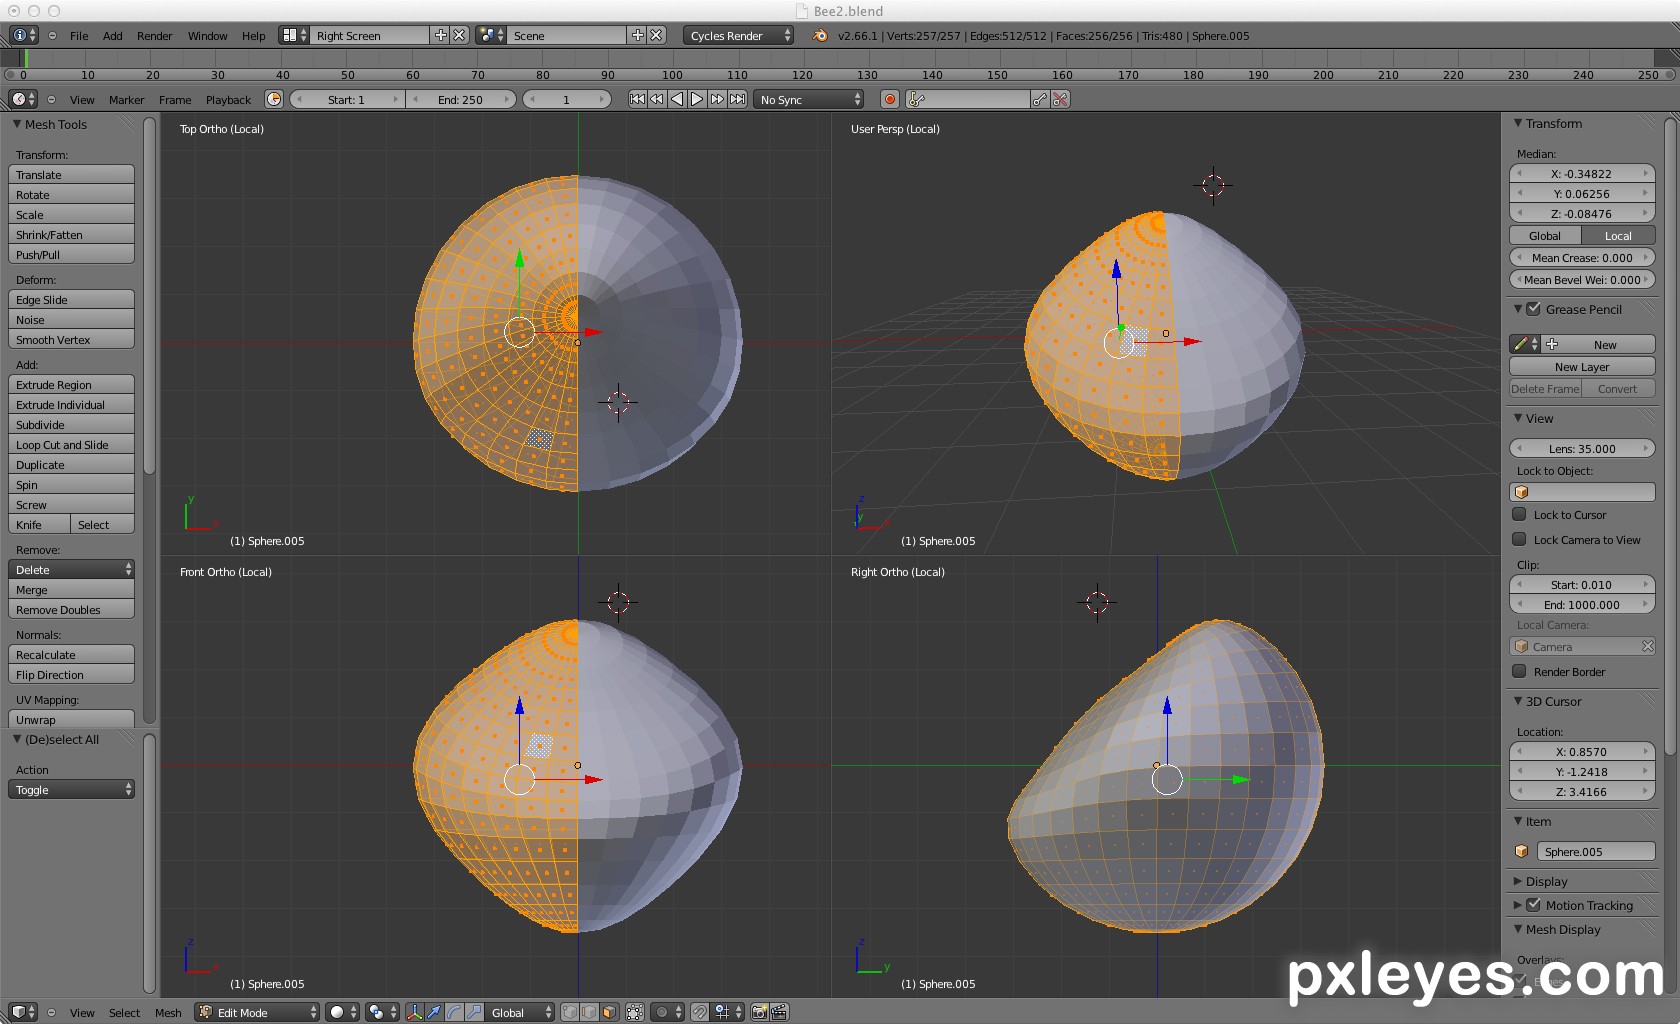
The body are 2 simple spheres, nothing more.

Creation of The Bee: Step 1
( hi-res )

step 2 of 7

Eyes:
These are made like the head: a sphere with a lattice.

Creation of The Bee: Step 2
( hi-res )

step 3 of 7

Head 2:
To proceed more quickly, delete the half of the sphere you created for the head. Add an Mirror-modifier on that half.

Creation of The Bee: Step 3
( hi-res )

step 4 of 7

Head details:
Now that we have the half sphere mirrored, add details to the head: the antennas, and the mouth.
Since it's mirrored, you just need to model one antenna and one side of the mouth.

Creation of The Bee: Step 4
( hi-res )

step 5 of 7

Legs:
For the legs, I used simple cubes, on which I put an Subsurface-modifier. The modifier morphs the cube to a sphere. The nice thing about this, is that if you go to Edit-mode, you'll still see the cube (as a sort of outline). So just add 3 cubes and stretch them to get the legs, as shown in my screenshot.

Creation of The Bee: Step 5
( hi-res )

step 6 of 7

Leaf:
I created a leaf, on which the Bee sits. This step is optional, you can put the Bee on a flower, a wooden branch, or whatever you like...
For the leaf, I used a circle, which has a lattice set as modifier, like for the head and the eyes of the Bee. (Sorry, but the lattice isn't visible anymore, since I've deleted it a bit too soon...)

Creation of The Bee: Step 6
( hi-res )

step 7 of 7

Scene and hairs:
After I created all the single objects I needed, I put them all in a scene. For the Hair, I applied the Hair physics who comes with the Software (Blender 3D 2.66a). The new version has now the Cycles rendering engine for Hairs build-in, so playing a bit around with the preferences will help to figure out what setting does what effect. You can even comb, cut, puff change the length of the Hair by switching to Particle-mode (found where you can choose between Editor-, Object-, Sculpt-mode) when you activate the Hair physics. I'll advise you to take a look at the Manual (found in the Help-menu), this contains very useful information about the new functions.

Creation of The Bee: Step 7
( hi-res )

Final result

Creation of The Bee: Final Result

LOGIN or REGISTER FOR FREE
to rate this guide and create your own guides.

Votes


uservoted
Gadion
Score:
8