
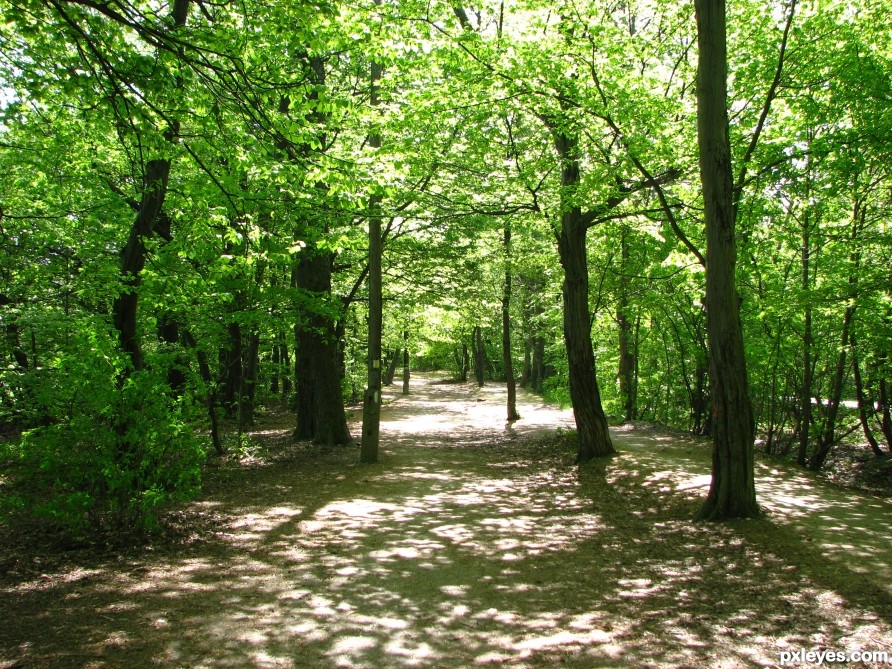
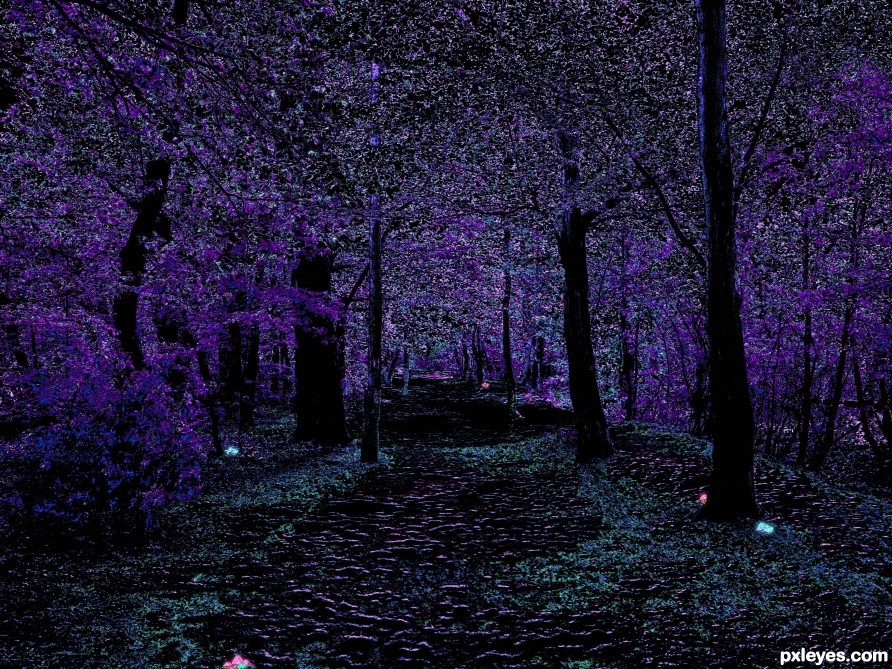
Original image
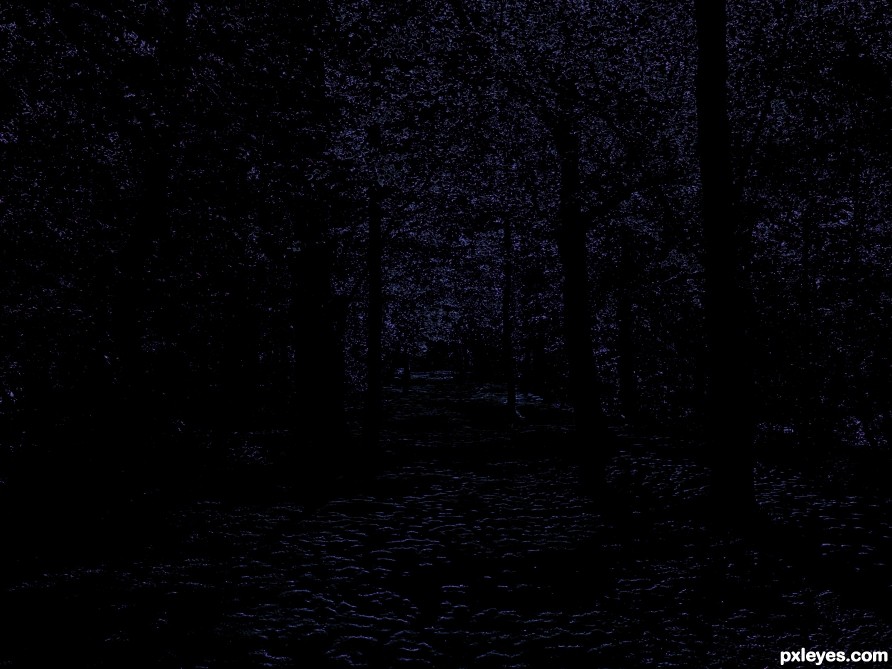
step 1 of 4
original background picture made by myself
I have used colour range selection and chosen different pixels of the greens, whites and darker colours then put each selections on different layers
I have used colour range selection and chosen different pixels of the greens, whites and darker colours then put each selections on different layers
step 2 of 4
after many different pixels have been selected i have changed the hue and saturation on each of them to modify the colours to luminescence ones then i have put a black layer below the colour layers.
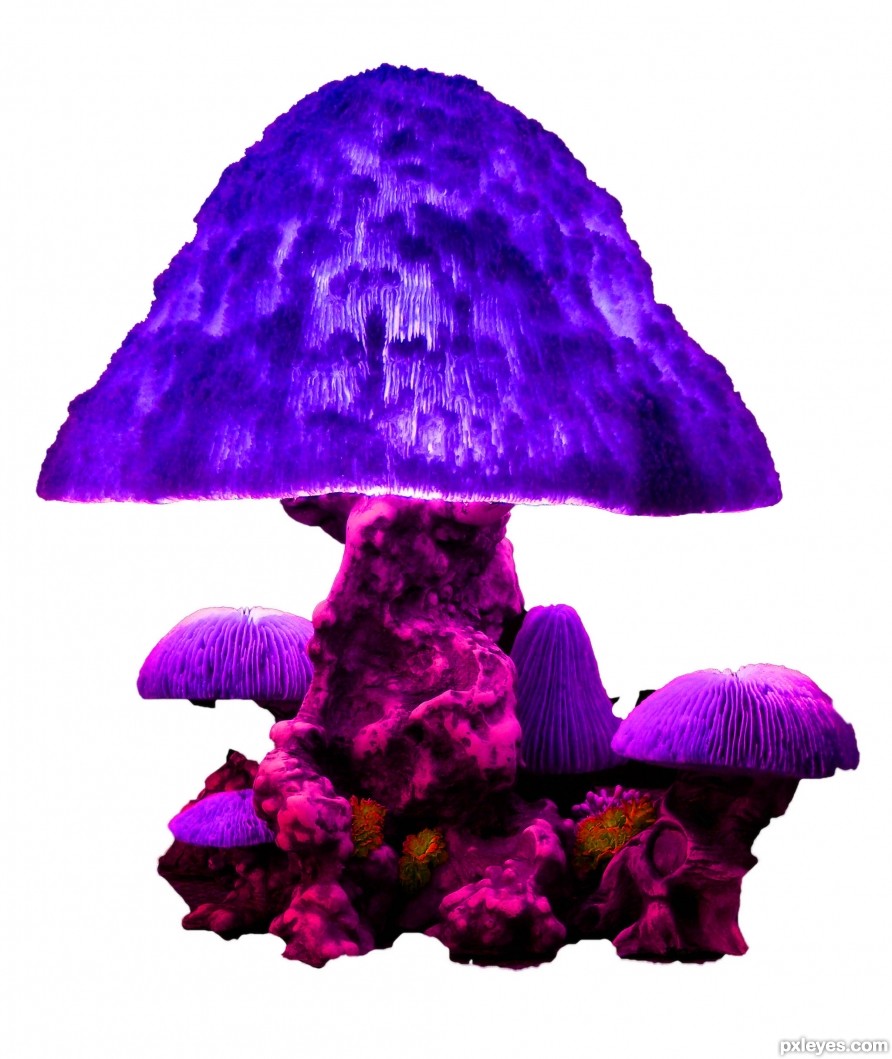
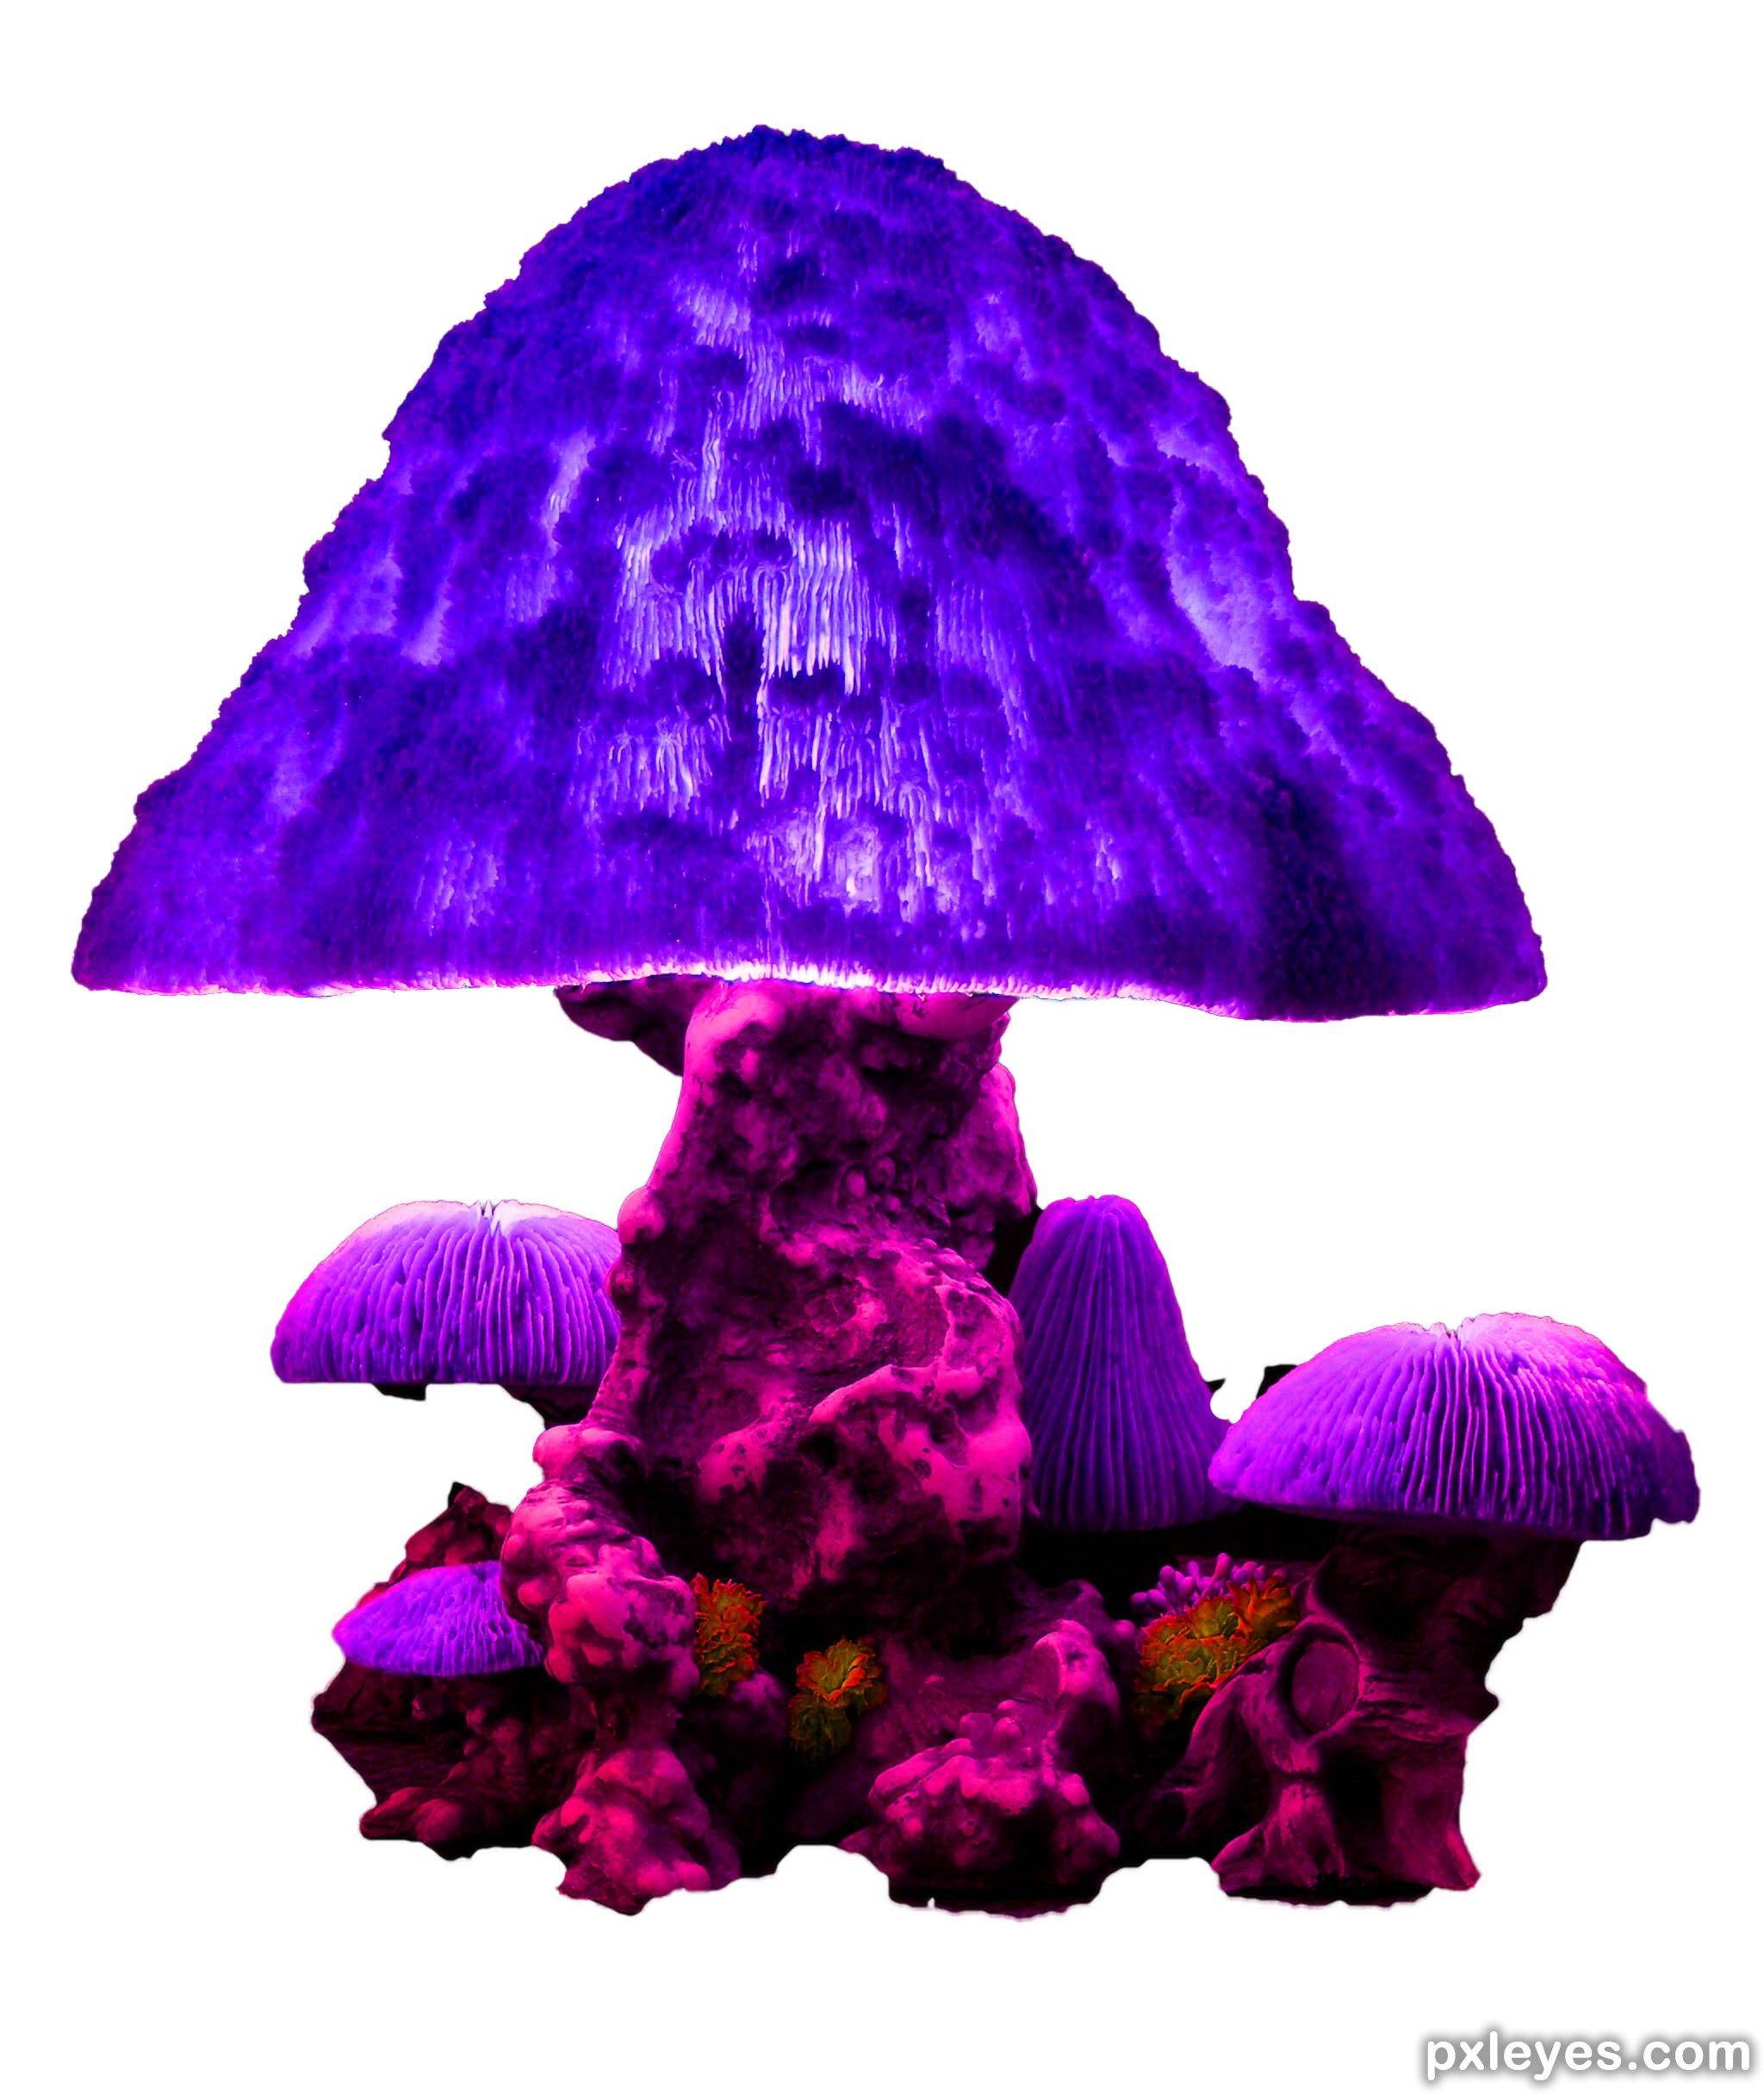
step 3 of 4
at this step i have modified the source image, deleted its background, changed the hue and saturation, than multiplied it several times to have the mushroom bunches on different layers.
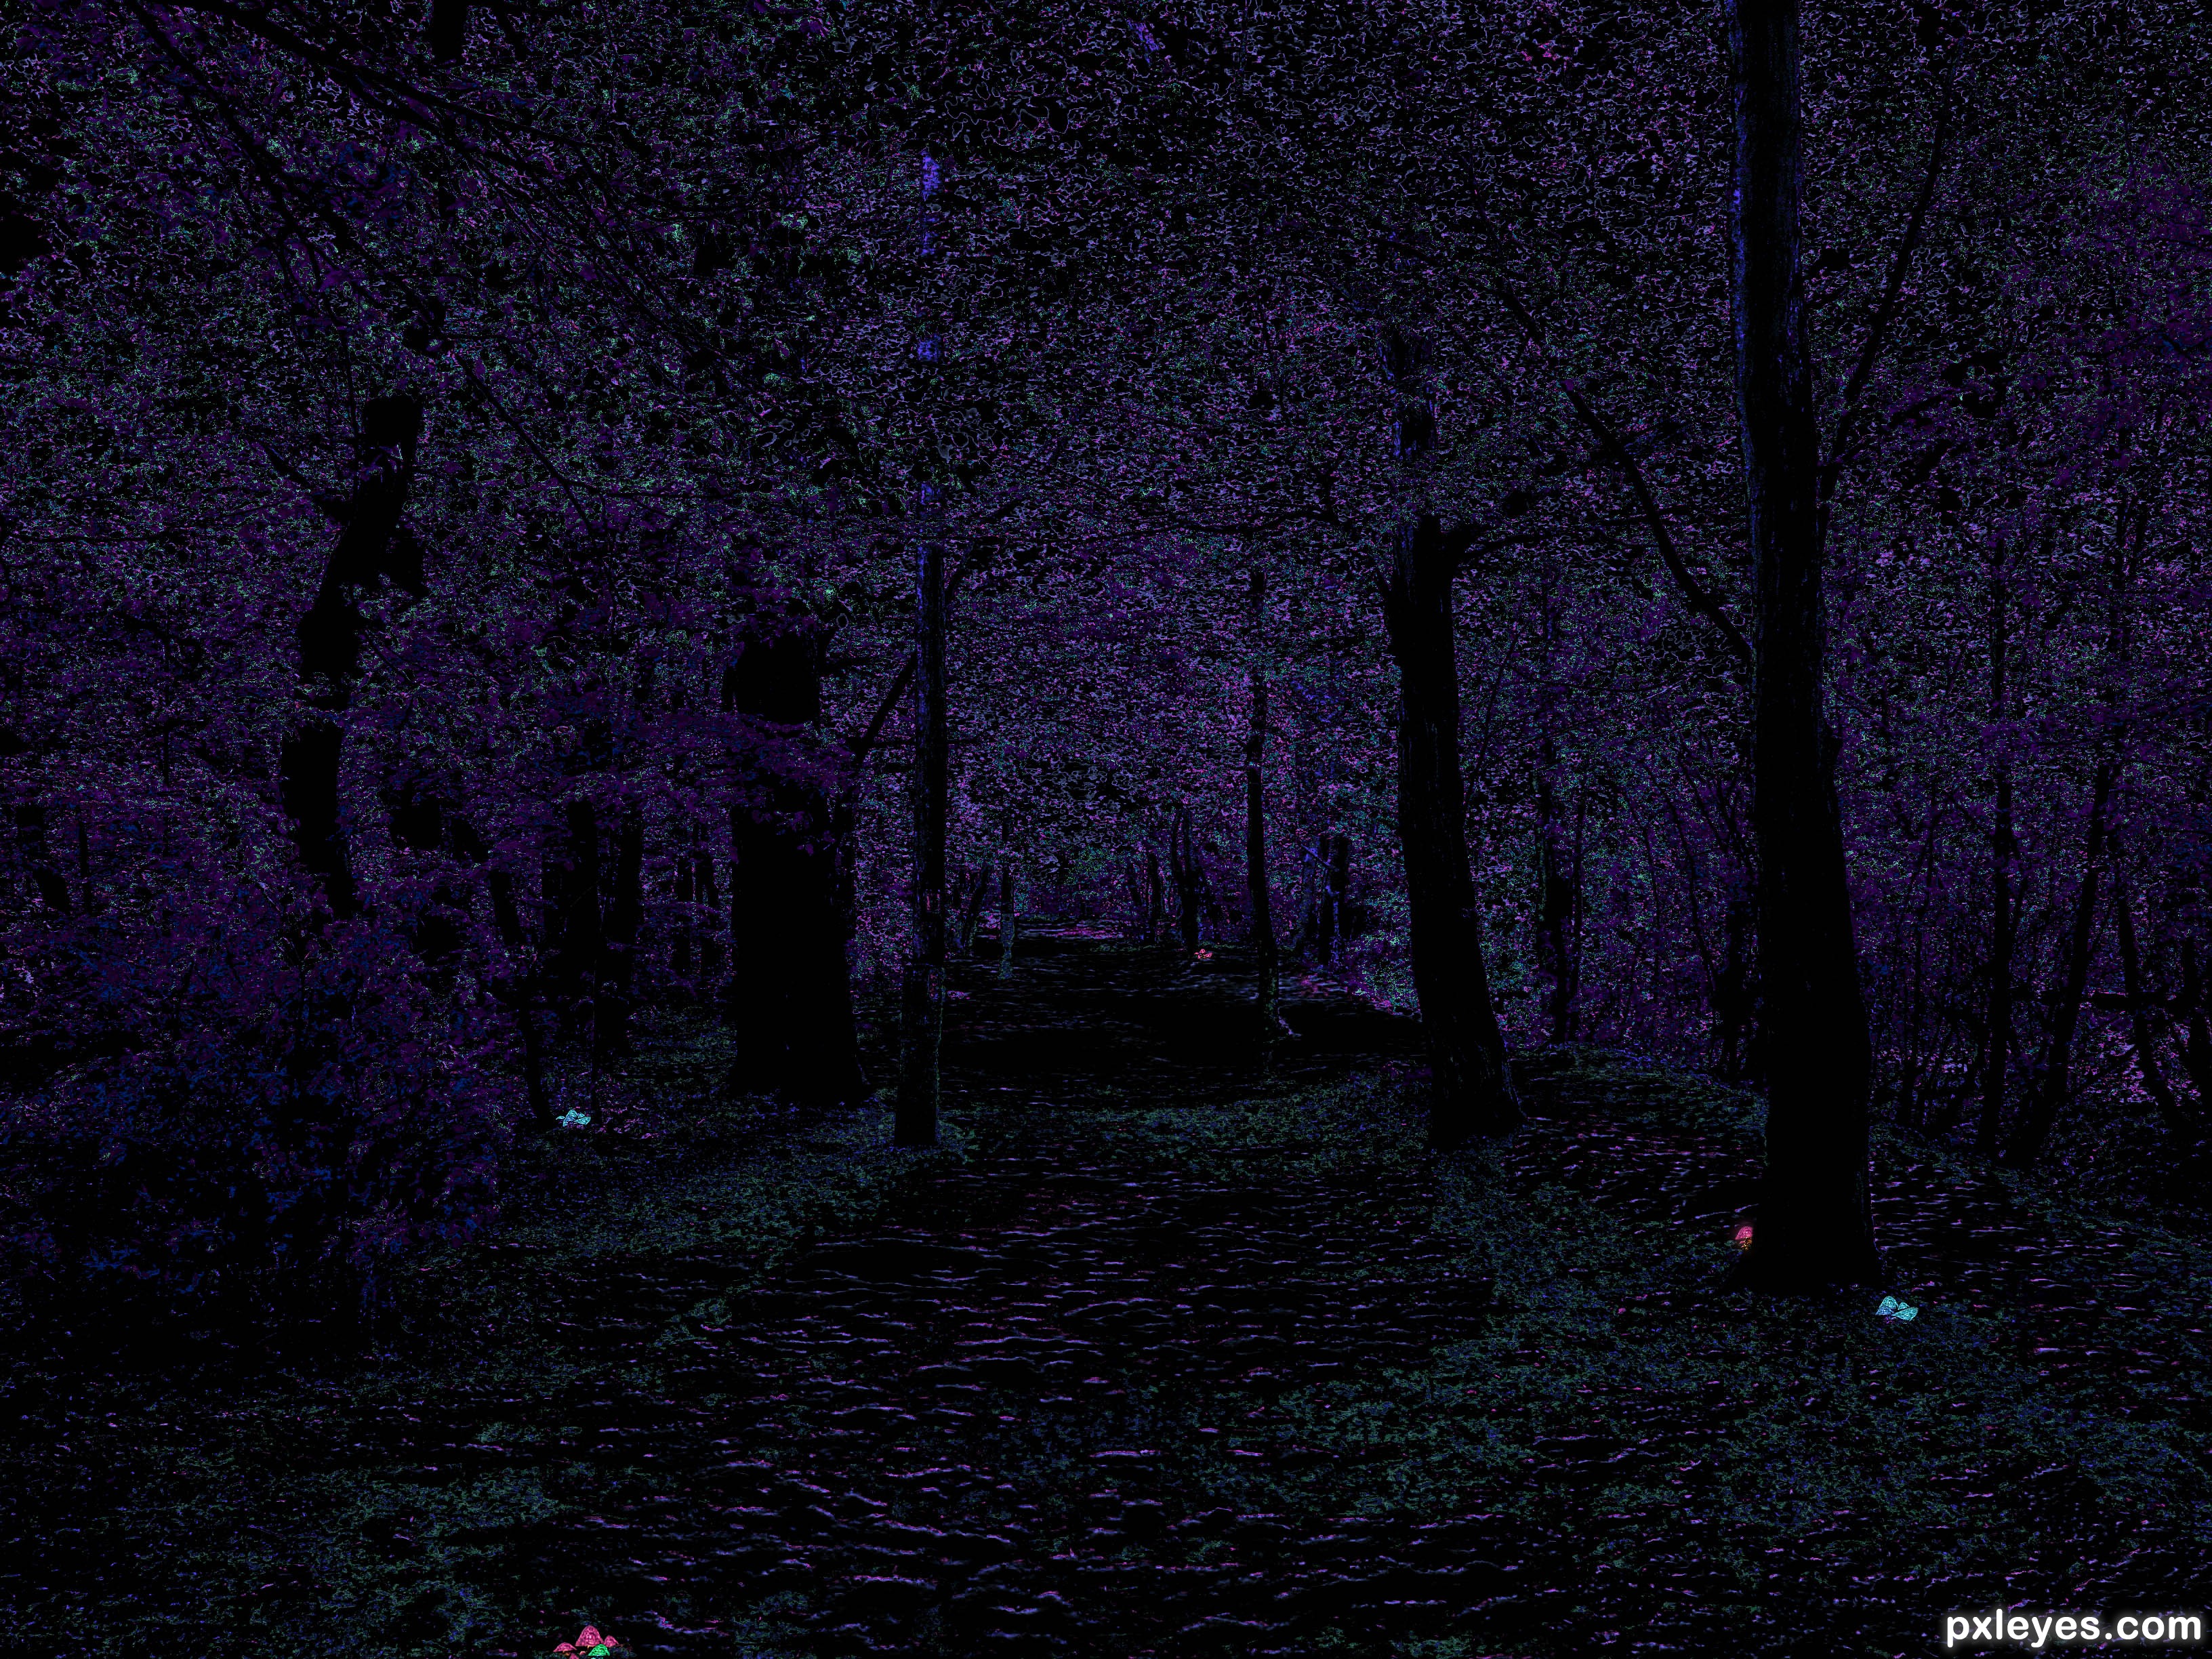
step 4 of 4
finally i have put the mushroom bunches on the top of the colour layers and used gaussian blur filter on each mushrooms to give them shiny effect.
As last step i have flattened the image then changed the brightness a bit and that's it. :)
As last step i have flattened the image then changed the brightness a bit and that's it. :)
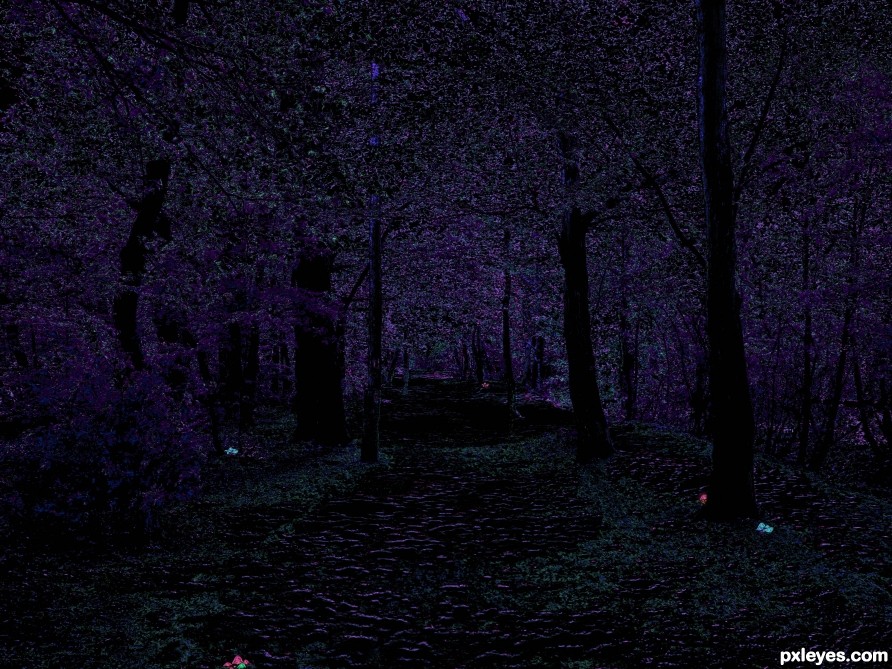
Final result
Comments
Pxleyes
Photography and photoshop contests
We are a community of people with
a passion for photography, graphics and art in general.
Every day new photoshop
and photography contests are posted to compete in. We also have one weekly drawing contest
and one weekly 3D contest!
Participation is 100% free!
Just
register and get
started!
Good luck!
Follow us:


© 2015 Pxleyes.com. All rights reserved.
Hey.
(5 years and 2633 days ago)You could have saved yourself a lot of time at the start by just creating a new layer above the original pic, filling it with a deep blue and setting the layer mode to Multiply.
Hey,

(5 years and 2629 days ago)Yes, i tried that method first but with colour range and hues&sat changing the shades became a bit more realistic and i wanted to create a colourful magical mood but many thanks for your input!