
Original image
step 1 of 13
Extract the zipper and position it above the landscape.

step 2 of 13
Copy/paste small parts to make the zipper larger. Use the clone stamp to merge the separate parts.

step 3 of 13
Use the warp tool to bend the top left part along the hill and the right part along the road. Use a layer mask to place it behind the gate.

step 4 of 13
Copy a part of the background and use the warp tool again to alter the shape of the piece of land.

step 5 of 13
Add the rock chair source.

step 6 of 13
Extract the second zipper and place it in front of the rocky part.

step 7 of 13
Adjusted the color of the zipper to match the color of the rock face.

step 8 of 13
Add the standing stone source

step 9 of 13
Add the button. Use a layer mask to place it in the grass. Place a copy of the button in the back.

step 10 of 13
Paint with a very low opacity some green on the button (the color of the grass that reflects on the button). This will make the button merge better with the grass.

step 11 of 13
Refined the masking of the zippers.

step 12 of 13
Make some parts of the standing stone darker.

step 13 of 13
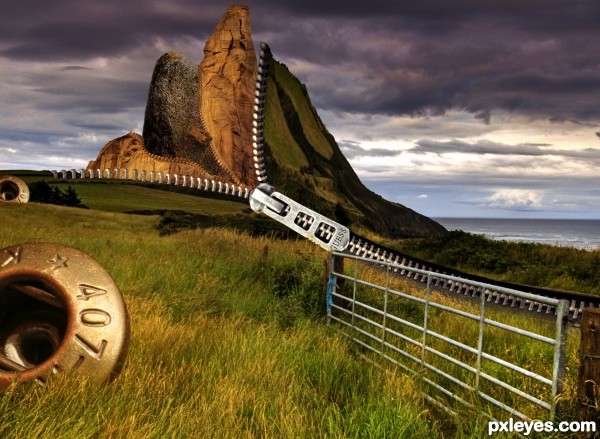
Made some last corrections to the masking and fine tuned the colors with a curves adaption layer.

Final result
Pxleyes
Photography and photoshop contests
We are a community of people with
a passion for photography, graphics and art in general.
Every day new photoshop
and photography contests are posted to compete in. We also have one weekly drawing contest
and one weekly 3D contest!
Participation is 100% free!
Just
register and get
started!
Good luck!
Follow us:


© 2015 Pxleyes.com. All rights reserved.