
Original image
step 1 of 9
Horsehead nebula used for texture layer over background

step 2 of 9
Container for fruit arrangement is made with brush tool. Color will be adjusted as project moves along.

step 3 of 9
Fruit pieces are chopped and will be scaled to various sizes , and flipped to add variety to the arrangement. Color changes will also be made to the apples and grapes to add more variety and color contrasts.

step 4 of 9
Adding grapes. With grapes as with all the fruit pieces, edges will be softened using the blur tool.

step 5 of 9
Most of the fruit has been placed and ready to do shading and highlighting.

step 6 of 9
Background is started with liquid warp tool. After warping, scale tool will make the image into a narrower strip which will be duplicated, then joined together.

step 7 of 9
Here the strips are ready to join together into single layer

step 8 of 9
Gradient layer is added to background, and table layer made with a duplicate.

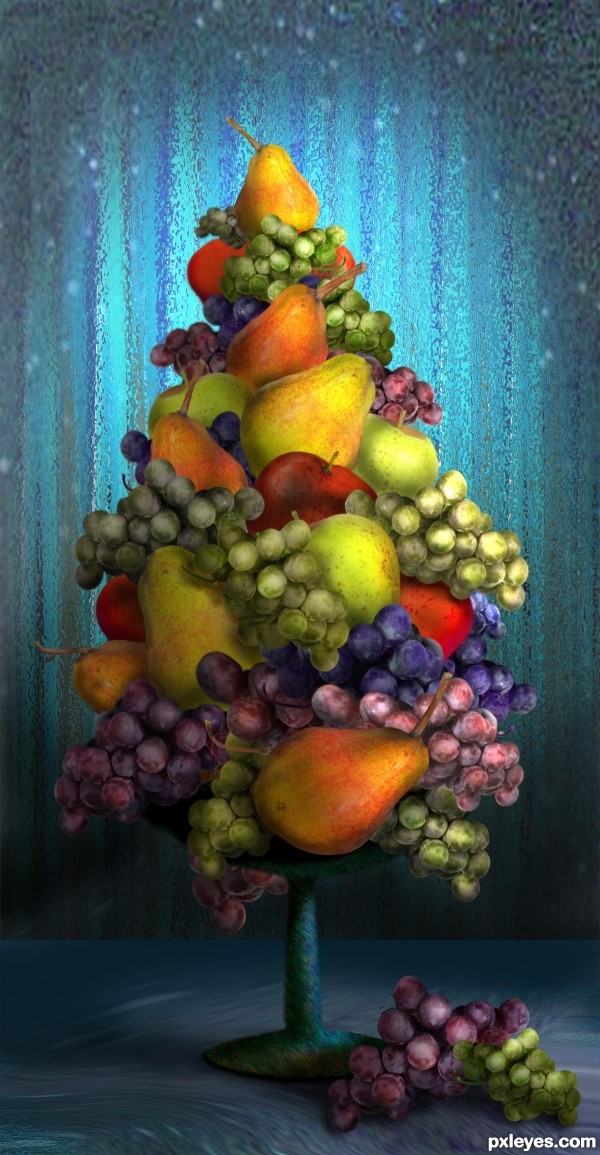
step 9 of 9
Color/hue adjustments were made here to a background to contrast better with the fruit, and grapes have been added to foreground. All pieces of fruit are shaded with the dodge and burn tool, then all layers of fruit are merged so that entire left side of arrangement can be softly shadowed with burn tool.

Final result
Pxleyes
Photography and photoshop contests
We are a community of people with
a passion for photography, graphics and art in general.
Every day new photoshop
and photography contests are posted to compete in. We also have one weekly drawing contest
and one weekly 3D contest!
Participation is 100% free!
Just
register and get
started!
Good luck!
Follow us:


© 2015 Pxleyes.com. All rights reserved.