
Original image
step 1 of 8
Lily pond photo (my own) used for the pond

step 2 of 8
Geese are chopped to be placed on a new canvas.

step 3 of 8
Geese are changed into stems and foliage for the magic tree using the liquify warp tool. Here the first liquify changes have been made.

step 4 of 8
Here more work has been done using the liquify warp tool. Shapes will be duplicated, flipped and resized to form the magic tree. Edges will be softened where needed.

step 5 of 8
Branches have been layered and back layers have been lightened in opacity. Geese which were chopped are added now.

step 6 of 8
Green gradient layer is added behind the tree shapes.

step 7 of 8
Lily pond has been added and blended into the background gradient layer

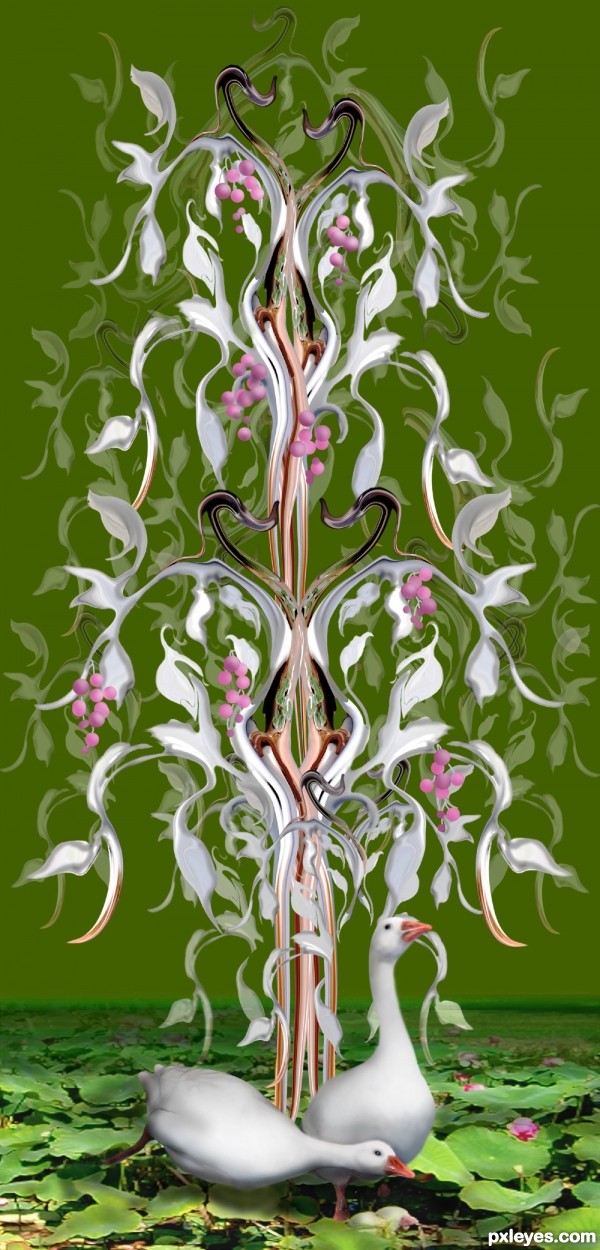
step 8 of 8
Berries are added with paint tool in several shades of rose to carry color of lilies through to the tree. Dodge and Burn tools are used to create more shape to the berries. Stems are drawn in with the paint tool.

Final result
Pxleyes
Photography and photoshop contests
We are a community of people with
a passion for photography, graphics and art in general.
Every day new photoshop
and photography contests are posted to compete in. We also have one weekly drawing contest
and one weekly 3D contest!
Participation is 100% free!
Just
register and get
started!
Good luck!
Follow us:


© 2015 Pxleyes.com. All rights reserved.