
Original image
step 1 of 9
First I cut out the ball I wanted.

step 2 of 9
I placed the ball on the canvas and duplicated it. I moved the transfom center of the duplicated ball to the center of the canvas, resized this ball a little, moved it down a little and rotated it some degrees.

step 3 of 9
After having resized, moved and rotated the duplicated ball, and without clicking anywhere, CTRL+SHIFT+ALT+T did the trick, repeating the action ad infinitum...

step 4 of 9
I put all the ball into a folder, duplicated it, converted to smart object and rasterized it. I duplicated the new object, flipped it horizontally and vertically and put these objects into a new folder.

step 5 of 9
Using the same process in the step 2, I created a new object.

step 6 of 9
I duplicated the new object, flipped it horizontally and vertically and moved it to the other side of the canvas.

step 7 of 9
For the background I used two huge red balls to wich I applied 25 px gaussian blur.

step 8 of 9
I placed two more balls over the big ones, and applied 15 px gaussian blur.

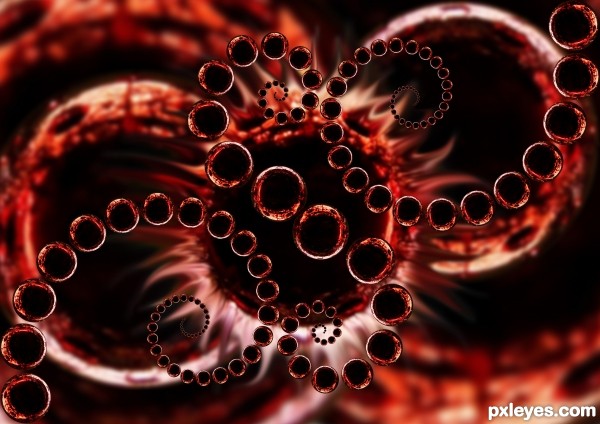
step 9 of 9
To create the "sun" I simply used the smudge tool on a new red ball and applied some gaussian blur too.

Final result
Pxleyes
Photography and photoshop contests
We are a community of people with
a passion for photography, graphics and art in general.
Every day new photoshop
and photography contests are posted to compete in. We also have one weekly drawing contest
and one weekly 3D contest!
Participation is 100% free!
Just
register and get
started!
Good luck!
Follow us:


© 2015 Pxleyes.com. All rights reserved.