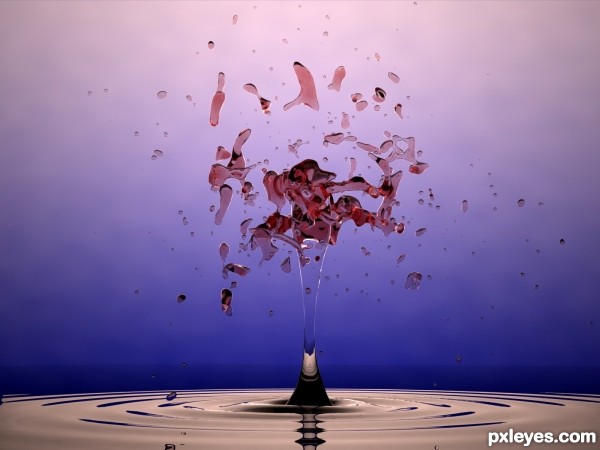
A Work in Progress: Water To Wine


This guide was made for entry:
Water To Wine
In Contest:
water drops


step 1 of 19

I set up realflow with the following daemons and objects:
1)Cube (to stop the sphere from falling into infinity)
2)Gravity daemon
3)Realwave
4)Sphere for the splash emmiter
5)K_volume daemon to kill stray particles when the exit the scene.

I decided to use a realwave splash emmiter as it was giving me much better results than a filled object.

Creation of Water To Wine: Step 1

step 2 of 19

This is the realwave with the node and Realwave settings I used.

Creation of Water To Wine: Step 2

step 3 of 19

Here are the setting used for the RW_splash emmiter. I played around with the @width, @H strength, @V strength and @side emmision to create a nice realistic splash.

Creation of Water To Wine: Step 3

step 4 of 19

Once I had my scene setup i ran the simulation, depending on the number of particles the scene can take a really looong time to simulate.

Creation of Water To Wine: Step 4

step 5 of 19

Once I had ran the simulation with a mesh (standard mesh) I exported the simulation as a .obj sequence. Because I was creating a still there was no need for me to export the .BIN file. I now had 200 meshes! to choose my splash from at different stages.

Creation of Water To Wine: Step 5

step 6 of 19

To make the ripple I added a ripple modifier in 3ds max. The plane I used had around 4000 polygons. I really wanted the detail in the ripple.

Creation of Water To Wine: Step 6

step 7 of 19

I modelled the central column using a cylinder and several different modifiers. These were:
1)Noise- to disturb the column in all directions.
2)Taper - to funnel the column
3)Squeeze - To push a bulge towards the top
4)FFD 4x4x4 - To further squeeze the centre and splay the bottom.

Creation of Water To Wine: Step 7

step 8 of 19

Now I imported 2 frames from my realflow mesh sequence, this gave me two separate meshes at different stages of splashing. I scaled them up and then arranged them around the central column of water.

Creation of Water To Wine: Step 8

step 9 of 19

I used A&G Studio Light rig for Vray to light the scene. I used a double ringed HDR light for top lighting and a large diffuse panel for the back lighting

Creation of Water To Wine: Step 9

step 10 of 19

Back ground material was a gradient map placed in the environment slot. Messed around with the color 2 position and coloring.

Creation of Water To Wine: Step 10

step 11 of 19

The red water material was simple to make. To get the red just added a red tint to the "fog color" slot in the refraction rollout of the material. Played with the fog multiplier till I got the desired effect.

Creation of Water To Wine: Step 11

step 12 of 19

A very simple but effective method for creating water, especially still water. Black diffuse, white reflect with fresnel reflection, white refraction with an IOR of 1.3(water)

Creation of Water To Wine: Step 12

step 13 of 19

I used a vray camera to render the scene, it always provides the best quality with vray rendering.

Creation of Water To Wine: Step 13

step 14 of 19

I used adaptive DMC antialiasing with filtering set to Mitchell-Netravali

Creation of Water To Wine: Step 14

step 15 of 19

Here's the Irradiance map settings I used.

Creation of Water To Wine: Step 15

step 16 of 19

This is the Light cache settings.

Creation of Water To Wine: Step 16

step 17 of 19

The adaptive DMC settings for antialiasing

Creation of Water To Wine: Step 17

step 18 of 19

I added the VRayZDepth element to the final render.

Creation of Water To Wine: Step 18

step 19 of 19

The VRayZDepth image.

Creation of Water To Wine: Step 19

Final result

Creation of Water To Wine: Final Result

LOGIN or REGISTER FOR FREE
to rate this guide and create your own guides.