
Original image
step 1 of 10
First I sketched the shape of the flowers in color using the normal brush. I duplicated and turned and warped some parts because heck, im not that great at drawing and was happy with the one I created succesfully.

step 2 of 10
Transformed the leafs a little with warp so they wouldnt be all excactly the same.
I cut out the eye roughly using the pentool and then with the lassotool I cut out a flowershape out of the eye.
You see also a part of the eyebrow there but I ended up not using that at all.
I cut out the eye roughly using the pentool and then with the lassotool I cut out a flowershape out of the eye.
You see also a part of the eyebrow there but I ended up not using that at all.

step 3 of 10
With smudge I made the flowerpetals nice and then I duplicated the flower, turned it a little in free transform and finally used some burn on the bottom petals to create a little shading and depth.
With that one flower I have build all the panicles. I simply turned every little flower a bit and use transform tool to make it smaller or bigger sometimes.
With that one flower I have build all the panicles. I simply turned every little flower a bit and use transform tool to make it smaller or bigger sometimes.

step 4 of 10
For the leafs I used the hair of the doll. I reshaped it using duplicate layer, warp, transform and eraser to create the leaf excactly after the shape of the leafs I draw.

step 5 of 10
After all the leafs where done I continued with the Panicles. First I duplicated the one I had allready amde and just changed the shape a little bit by using transform on the group. I had grouped them because it was an insane number of layers per panicle. Between 40 and 60 layers each.
Then I rebuilded the flower panicles. I first turned off all the flowers in one panicle and then started to rearrange them and turned them back on one by one. So that each panicle would look different.
Then I rebuilded the flower panicles. I first turned off all the flowers in one panicle and then started to rearrange them and turned them back on one by one. So that each panicle would look different.

step 6 of 10
Here you see how I rebuild the flower panicles and colored them. You can also see that I have used burn on one of the leafs to create shading and depth.

step 7 of 10

step 8 of 10
Creating the stem, I think the images speak for themselfs

step 9 of 10
The background was created from the source picture of the doll as well. I didnt save or just lost some screenshots so I recreated a few steps to show how it was made.

step 10 of 10

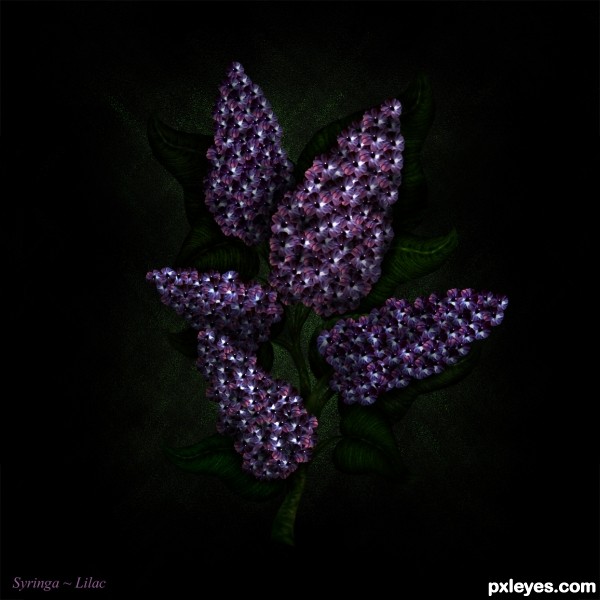
Final result
Pxleyes
Photography and photoshop contests
We are a community of people with
a passion for photography, graphics and art in general.
Every day new photoshop
and photography contests are posted to compete in. We also have one weekly drawing contest
and one weekly 3D contest!
Participation is 100% free!
Just
register and get
started!
Good luck!
Follow us:


© 2015 Pxleyes.com. All rights reserved.