A Work in Progress: Shine on


This guide was made for entry:
Shine on
In Contest:
disco ball


step 1 of 18

Making Of : Shine On

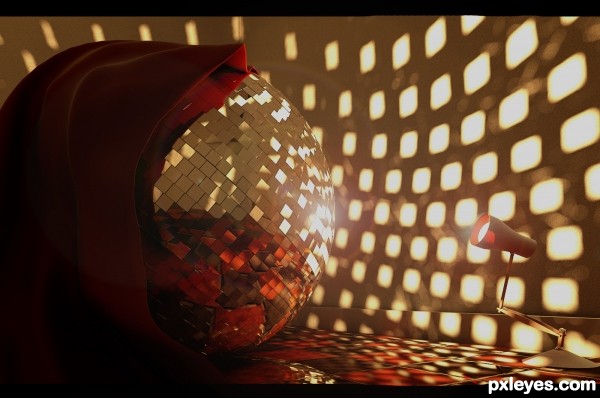
Modeling the Disco Ball:

First I've created a plane with 1x1cm, applied an edit poly modifier to extrude and bevel, creating this way a single mirror.

Creation of Shine on: Step 1

step 2 of 18

The ball:
Created a sphere with 15.9 cm radius - [(1cm x 100 /pi) / 2 ]- this way i would have 100 single mirrors on the diameter of the sphere.
Segments - 100

Converted to editable Poly, so I could use the fill mode in the graphite modeling tools.

Creation of Shine on: Step 2

step 3 of 18

Filling the sphere with mirrors:

To start filling the ball with mirrors, select an horizontal edge loop of the sphere (editable poly), in the graphite modeling tools go to the object paint Tab, select single mirror as the object to be painted on the scene, and click Fill.
Use the fill# or spacing to adjust the amount of mirrors. I've also used a little randomness in position U and W (scatter parameters).
As you move up \ down in the sphere, it's better to adjust the scaling also!
with all mirrors in place, i have attached them in to one single edit poly.

Creation of Shine on: Step 3

step 4 of 18

Modeling the lamp:
For the lamp i used simple geometry, the base is a cone +edit poly mod.(extrude the base just a little to give thickness), the body is made with cylinders, spheres and a box with edit poly mod. to give a little more thickness in the center. the top is a cylinder with a taper modifier and a edit poly mod. to bevel the hole for the light bulb.
The light bulb it's a geosphere with taper mod.

Creation of Shine on: Step 4

step 5 of 18

the Room it's a box with a shell mod. and an edit poly modifier to edit the polygon ID's. created a spline with sweep modifier for the skirting.

Creation of Shine on: Step 5

step 6 of 18

After posing the objects in the room, I've modeled the cloth by creating a plane above the disco ball with 75 x 60 cm and 60 x 60 segments, applied a cloth modifier and added the disco ball and the room as collision objects.
made a local simulation, and when the cloth was the way i wanted I´ve applied an edit poly modifier to adjust by moving, relaxing, pulling and conform with the freeform graphite modeling tools.
A shell modifier to give some thickness and a turbosmooth in the top.

Creation of Shine on: Step 6

step 7 of 18

Floor Material:
Base is a multi / sub-object with 2 id's (wall + floor)

floor- arch & design shader, for the diffuse map and bump i used a substance map and choose the texture checker.

reflection= 0.6
reflection gloss= 0.75
-Material advanced rendering options-
reflections max distance 120 cm, fade to black.

Creation of Shine on: Step 7

step 8 of 18

walls material:

arch & design with substance map applied to diffuse and bump channels. (stucco)

Reflection 0.4
reflection gloss 0.3
highlights and FG only


Creation of Shine on: Step 8

step 9 of 18

Mirror ball material:
each single mirror has 3 id's:
1 id for the sides (for a black non reflective material), another for the main mirror material witch is an arch and design shader with reflection 1.0, glossines 1.0, Brdf 0 deg. reflection at 0.95, and a third id just to change the brdf to 0.70 on the sides of the main mirror.

Creation of Shine on: Step 9

step 10 of 18

Desk Lamp material it's an arch & design shader, solid red color in the diffuse channel, reflection 0.6, reflection gloss 0.9, highlights and FG only, Metal material.

Creation of Shine on: Step 10

step 11 of 18

Light bulb material:
arch & design with self illumination on.

Creation of Shine on: Step 11

step 12 of 18

cloth material:
Arch & design shader, diffuse solid dark red, roughness 0.2, reflection 0.1, reflection gloss 0.25, highlights and FG only, IOR 1.9, brdf by IOR.

Creation of Shine on: Step 12

step 13 of 18

Light source:
the scene as one light only, for the lamp.
photometric free:
raytraced shadows on
distribution spotlight,
3200 K
230 cd
light shape point.

in the properties of the light bulb, exclude "cast shadows"

Creation of Shine on: Step 13

step 14 of 18

Indirect illumination:

used photons and final gather.

1st, calculated the GI and caustics photon map and saved it to disk, then i did the same for the FG.

i did some adjustments on the mental ray exposure control: menu bar/ rendering menu/ environment.
by decreasing the whitening point i got a colder image, and also increase contrast by reducing mid tones.

Creation of Shine on: Step 14

step 15 of 18

Render settings:

for the final render (1600x1200)

increased the precision multipliers to 2x

samples per pixel at min.4 max 64

Filter type: Lanczos
with spatial contrast at 0.3

Creation of Shine on: Step 15

step 16 of 18

Render elements:
I rendered some elements and save them as Hdr to edit in photoshop.

Creation of Shine on: Step 16

step 17 of 18

In photoshop I used the render elements to have a nice control over the final image. working in 32 bit HDR image, i only used the exposure to control the brightness of each element.

Creation of Shine on: Step 17

step 18 of 18

To finalize i convert the image to 8bit (using exposure option when merging)
and add lens flare effect.


Thanks to all for watching!!!

shine on!

Creation of Shine on: Step 18

Final result

Creation of Shine on: Final Result

LOGIN or REGISTER FOR FREE
to rate this guide and create your own guides.

Votes


uservoted
ccarlin82
enblanco
layerstack
Score:
10


Comments

avatar layerstack

Excellent SBS! 5* well done

(5 years and 2688 days ago)
author says:

Thank you layerstack!!

(5 years and 2688 days ago)
avatar enblanco
enblanco says:

5*

(5 years and 2684 days ago)