
Original image
step 1 of 13
Using the pen tool, I chopped the stick's head, rotate it and created the bee body from it.

step 2 of 13
Using the same part as in Step 1, i created the head of the bee using Warp Tool. Then I made the eye using pen tool, then I fil the eye with black, applied a Texture->Stained Glass filter on it and after all of these I made some glow using Brush tool with some 9% opacity and no hardness.

step 3 of 13
I made the wings also using the Warp Tool.

step 4 of 13
I made the feet of the bee chopping them from the wood part of the source image, aplied some Image Adjustments->Brightness/Contrast, and then I bevelled them to look volumetric. The yellow spots on the feet were made from the bee's body using the Stamp Tool.

step 5 of 13
In this final step I made the bee's antennas and sting chopping them also from the wood part of the source image.

step 6 of 13
Using the honey drop chop( aka wing of the bee) I made a flower petal. I changed color using Adjustments-> Color Balance.

step 7 of 13
Using transform I created the entire flower. Then I merged all the petals, I used Distort to make the flower volumetric and then using the Liquify Filter I tweaked the volume of the flower once again.

step 8 of 13
Using the bee body I made the flower's bulb and then changed color using Adjustments->Color balance.

step 9 of 13
I added the stem of the plant using the source image file's wood stick and Color balance.

step 10 of 13
Using radial Gradient, I made the background. Then I rescaled th bee, and voila: the final image file.

step 11 of 13
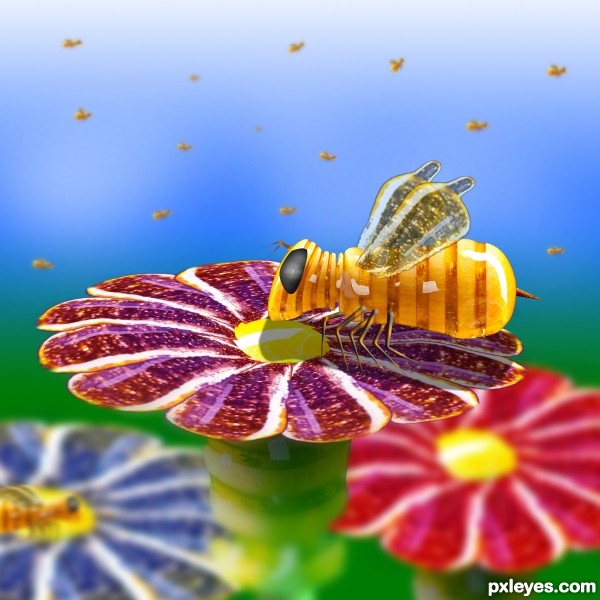
I added some flowers and I changed the background to something "happier" using the Gradient Tool.

step 12 of 13
Some Gaussian Blur To simulate the DOF effect.

step 13 of 13
The final result after I added some transformed bees in background, and then blurred them also with Gaussian blur.

Final result
Pxleyes
Photography and photoshop contests
We are a community of people with
a passion for photography, graphics and art in general.
Every day new photoshop
and photography contests are posted to compete in. We also have one weekly drawing contest
and one weekly 3D contest!
Participation is 100% free!
Just
register and get
started!
Good luck!
Follow us:


© 2015 Pxleyes.com. All rights reserved.