
Original image
step 1 of 10
Wrinkled fabric source (my own) for under vase

step 2 of 10
Dried stalks source photo (my own)

step 3 of 10
First color changes were made to bring color into the source stylus using color balance, and hue/saturation tools.

step 4 of 10
Shift/pixel tool in liquify is used to bring a different shape to work with. This looks like a possible flower, which leads me into the next step.

step 5 of 10
The base of stylus is isolated and liquify warp 'pulls' out side petals, and the liquify bloat creates the larger, deep areas in the flower.

step 6 of 10
Stylus is pulled up into vase using the edit/transform/scale tool.

step 7 of 10
First of flowers are put into vase after brushing in some stems and leaves.

step 8 of 10
Glass filter will be used on the vase, flower and leaves will be added in foreground. Background is covered in a dark redish brown and will have filter/render/omni light added.

step 9 of 10
Base cloth is added now and small amount erased around base of the stylus to make it look like it sits behind a fold. Additional flowers are added to vase now in sizes scaled smaller.

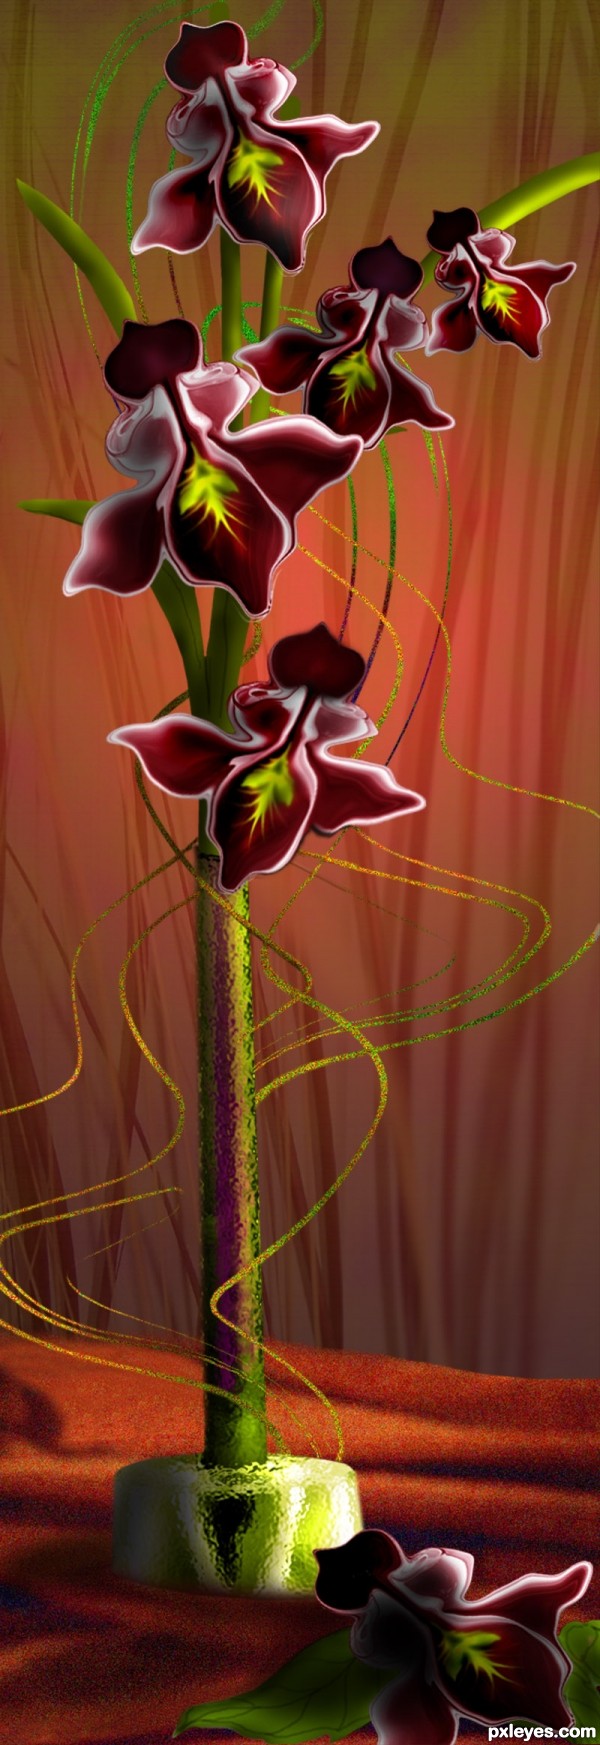
step 10 of 10
From brush strokes in light color, swirly strokes are moved with liquify warp to produce wispy spiral-like shapes for around vase and going up into the flowers. Noise is added (filter/noise) and also contrast is brought up for interesting texture on the spirals.

Final result
Pxleyes
Photography and photoshop contests
We are a community of people with
a passion for photography, graphics and art in general.
Every day new photoshop
and photography contests are posted to compete in. We also have one weekly drawing contest
and one weekly 3D contest!
Participation is 100% free!
Just
register and get
started!
Good luck!
Follow us:


© 2015 Pxleyes.com. All rights reserved.