
Original image
step 1 of 4
I opened the source image of Sepia Girl, used the Ruker Tool to straighten the image slightly and Cropped it to the
picture you see here.
I then duplicated the image and started removing some of the blemishes and the hair strands across her face using the
Patch and Spot Healing Brush Tools, then duplicated this layer to be used later.
picture you see here.
I then duplicated the image and started removing some of the blemishes and the hair strands across her face using the
Patch and Spot Healing Brush Tools, then duplicated this layer to be used later.

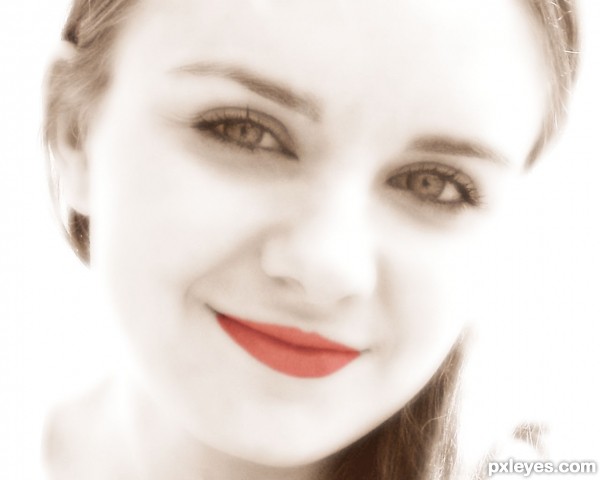
step 2 of 4
Next I used the Diffuse Glow Filter with the setings Graininess: 0, Glow Amount: 14, Clear Amount: 9 to achive the desired effect.

step 3 of 4
I then drew red lips and put the Opacity to about 48% with a New Layer Adjustment of Hue/Saturation with the
settings: Master: Hue: 0, Saturation: +71, Lightness: +35.
settings: Master: Hue: 0, Saturation: +71, Lightness: +35.

step 4 of 4
With the duplicated layer from previous, I Desaturated the image then added the High Pass Filter with a Radius: 26.1
and set the Opacity to 81%.
and set the Opacity to 81%.

Final result
Pxleyes
Photography and photoshop contests
We are a community of people with
a passion for photography, graphics and art in general.
Every day new photoshop
and photography contests are posted to compete in. We also have one weekly drawing contest
and one weekly 3D contest!
Participation is 100% free!
Just
register and get
started!
Good luck!
Follow us:


© 2015 Pxleyes.com. All rights reserved.