
Original image
step 1 of 17
create a new layer 1280 x 1024

step 2 of 17
open the image of the clouds, drag it over to the layer you created and resize it to fit suit

- : source
step 3 of 17
open the image of the woman and extract her from the background

- 1: source 1
step 4 of 17
drag her over to the layer you created so she is placed on top of the clouds image

step 5 of 17
now open the rock image and extract the rock from it's background

- 2: source 2
step 6 of 17
drag the rock over to the same layer as above

step 7 of 17
now resize both the woman and the rock images so as to make it look as though she is sitting on the rock above the clouds as seen in the picture

step 8 of 17
now for the source image (evil mask). open the image and extract it from it's background

step 9 of 17
drag it over to the created layer as above and resize it to suit as seen in the picture

step 10 of 17
go back the the woman and add a new adjustment layer of hue/saturation also tick previous layer and click ok. select the red channel and place these settings hue:0, saturation:-66. lightness:0

step 11 of 17
add another new adjustment layer of brightness/contrast place the following settings brightness:-100, contrast:100

step 12 of 17
now go to the rock and add a new adjustment layer of brightness/contrast tick previous layer and click ok and place the following setting brightness:-73, contrast:73

step 13 of 17
add another new adjustment layer of hue/saturation and tick colorize then place these settings hue:215, saturation:30, lightness:-21

step 14 of 17
go to the mask layer and add a new adjustment layer of brightness/contrast tick previous layer and click ok and place the following settings brightness:-100, contrast:100

step 15 of 17
back to the rock layer we will be adding the shadows and highlights. create a new layer in the layers palette and with a medium sized soft round brush paint the right side of the rock then select overlay in the blending options of that layer, do the same for the left side of the rock but with a white brush, then add a shadow on the rock for the woman by again creating a new layer in the layers palette and with a small soft round brush just paint on the rock under the woman and add the gaussian blur to this layer to soften it a little more

step 16 of 17
options: i added a bit of detail just below the rock, created a new layer in the layers palette and painted some shadow.
i also added some hair extentions on the womans head. again made a new layer and with a very small soft round brush painted a few swurly lines, and made her eyes glow.
i also added some hair extentions on the womans head. again made a new layer and with a very small soft round brush painted a few swurly lines, and made her eyes glow.

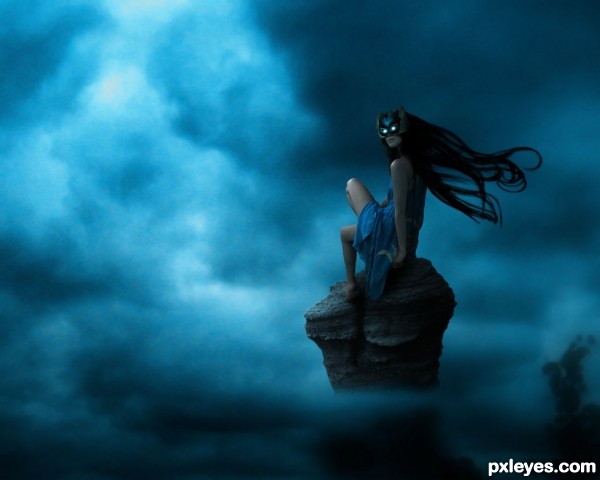
step 17 of 17
lastly i added a colour filter to the overall image by again creating a new layer and filling it withe the colour #075773 and dropping the opacity to 79%

Final result
Comments
Pxleyes
Photography and photoshop contests
We are a community of people with
a passion for photography, graphics and art in general.
Every day new photoshop
and photography contests are posted to compete in. We also have one weekly drawing contest
and one weekly 3D contest!
Participation is 100% free!
Just
register and get
started!
Good luck!
Follow us:


© 2015 Pxleyes.com. All rights reserved.
NIce SBS
(5 years and 3189 days ago)