
Original image
step 1 of 10
After selecting a piece of the source, I erased the darker parts, then lengthened it. I used contrast to alter the color. After lengthening it, I used the elliptical marquee tool and stroke to make a circle for my guide and used warp and liquify to curve the piece into a half circle. I copied the half circle, flipped it and aligned it to make a full circle.

step 2 of 10
I copied half of the circle and, using liquify and my circle guide, narrowed one end of it. Then I copied, flipped and merged the two pieces, finally centering it.

step 3 of 10
I used rotate x.xx on the top bar to rotate copies 15 degrees, then flipped a copy and rotated those 15 degrees, making it look like a weave.

step 4 of 10
At this point, I still have individual spirals. I used the magic wand on the outside of the large circle and the inside of the small circle, then hit Edit > Clear to get rid of the extra spiral parts. I wanted to shadow the sprials, but drop shadow wasn't working for me. Here's where it gets a little tricky. I copied the spirals, Image > Adjustment > Levels and pushed the Output Levels to black. I kept each "shadow" under its original spiral. I then nudged them to the left, keeping them aligned. Each one was reduced in opacity to 75% and gaussian blurred 5 pixels. Now I had proper shadows, but I also had shadows where I didn't want them. So, I put all the catcher parts into a folder (click on the folder at the bottom of the layers palette and drag the layers into it), copied the folder, merged all the layers and used the Output levels again, this time making it white. I had a template! By using the magic wand on the template, I could eliminate all the unwanted shadows the same way I had eliminated the extra weave.

step 5 of 10
I copied the fan part, moved it down, merged and cloned in the empty spots. Then it was Image > Adjustments > Match Color to the outer ring. I used a layer mask to cut out the feather shape. I used warp to straighten a piece of source, then more warp to curve it. I merged the feather spine with the feather, reduced the size and desaturated it just a little. Then I used brightness/contrast adjustment layers to shade it. To make the white feathers, I made copy, desaturated, bumped up the brightness and used a blue color overlay on it. I made another feather, desaturated it, bumped up the brightness, but didn't add the color overlay. I then used a natural brush with a strong smudge on them to give them a more feathery look.

step 6 of 10
Copy, flip and merge. Copy, reduce size, bring down, merge. Erase to shape. Copy previous feather spine, match color to feather. Then I used brightness/contrast adjustment layers to shade it.

step 7 of 10
Cut the edge off the fan, copy and merge. Brightness/contrast adjustment and light desaturation.

step 8 of 10
Warp and smudge. Brightness/Contrast adjustments. 2. Color adjustment. 3. Copy, flip, merge. darken, warp. 4. Color adjustment. 5. Lower contrast, smudged white dot for reflection. 6. Invert, color overlay. 7. Erased the purple part, warp. Shadowing was done with a soft brush. Adjustment layer (brightness) for the high lights.

step 9 of 10
Background color. Next layer is Filter > Render > Clouds with Soft Light layer style and reduced opacity. Next layer is light gradient. Last layer is dark gradient.

step 10 of 10
Parts used.

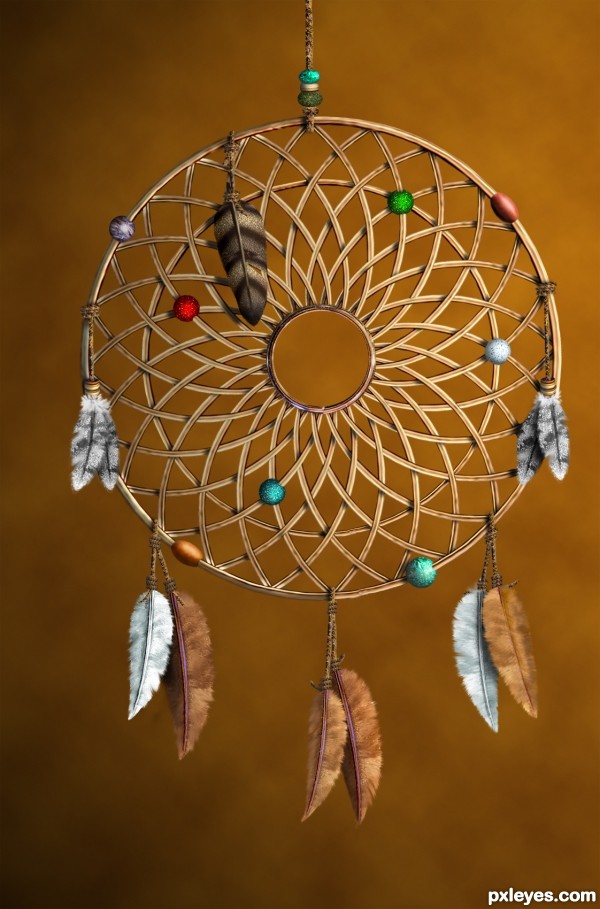
Final result
Comments
Pxleyes
Photography and photoshop contests
We are a community of people with
a passion for photography, graphics and art in general.
Every day new photoshop
and photography contests are posted to compete in. We also have one weekly drawing contest
and one weekly 3D contest!
Participation is 100% free!
Just
register and get
started!
Good luck!
Follow us:


© 2015 Pxleyes.com. All rights reserved.
Beautiful work, and informative SBS!
(5 years and 3192 days ago)