A Work in Progress: The bright idea


This guide was made for entry:
The bright idea
In Contest:
your desk


step 1 of 6

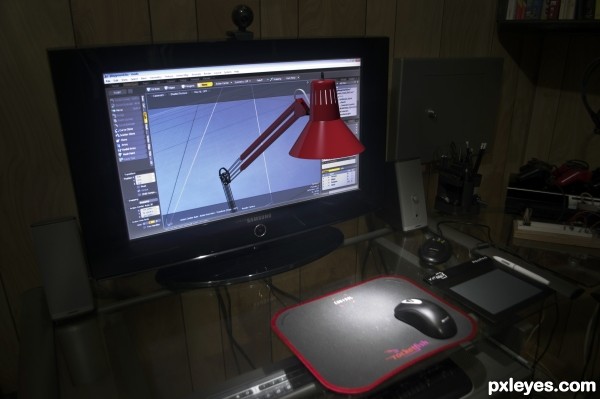
I thought it would be neat to have the model coming out of the monitor since it had to be on the monitor and in the picture. It took a while to come up with something that can hang out of the monitor, yet still look natural. The idea of a light, since the light could also be simulated in the image, seemed to be a good idea.

Creation of The bright idea: Step 1

step 2 of 6

The modeling was pretty straightforward. I didn't plan on it, but I ended up adding minor details like the power cord, screws, and even added a texture to the on/off switch, despite knowing that it wouldn't be visible in the final render.

Creation of The bright idea: Step 2

step 3 of 6

I setup a tripod and took an early image of the scene, since I had to know where to cut the model for the transition between the monitor and the render.

I also added a box to the scene to simulate the monitor in 3d space.

Creation of The bright idea: Step 3

step 4 of 6

I cut the model down the monitor geometry that I added, removed the front half that sticks out and took multiple pictures from the camera (still in the same position on the tripod)

There's a fine balance between under and overexposing when you're taking a picture of a monitor.

In the end, I decided on the underexposed image, as that would create more of a contrast from the light emitted by the lamp in the final.

Creation of The bright idea: Step 4

step 5 of 6

The final image was chosen (the darker image) and I took the picture with a flashlight above the camera aimed down, as I knew I wouldn't be able to simulate the light better than actually lighting the area in the image.

4 images make up the background. The first is what you see in the render. The rest were taken at 3 different exposures (-2, 0, 2) and converted to a real HDR image. The HDR was then used for the indirect lighting in the scene, but I probably could have done without.

The blue box in the image on the right is the simulated monitor geometry converted to a light panel to simulate the lighting that would come from the monitor if the lamp were real.

Creation of The bright idea: Step 5

step 6 of 6

Oops, THIS blue box is the light. ;)

Creation of The bright idea: Step 6

Final result

Creation of The bright idea: Final Result

LOGIN or REGISTER FOR FREE
to rate this guide and create your own guides.

Votes


uservoted
Bitmap
Score:
8