
Original image
step 1 of 9
This is the main source image. Loaded into Photoshop using camera raw to make some color corrections.

- : source
step 2 of 9
I extended the canvas so the composition has some more 'head room' and the woman has somewhere to look.
I used a combination of the free transform tool and the patch tool as well as the clone brush and the healing brush to create the missing pieces of the background.
I used a combination of the free transform tool and the patch tool as well as the clone brush and the healing brush to create the missing pieces of the background.

step 3 of 9
I isolated the frame of the glasses from the background using the pen tool. I blurred the mask to retain the DOF effect. That, of course, resulted in some color fringing, which I fixed using the clone tool. Then I painted the specular highlights back in.
On a new layer, I placed the result on top of the 'subway' image.
On a new layer, I placed the result on top of the 'subway' image.

step 4 of 9
First I isolated the right leg from the background and placed it just below the 'glasses' layer in the 'subway' image. Using the puppet warp tool, I aligned it with the appropriate leg of the jeans. I repeated this procedure with the left leg, except I placed this below the 'right leg' layer.
I did not have quite enough source material for the buttock and a tiny portion of the tummy, so created that using a combination of digital painting, cloning and healing.
I did not have quite enough source material for the buttock and a tiny portion of the tummy, so created that using a combination of digital painting, cloning and healing.

- 1: source 1
step 5 of 9
I reconstructed the background around the legs using the clone tool.

step 6 of 9
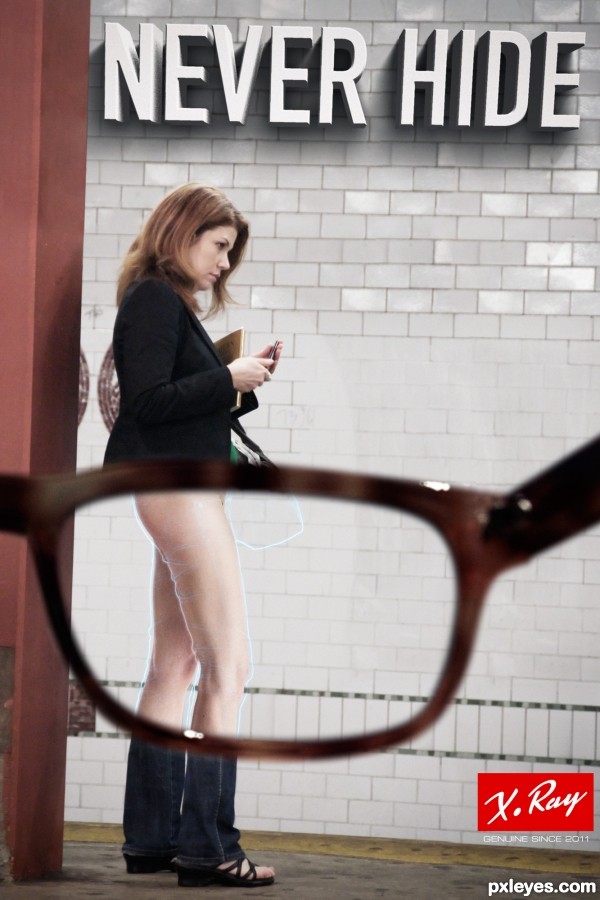
I created an pseudo 'x-ray' effect by duplicating the background layer, putting it just below the 'glasses' layer and running the glowing edges filter on it. I set the blending mode to screen and masked out any unwanted areas.
I actually did some more stuff to enhance the effect somewhat, but the above is the main technique used.
I actually did some more stuff to enhance the effect somewhat, but the above is the main technique used.

step 7 of 9
I added the headline using repoussé and painted in the drop shadow manually.

step 8 of 9
I adjusted the overall color (bleach bypass) and added some grain to add some atmosphere and tie it all together.

step 9 of 9
I added the 'X•Ray' label to reach the final result.

Final result
Pxleyes
Photography and photoshop contests
We are a community of people with
a passion for photography, graphics and art in general.
Every day new photoshop
and photography contests are posted to compete in. We also have one weekly drawing contest
and one weekly 3D contest!
Participation is 100% free!
Just
register and get
started!
Good luck!
Follow us:


© 2015 Pxleyes.com. All rights reserved.