
Original image
step 1 of 14
Rotate source image, duplicate and flip horizontally.

step 2 of 14
Join both images together, carefully matching seams

step 3 of 14
With Corel Painter, using the "Kaliedoscope" Dynamic Plugin, select a 500px area to create a "quilt square." Alternatively, in Photoshop, you can create a 250px selection of an area, dupicate and flip it horizontally, then duplicate and flip both of those vertically and merge all 4 layers to create a 500px square.

step 4 of 14
Repeat creating squares from all over the image until you have 4 rows of 5 squares (20 squares total)

step 5 of 14
Working with 1 square at a time, create a Gradient Adustment Level

step 6 of 14
Click the gradient and choose Noise, 50%, either HSB or LAB mode.

step 7 of 14
Duplicate the original square layer, desaturate it (Ctrl+Shift+U), duplicate the desaturated layer (Ctrl+J) and invert it (Ctrl+I). Change the layer mode to "Color Dodge," and then apply Filter>Other>Minimum at 1px. Click OK to create a "sketch."

step 8 of 14
Duplicate the sketch layer, change the Layer Mode to "Linear Burn" and merge the two sketch layers together.

step 9 of 14
Remove the white from the sketch (I use a plugin, "Mac's Remove White," but you can use the magic wand with the tolerance set to about 40), and place the sketch over the colored square layer. Double click the sketch layer to bring up the Layer Styles dialogue box, and choose Bevel and Emboss. Click the Bevel and Emboss, and select "Pillow Emboss," adjusting Depth and Size to taste.

step 10 of 14
Here are all the squares colored with Gradient Map adjustment layers.

step 11 of 14
And here they all are with sketch layers and the Pillow Emboss Layer Style applied

step 12 of 14
Prepare a "trim" layer beneath all the squares in a desired color. Link each square with its Gradient Map adjustment layer and its Pillow Emboss sketch layer, and position it on the background, leaving a small gap between the squares, and around the edge. Turn off the background layer visibility, and hit "Ctrl+Alt+Shift+E" to create a merged layer of all the quilt squares. Holding the Ctrl key, click inside the thumbnail of the merged layer to select all of the squares. Turn off the visiblity of all layers (Right click the visibility check mark of the layer to do this)
Make the background layer visible, and create a new layer above it. Stroke the selection 2px from the center with black, and then give it a Pillow Emboss Layer Style, like you did the quilt squares.
Make the background layer visible, and create a new layer above it. Stroke the selection 2px from the center with black, and then give it a Pillow Emboss Layer Style, like you did the quilt squares.

step 13 of 14
Make the merged squares layer visible above the background and the Pillow Emboss layer you just created.

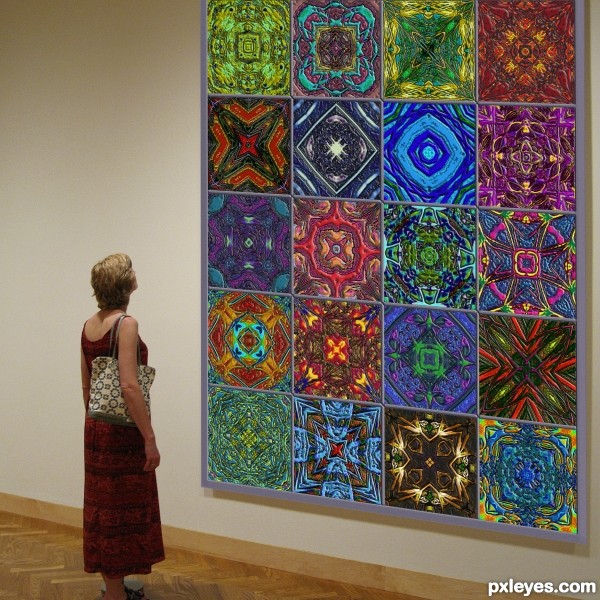
step 14 of 14
Merge Visible the quilt squares and background layers like you did earlier, and position this merged "quilt" layer on top of the background image, resizing and skewing the angle to fit.

Final result
Pxleyes
Photography and photoshop contests
We are a community of people with
a passion for photography, graphics and art in general.
Every day new photoshop
and photography contests are posted to compete in. We also have one weekly drawing contest
and one weekly 3D contest!
Participation is 100% free!
Just
register and get
started!
Good luck!
Follow us:


© 2015 Pxleyes.com. All rights reserved.