
Original image
step 1 of 11
Sketched out dragon. Filled with gray tones using paint tool and smudge brush.

step 2 of 11
Once the base for the dragon was done I cut out the seed from the Hamburger and used it to build the scales.
I used the warp tool and Puppet warp to fit it onto the dragon drawing
I used the warp tool and Puppet warp to fit it onto the dragon drawing

step 3 of 11
Using the Cheese from the hamburger I made the Chest cladding. Mostly cut, paste and blending using layer mask.

step 4 of 11
Using the same seed I covered the Face "bones" and horns. Again, warping, puppet warp and blending with layer masks.

step 5 of 11
Wing braces where created using the Pen tool and then filled and given shape using the Pillow emboss. This was enhanced later.

step 6 of 11
Using the Hamburger meat I covered the wing braces. I put a copy of the braces in the Hamburger image and selected it in pieces then pasted and blended it onto the image with Layer masks.

step 7 of 11
The wing leather was drawn using the braces as a template for the shape. I used about 6 or 7 layers to get the texture, veins and contour lighting. Trimmed to desired outline.
I used the Palm tree from the source to cover my grayscale drawing and give the wings more texture
I used the Palm tree from the source to cover my grayscale drawing and give the wings more texture

step 8 of 11
Detail was worked on like fixing the Claws on the wing tip and refining the wing braces. Also worked on the Wing "muscles" using the cloning and smudge tool.

step 9 of 11
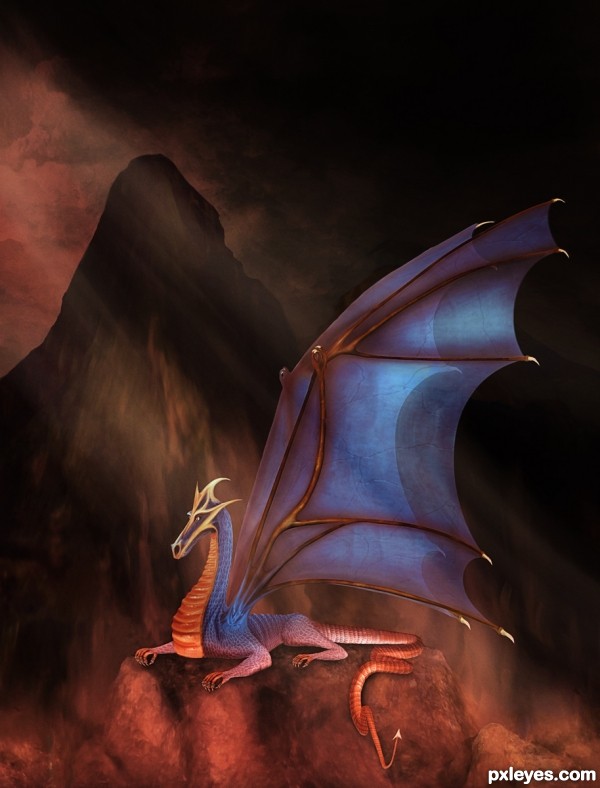
The background was created from the Hamburger meat and a lot of blending and mixing. There was also a couple of Adjustment layers and blend mode changes to get the Glow.
The flames were made by duplicating the Glowing rocks, enlarging them, gaussian blur, motion blur, layer mask painted to get flame look, then used Wave distortion filter on the Mask to get a wavy, flame like look.
The sky was created using a home made cloud brush and the ocean from the source (not shown).

step 10 of 11
Final fix-up. The tail had to be readjusted as it did not work on the rock. I also re-worked the claws.

step 11 of 11
Just of the fun of it ... here is the image before the edit.

Final result
Comments
Pxleyes
Photography and photoshop contests
We are a community of people with
a passion for photography, graphics and art in general.
Every day new photoshop
and photography contests are posted to compete in. We also have one weekly drawing contest
and one weekly 3D contest!
Participation is 100% free!
Just
register and get
started!
Good luck!
Follow us:


© 2015 Pxleyes.com. All rights reserved.
Nice SBS, well explained and a terrific result!!!! Wait to see a tutorial from you to practice it. The dragon looks very nice, and the colors blend all together......! Thanks for sharing it with us.
(5 years and 3300 days ago)