
Original image
step 1 of 10
Background source photo, just top right corner will actually show after scaling it to larger size.

step 2 of 10
Bird is created using liquify warp tool. I started with both wings to get front angle, but later decided to use a side view by using eraser tool to remove one wing.

step 3 of 10
Here the bird has been chopped using the eraser tool and body has been shaped a little further w liq/warp tool and smudge tool (wing is removed with eraser tool), and head has been detailed by adding smudge tool lines to represent a crest. Lines were added a different lengths, then trimmed evenly with eraser tool.

step 4 of 10
Crested 'thief' bird has had details finished, and a branch has been added using the smudge tools. Smudge tool (at hard setting) and burn tools are used to add all the feather details. Paint brush tool (hard at small setting) creates the facial details.

step 5 of 10
A nest is formed on a new layer next. Base of nest is top of the skull flipped over. It sets in a nest held up by duplicates of the branch the bird is sitting on. Pieces of the branch are added in various positions by using edit/transform/rotate tool. Then more nesting material is created with one of the fingers of the skull, stretching and scaling it to a long, thin piece. These are duplicated and added at many different angles (rotate tool). After front layer of nest is finished, it is duplicated and sent to layer behind the skull top, just showing some of the 'sticks' above the skull piece. Leave the front on its own layer so eyes can be inserted.

step 6 of 10
Here is the nest at this point. I will do a little smudging and burning with burn tool later to smooth it up a little.

step 7 of 10
Skull is added on layer behind the nest, then eye is lassoed out to use in nest, then blackened in. Fingers are now lassoed with magnetic lasso, flipped over and placed over the nest. Eye is placed in nest, duplicated to represent more stolen eyes, and one is moved under fingers. Burn and dodge tools will be used on fingers and eyes where needed to get correct lights and shadows.

step 8 of 10
Background is added, scaling to use just the upper right hand corner which has some great sweeping movement to it and a color to complement the scene.

step 9 of 10
Bird didn't satisfy me being red and black, so with hue/sat tool, I changed both the bird and background to blues. This helped to set them on a plane behind the nest and skull.

step 10 of 10
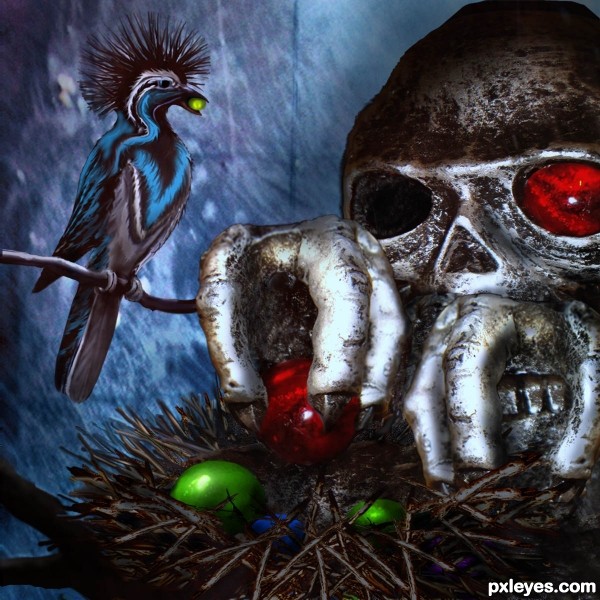
Last minute change here. Decided to change color of collected 'jewels' in nest of bird thief with brush and smudge tools. Also used brush tool to open mouth and add jewel there. Blue filter at 30% added after merge.

Final result
Pxleyes
Photography and photoshop contests
We are a community of people with
a passion for photography, graphics and art in general.
Every day new photoshop
and photography contests are posted to compete in. We also have one weekly drawing contest
and one weekly 3D contest!
Participation is 100% free!
Just
register and get
started!
Good luck!
Follow us:


© 2015 Pxleyes.com. All rights reserved.