
Original image
step 1 of 8
I clipped the base image and reversed.

step 2 of 8
I chose a background of forest, might not have to and I could have used the original, but I decided to change everything, wanted by the clone stamp to prove in the future steps.

step 3 of 8
I chose a model that represents good a forest, cut and insert.

step 4 of 8
Now I started working the clippings from the base, cut off the original bottom of all openings and I was able to clone stamp was spreading a little more "hair. "

step 5 of 8
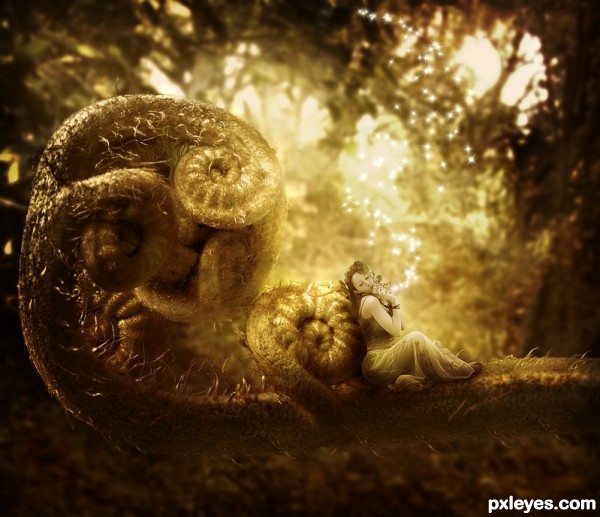
Photo colorization with gradient and photo filter, and the work of glare coming off the flute did with the pen tool.

step 6 of 8
For this work of brilliance, I created a new layer in the Layers palette and name it "shine", I created a new path in the Paths palette, and with the pen tool I drew a line coming out of the flute and go up.

step 7 of 8
After that I went into brushes, choose a brush of a single star and set on Scattering and Shape Dynamics BRUSHES PRESETS. Once set, hit ENTER, and became the brightness of stars!

step 8 of 8
Duplicated the layer "shine", I returned the original and made an outer glow and keeping the original settings in the copy I gave a gaussian blur of 0.5.
It's done!
SORRY FOR MY BAD ENGLISH!
It's done!
SORRY FOR MY BAD ENGLISH!

Final result
Pxleyes
Photography and photoshop contests
We are a community of people with
a passion for photography, graphics and art in general.
Every day new photoshop
and photography contests are posted to compete in. We also have one weekly drawing contest
and one weekly 3D contest!
Participation is 100% free!
Just
register and get
started!
Good luck!
Follow us:


© 2015 Pxleyes.com. All rights reserved.