
Original image
step 1 of 6
To create this effect I used the smoky clouds photoshop (Filter / Render / Clouds)

step 2 of 6
I threw him over the image of the universe with the blending SCREEN

step 3 of 6
Here I used the Vanish Point (Filter / Vanish Point)
With the selection tool I created the perspective and with the clone tool to vanish increased the building in perfect perspective.
With the selection tool I created the perspective and with the clone tool to vanish increased the building in perfect perspective.

step 4 of 6
Light: I used the Lens Flare (Filter / Render / Lens Flare)
Platform: I made up the perspective and duplicated (Free Transform + Perspective)
Structure Deck: I cut out the picture and worked in color and light (Hue Saturation / Curves / Color Balance / Dodge and Burn Tool)
Platform: I made up the perspective and duplicated (Free Transform + Perspective)
Structure Deck: I cut out the picture and worked in color and light (Hue Saturation / Curves / Color Balance / Dodge and Burn Tool)

step 5 of 6
To make the lights e cut, paste and modify...cut, paste and modify.....cut, paste and modify many times the Plasma source....change de color with Hue Saturation and the size with Free Transform

step 6 of 6
Marty did with the patch tool
The lights put on screen to add realism, I applied them in a radial blur
Plasma screen just put in over the image
The lights put on screen to add realism, I applied them in a radial blur
Plasma screen just put in over the image

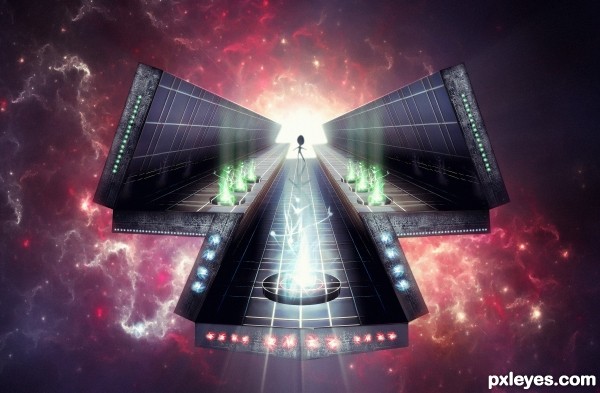
Final result
Pxleyes
Photography and photoshop contests
We are a community of people with
a passion for photography, graphics and art in general.
Every day new photoshop
and photography contests are posted to compete in. We also have one weekly drawing contest
and one weekly 3D contest!
Participation is 100% free!
Just
register and get
started!
Good luck!
Follow us:


© 2015 Pxleyes.com. All rights reserved.