
Original image
step 1 of 11
Bus source is liquify warped then ripple, spatter, lens flare used.

step 2 of 11
Wave filter has been added, then difference clouds to complete background layer. Next a gradient layer will be added then reduced in opacity. At a later time, I decided to again use liquify warp tool to swirl background to give a graceful feel to background.

step 3 of 11
Here the windshield of bus is formed with distort tools into a shape which is layered to create the container for the floral arrangement.

step 4 of 11
Flower shapes also from bus window made with liquify and smudge tools

step 5 of 11
Iris being formed. Each iris will be slightly different by using smudge and warp tools to change them.

step 6 of 11
With gradient layer as a background, irises are duplicated and container is put into place. Iris leaves are formed from windshield piece also, using liquify warp tool, then trimming w eraser and smudge tools. Colors are changed using hue/sat tool.

step 7 of 11
Screen is made from shades in bus window. Here are the steps used.

step 8 of 11
Background has been liquified into a swirled design and screen 'hung' over it at 15% opacity to allow the design to show through, giving it a a somewhat transparent look.

step 9 of 11
Here are shapes lassoed from source to use in making a windchime to hang above arrangement.

step 10 of 11
To make room for the chime, canvas is extended at the top, then shapes from source are chopped and sized to various sizes. The large round headlamp is used for the top from which they will all hang. Now they are attached to top using a fine brush tool, then color changed.

step 11 of 11
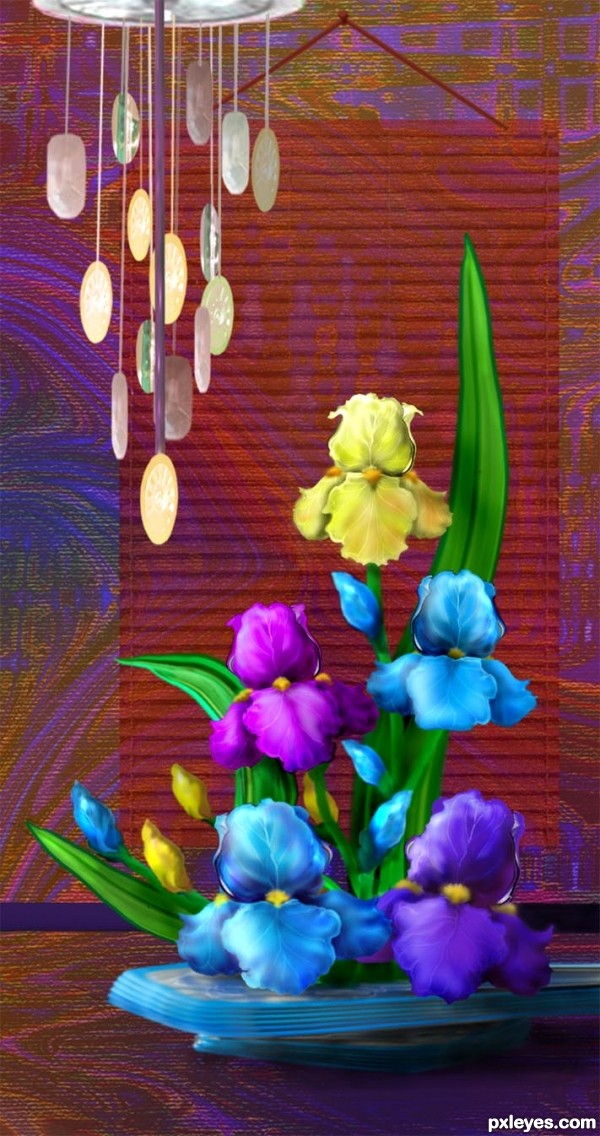
Color changes have been made, more detail to flowers, and buds added (made with eraser and smudge tools from portion of a duplicated iris).

Final result
Comments
Pxleyes
Photography and photoshop contests
We are a community of people with
a passion for photography, graphics and art in general.
Every day new photoshop
and photography contests are posted to compete in. We also have one weekly drawing contest
and one weekly 3D contest!
Participation is 100% free!
Just
register and get
started!
Good luck!
Follow us:


© 2015 Pxleyes.com. All rights reserved.
Nice! A lot of work and a great outcome!
(5 years and 3434 days ago)