
Original image
step 1 of 17
Great Eagle nebulae source used for layer over background

step 2 of 17
Parrot source used for reference

step 3 of 17
To create bird, Shape of bird is made using liquify warp on one of the bowling pins.

step 4 of 17
Feathers for on bird are shaped from blue section in source and from section of one of the pins.

step 5 of 17
Tail is 'feathered' first using one of the yellow feathers, elongating it with the edit/scale tool, then duplicating it. Tail feathers are then merged to keep # of layers from becoming enormous later on.

step 6 of 17
Breast feathers are applied next, duplicating the yellow feather, rotating when necessary, then softening edges with smudge tool.

step 7 of 17
Now the blue feather is scaled to elongate it, then is is duplicated and applied to the sides of bird.

step 8 of 17
From blue area of source, a dark section is lassoed and placed over where beak and dark throat feathers are needed. Eraser tool removes unnecessary portions, then smudge tool blends yellow and blue areas of the design. A light gray is brushed on 'face' with airbrush.

step 9 of 17
Here the beak and 'chin' feathers are refined with the smudge and eraser tools.

step 10 of 17
Using a dark brush and smudge tool, the face is created, merging it into the surrounding areas. Burn tool is used on edges to blend into feathers and beak.

step 11 of 17
The bird is completed, except for using burn tool to add more shape

step 12 of 17
A large section of the grass in the source is lassoed and scaled large enough to cover all of the background. Shapes of grass are stretched in the process of scaling, but will later have layer over it to look more like water. With color change tools, more blue is added to this background layer.

step 13 of 17
Here the buildings in the background of the source has been liquify warped to create vine/branch shapes. When satisfied with the design, it is duplicated and edit/transform/flip horizontal to finish vine shapes. Noise filter is added at low setting. These will be refined later using clone tools and burning for shadows.

step 14 of 17
Liquify warp is used again to turn a bowling pin into one of the trumpet flowers. Edges are refined using eraser tool, and shaped further by using burn tool.

step 15 of 17
Flowers are put into place, with stems pulled out with smudge tool. They are all a little different. Some are a little smaller, some a little darker, and some have just a little red added to tie flowers into bird shape.

step 16 of 17
A leaf has been shaped with eraser, smudge tool and liquify warp and will be duplicated, color changed on some, and placed in between layers of the vines and flowers. Burn tool makes shadows on them.

step 17 of 17
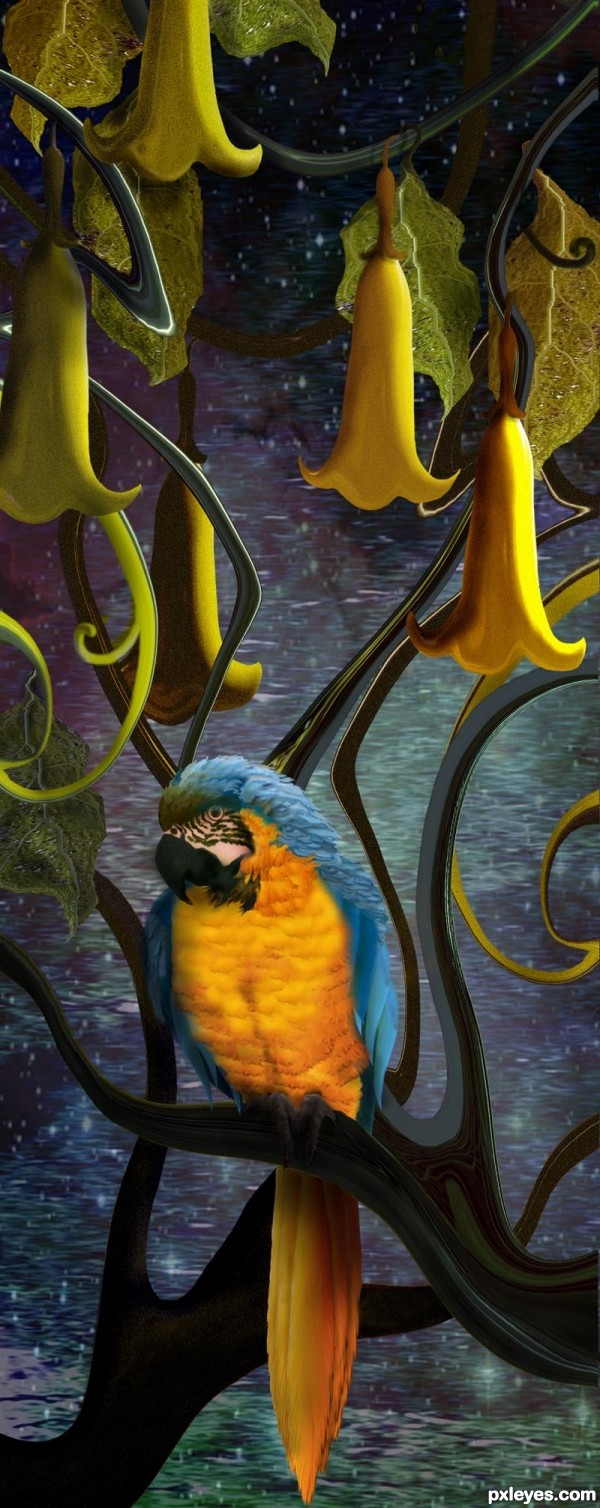
Background layer seemed to dark and distinct, so the nebulae layer was added to finish off the image, then opacity is down to where background of grass layer comes through. Finally, last minute refinements are done with smudge and clone tools after merging is done.

Final result
Pxleyes
Photography and photoshop contests
We are a community of people with
a passion for photography, graphics and art in general.
Every day new photoshop
and photography contests are posted to compete in. We also have one weekly drawing contest
and one weekly 3D contest!
Participation is 100% free!
Just
register and get
started!
Good luck!
Follow us:


© 2015 Pxleyes.com. All rights reserved.