
Original image
step 1 of 3
Sketch

step 2 of 3
Body parts were made by filling a new custom shape for each body part with a medium red. Then a new layer is created above the shape and linked above by holding alt and clicking between the two layers. Shadows are created with a soft black 5% opacity brush and highlights are made with a soft 5% opacity brush. A new layer was filled above each layer and the style "Gun Metal Neutral" was applied. The Gun Metal was then set to blend mode overlay. Additional lighting was achieved with a new layer filled with black and set to color dodge. Highlights were then painted with a soft white 5% opacity brush.

step 3 of 3
Create a new layer and make a selection of the area you want and fill it with black. Double click the layer and add a bevel, choose the best setting to resemble 3d effect. Choose the pattern option and select the checkerboard pattern. Scale the pattern to your liking and reduce the opacity to your liking. Now choose gradient and pick the grey to black gradient. Make sure it is set to linear and the direction matches the lighting on your source image, then reduce the opacity to your liking. Additional lighting can be accomplished with a black or white soft 5% opacity brush. Additional lighting can be accomplished with a new layer set to color dodge and filled with black. Also painted on with a soft white 5% opacity brush.

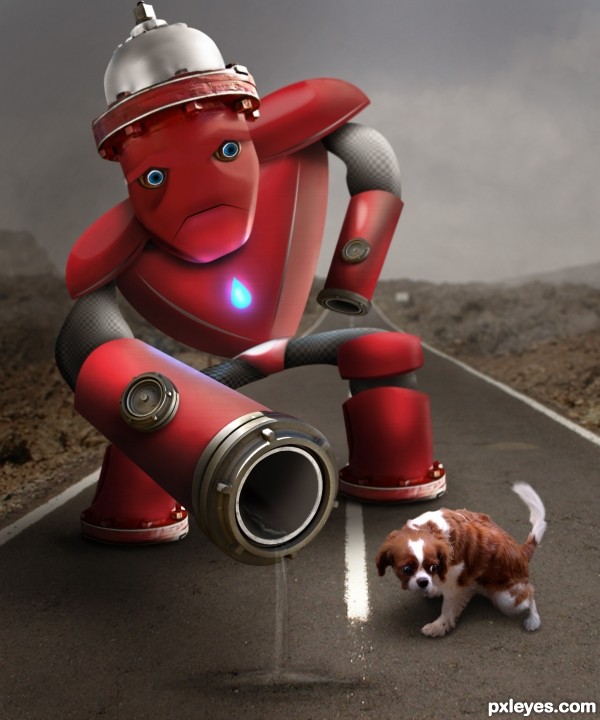
Final result
Pxleyes
Photography and photoshop contests
We are a community of people with
a passion for photography, graphics and art in general.
Every day new photoshop
and photography contests are posted to compete in. We also have one weekly drawing contest
and one weekly 3D contest!
Participation is 100% free!
Just
register and get
started!
Good luck!
Follow us:


© 2015 Pxleyes.com. All rights reserved.