
Original image
step 1 of 8
I first duplicated the original photo, and then went to Layer>New Adjustment Layer>Hue/Saturation. I then took the saturation all the way down.

step 2 of 8
I then went to Layers>New Adjustment Layers>Color Balance. Picking a good color scheme and repeated this step a few times. And then went to Filter>Render>Clouds and did this filter on the Hue/Saturation Layer and ALL the Color Balance Layers.

step 3 of 8
After that I flattened the image and then duplicated it and changed the Blending Mode. I repeated this step until I got the result I was happy with.

step 4 of 8
I then Flattened the image again and pulled the stock photo in and layered it on top, erased all but the iris and pupil of the eye and then changed the Blending Mode on that as well. And once again flattened the image.

step 5 of 8
I then outlined the whited of the eye with the Lasso Tool, right clicked and feathered the selection a bit to clean up the edges. I then went to Filter>Stylize>Extrude with the settings I have selected in the picture below.

step 6 of 8
I then used the Dodge and Burn Tools to highlight and shadow where needed to make the piece "pop".

step 7 of 8
I then used the Healing Brush Tool to get rid of some of the Saturated Noise that was throughout some of the picture.

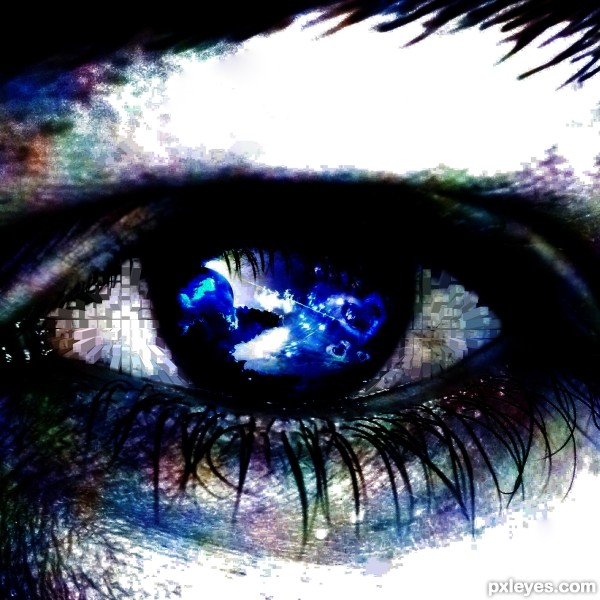
step 8 of 8
I then duplicated the layer, adjusted the Blending Modes, and flattened the image once again. I did this a few times until I got this final result.

Final result
Pxleyes
Photography and photoshop contests
We are a community of people with
a passion for photography, graphics and art in general.
Every day new photoshop
and photography contests are posted to compete in. We also have one weekly drawing contest
and one weekly 3D contest!
Participation is 100% free!
Just
register and get
started!
Good luck!
Follow us:


© 2015 Pxleyes.com. All rights reserved.