A Work in Progress: A kaleidoscope of butterflies


This guide was made for entry:
A kaleidoscope of butterflies
In Contest:
collective nouns


step 1 of 7

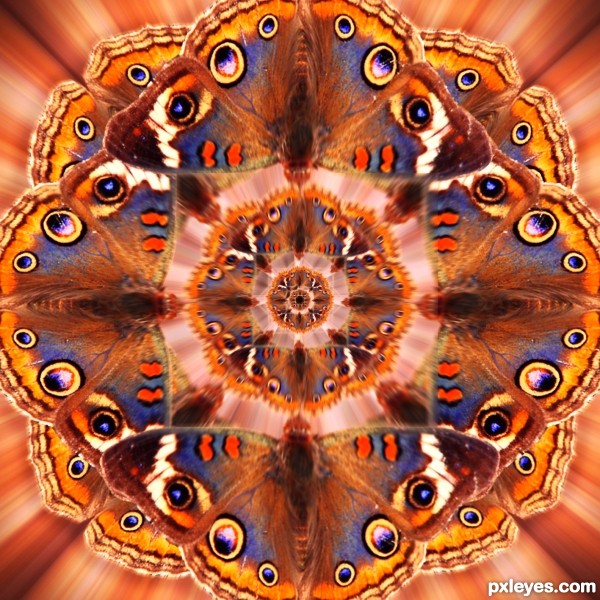
Place the butterfly in your project and use the guidelines to determine the middle. Duplicate layer and then flip the image vertical and place it on the top of your project. Use shift key to make sure you are moving in a straight line.
Duplicate layer again and rotate image to place the butterfly at the right or left side of your project.
Duplicate layer, flip and put one at the opposite site..

You now have four layers.. I did some editing (Edit-transform) to make sure the image fitted perfectly.

Then merge all four layers to complete first step. I named this layer my “butterfly base.”

Creation of A kaleidoscope of butterflies: Step 1

step 2 of 7

Take the butterfly base layer, and duplicate this layer.. Rotate this layer, use the guidelines to line it up perfectly.

Creation of A kaleidoscope of butterflies: Step 2

step 3 of 7

Creation of A kaleidoscope of butterflies: Step 3

step 4 of 7

Duplicate layer and shrink to fit the next row to make the kaleidoscope.. When done, duplicate that layer and rotate image again.. I numbered and called my layers “base” and “rotated” Now place and rotate away.. You can go as far as you like with it. I wrote this sbs while I was working on it, and I decided along the way to fill the whole image and then decided to leave some rows out. Go with the flow with this one.. Just experiment away and see what looks right.

Creation of A kaleidoscope of butterflies: Step 4

step 5 of 7

Change background color in any color you like.

I wanted to have some more intens color in my image and made two adjustment layers. One brightness/contrast layer and one channel mixer..

If you are happy with the outcome, merge the butterfly layers and save..

Creation of A kaleidoscope of butterflies: Step 5

step 6 of 7

Since I was not happy with the image so far I tried adding more of a “Kaleidoscope” feeling to the image by adding some light rays..

I duplicated my butterfly layer and named it light rays.. I set my blending mode to Linear Dodge and added a Stained Glass Filter to it.. Then I added Radial Blur to this layer.. (amount 100-Zoom-Best) I also added some difuse glow.. Again.. Just see what looks right for your image and what you want to achieve.. I ended up using Radial Blur Filter about 5 times.

Again duplicated my butterfly layer and named it Light Rays 2. Setting blending mode to Linear Dodge again and doing some Radial Blur again.

Creation of A kaleidoscope of butterflies: Step 6

step 7 of 7

Since my image was to clear in the background I did a small radial blur on my (duplicated!) base layer and used a mask to get rid of the blur on the outside..


Creation of A kaleidoscope of butterflies: Step 7

Final result

Creation of A kaleidoscope of butterflies: Final Result

LOGIN or REGISTER FOR FREE
to rate this guide and create your own guides.

Votes


uservoted
Disco
TwilightMuse
Score:
10