
Original image
step 1 of 7
Source design is liquified to be used in frame (liquify/warp tool)

step 2 of 7
Liquified flower is duplicated, then flipped to join to first one, then this is repeated to make multiple images in a strip. Design will also be flipped vertically to complete design.

step 3 of 7
Here is the completed frame. Sides are same as top and bottom, but using edit/rotate they are turned to go up and down. Corners are mitered by trimming with eraser tool. Design will be matched with smudge tool where design doesn't meet as it should (to complete a flower or stem)

step 4 of 7
Tulip is chopped and stems removed, then flower is duplicated twice, changing scale to slightly larger for the lower one. New stems are brushed on with brush tool, giving each stem a nice curve. Stems will be later burned with shadows.

step 5 of 7
Container in source is used for new container, but size is changed, leaves made larger using liquify/warp tool, and table and shadows are brushed in.

step 6 of 7
Frame has a filter/pixelate/crystallize texture added, and center portion has filter/texture/texturizer/canvas filter added.

step 7 of 7
Finally, a red/brown filter is added to frame at 30% opacity, and the same filter is added to center portion of design at 17%.

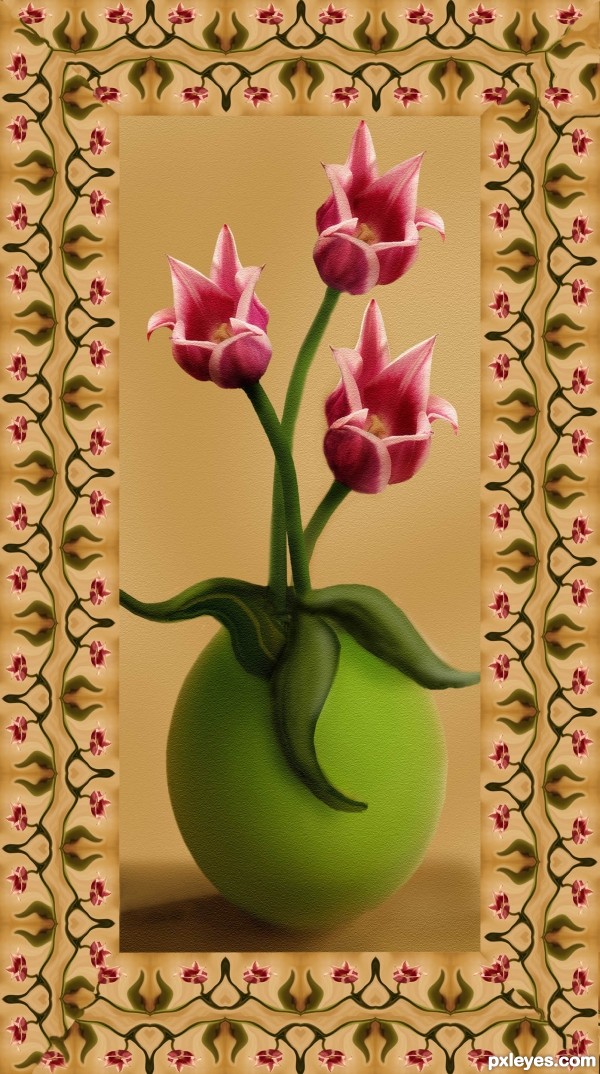
Final result
Pxleyes
Photography and photoshop contests
We are a community of people with
a passion for photography, graphics and art in general.
Every day new photoshop
and photography contests are posted to compete in. We also have one weekly drawing contest
and one weekly 3D contest!
Participation is 100% free!
Just
register and get
started!
Good luck!
Follow us:


© 2015 Pxleyes.com. All rights reserved.