
Original image
step 1 of 29

step 2 of 29
added room to breathe around the base image, seriously though I did this to set up for future steps.

step 3 of 29
Used the pen tool to create a path around the armour so I could isolate it from the black back ground.

step 4 of 29
I really didn't like the symmetry, and the lack of matching arms on the subjects left side so I selected the left half and duplicated it flipped horizontally, and aligned over the left half.

step 5 of 29
now i started in on the background. Simple step here. I added a black color fill layer to the bottom of the stack.

step 6 of 29

step 7 of 29
Had to get that sword off of the white background where it resided. I used channels to generate my selection outline. First step for alpha 1 was was calculations using overlay, Alpha2 was calculations again with multiply, and then the brush using soft light, and the lasso tool for further refinement.

step 8 of 29
Used the channel alpha2 to generate my selection and copied the sword to a new layer.

step 9 of 29
duplicated layer to my working document. I do this by right clicking on the layer so I can name my layer at the same time as moving it. Then I made some coffee!

step 10 of 29
Sword wasn't the right size to match the image so I had to transform it. Nothing fancy "ctrl t" "shift + alt" to constrain proportions.

step 11 of 29
After the resizing the sword extended beyond the armour so I went ahead and masked out the bottom of it. I got the precise selection by selecting the sword from the thumbnail and then subtracting the armour from the selection by "ctrl alt" clicking the armor thumbnail. Then I fixed a cup of coffee.

step 12 of 29

step 13 of 29
Resized the base rock, and postioned it where i thought it looked best.

step 14 of 29
Lowered the layers opacity and used the polygonal lasso tool to make a selection following the rocks natural contours and base of the armour. Saved selection as an alpha channel.

step 15 of 29
raised the opacity back to 100% and duplicated layer. This might get tricky so I'm going to go ahead and say here what I do next, and then repeat it.
I applied the layer mask, and switched the mode to hue. The rock dissapears but I immediately duplicate it.
I applied the layer mask, and switched the mode to hue. The rock dissapears but I immediately duplicate it.

step 16 of 29
Then I switch the blend mode of the duplicated layer to luminosity. This desaturated the image, and at the same time retains its natural shadows, and also brings it back into view. this also keeps me from having to generate a new mask.

step 17 of 29

step 18 of 29
Changed blend mode of layer to multiply so it would umm well blend better, and darken the rock

step 19 of 29
added a levels layer adjustment, and set the blend mode to multiply so I could better match the lighting of the scene. I used a mask on the layer so only the rock was affected.

step 20 of 29
added a gradient fill layer above the color fill layer. Foreground to background black to white. This sets the stage or adds dimension to overall scene.

step 21 of 29
Now the time for the floor glow. this has a few steps all to itself so once again I'll go ahead and tell you where im going then take you there. Elliptical marquee around base where i wanted to apply the effect.Saved an alpha channel. gaussian blurred it, selected it, made a levels adjustment.

step 22 of 29
The knock out shows where the effect will be. I blurred this channel to create a gentle transition out to the edge

step 23 of 29
the red shows the soft transition of the blur, and the green shows the original before the blur.

step 24 of 29
Selected the blurred channel and made a levels adjustment.
I did it this way so I could edit it later if necessary.
I did it this way so I could edit it later if necessary.

step 25 of 29
Now that I had that selection and effect I could create the light from the top. I did this by adding to the selection I had using the rectangular marquee. I shift clicked to add to the selection and that gave me nice round edges.

step 26 of 29
then I free transformed the selection to emulate a light from the top and radiating downwards. Notice the really nice round edge at the bottom.

step 27 of 29
Now just to add some touch ups and embellishments. Outer glows for the armour and the sword.

step 28 of 29
Added a drop shadow to the base rock layer

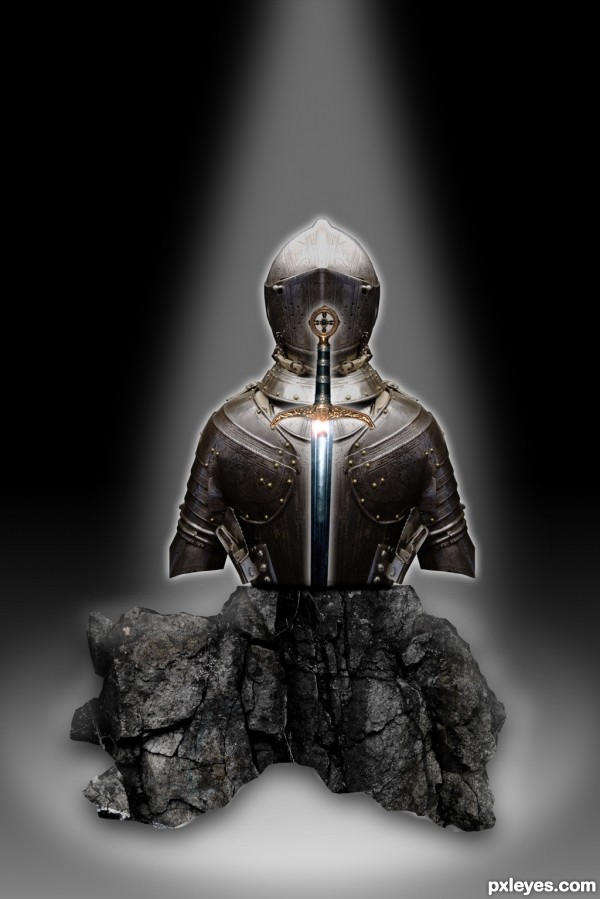
step 29 of 29
resized for uploading, and touched up added some dimension to the rock base and shadow to base of the armour. Thats it, made more coffee!

Final result
Pxleyes
Photography and photoshop contests
We are a community of people with
a passion for photography, graphics and art in general.
Every day new photoshop
and photography contests are posted to compete in. We also have one weekly drawing contest
and one weekly 3D contest!
Participation is 100% free!
Just
register and get
started!
Good luck!
Follow us:


© 2015 Pxleyes.com. All rights reserved.