
Original image
step 1 of 18
I started off by masking out the part of the source image that I no longer wanted

step 2 of 18
I rotated the this part of the violin and cut out a space for the wheels and the under part of the car.

step 3 of 18
In this step I added the wheels from the image I found at Morguefil.com

step 4 of 18

step 5 of 18
In this step I used the burn tool to add some shadows to the car creating a bit of depth.

step 6 of 18
Here I added some vents to the car. I did this using the pen tool and a black fill.

step 7 of 18
In this step I added a background using the gradient tool. I also used the burn tool a bit more to add more depth to the car.

step 8 of 18
I used the elliptical marquee too to create a white circle for the number 8. After the circle was created I selected the body of the car and then selected the inverse and hit delete on the circle layer so the white circle you fit the body of the car. I then added a blue stroke inside the circle using the blending options.

step 9 of 18
I used the pen tool here to create the flames. I made the flames fit the body using the same technique used for the white circle.

step 10 of 18
Here I simply set the flame layer and the white circle layer's blending options to overlay.

step 11 of 18
In this step I used the pen tool and a stroke path to create the doors and the hood of the car.

step 12 of 18
I created fenders in this step by using the pen too to create a crecent shape to fit around the wheel I fill this shape with white and set it to overlay using the blending options.

step 13 of 18
I used the dodge tool in this step to creat a highlight on the top of the car to make it pop more.

step 14 of 18
In this step I used the pen tool to create a headlight and a tail light.

step 15 of 18
I simply went into the blending options of the taillight and gave it an inner shadow and a pattern overlay which was set to overlay to give the tail light some texture. I also select the headlight and contracted the selection by 1 pixel and filled the selection with a white to nothing gradient. I then gave the gradient layer a pattern overlay set to overlay.

step 16 of 18
Here I used the pen tool to draw the seat, the steering wheel, the steering column, and the place where the odometer goes. Each piece was its own separate layer.

step 17 of 18
I then used the dodge tool to create highlight on each one of the layers created in the previous step. I also gave each layer a pattern overlay to give them some texture. I did this to give each layer some depth and make them feel as though they belonged in the image.

step 18 of 18
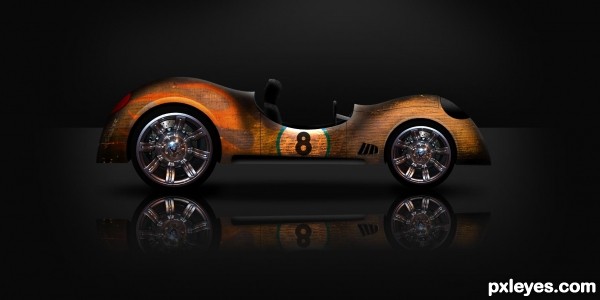
In this step I simple added a shadow beneath the car and also a reflection.

Final result
Pxleyes
Photography and photoshop contests
We are a community of people with
a passion for photography, graphics and art in general.
Every day new photoshop
and photography contests are posted to compete in. We also have one weekly drawing contest
and one weekly 3D contest!
Participation is 100% free!
Just
register and get
started!
Good luck!
Follow us:


© 2015 Pxleyes.com. All rights reserved.