A Work in Progress: to be or not to be


This guide was made for entry:
to be or not to be
In Contest:
skeletons TD


step 1 of 8

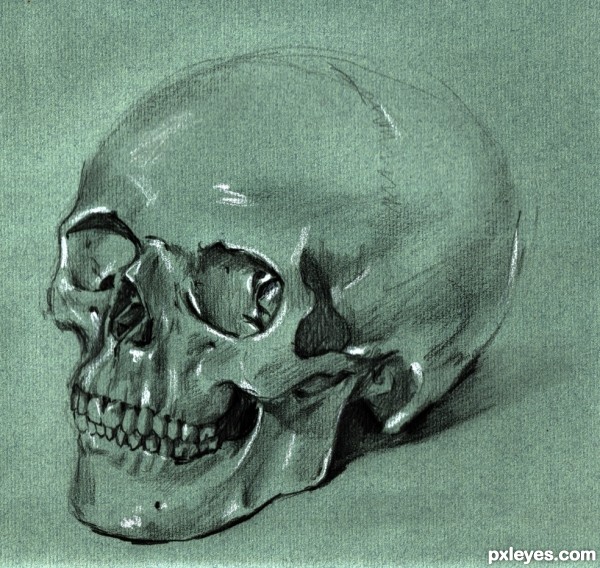
At first I arrange the model (Yes, that is mine :-) )
Try to play with the light and the position to find an interesting arrangement with nice shadows. It is important to position the skull in a way that the shadows are flattering for the object. Take care that the shadows don't lead to optical corruption of the form.
A white piece of fabric is always valuable in an artist's house.

Creation of to be or not to be: Step 1

step 2 of 8

I did this with a 6B pencil and a white chalk on a bluish piece of sketch paper. (I know it looks white, because of the bad photo ;-))
You could of course use different pencils, but for a fast little sketch those two are sufficient.
Coloured and textured paper should always be preferred to white. It gives your sketch more life and more depths (Not only because you can use white for highlights in the end!).

Start with a very slight outline to get an idea of the form. It's like a puzzle. Start with the frame and put the rest inside ;-)

Creation of to be or not to be: Step 2

step 3 of 8

Work yourself from light lines and shadings to deeper shadings and details. It's best to work from parts you already did or so to say "understood" to parts that still confuse you.

E.g. If you already have the outline of the orbit (eyehole) don't jump to the molar. Work your way down there. First work out details in and around the eyehole. This way you'll get to the nose, then the maxilla to the front teeth to the molar :-)

Creation of to be or not to be: Step 3

step 4 of 8

If you work your way only from one point to all the others you are guaranteed to misshape the object. To avoid this go from different points to the others and always check the proportions.


Creation of to be or not to be: Step 4

step 5 of 8

Now work yourself through the whole object.

Creation of to be or not to be: Step 5

step 6 of 8

Creation of to be or not to be: Step 6

step 7 of 8

Now we get to my favorite part.
My beloved 6B pencil isn't called 6 BLACK for no reason. Push it really hard on the paper to get really dark shadows. The trick is to do only a few very little parts in the blackest shade you can. The rest of the shadows should be dark, but not the darkest you can.That makes it more vivid.

Isn't this fun? Enjoy it!

Creation of to be or not to be: Step 7

step 8 of 8

Finish your sketch with white chalk. Highlight your work and don't forget to fixate it!

Don't buy expensive fixative! Simple strong hair spray does the trick! Spray several times from a distance of 30 cm from left to right and up and down. Don't mess with it. If your picture turns too dark, it's too much and maybe stays blotty. Better do it several times very thin and let each layer dry.
You're done if your finger stays clean after touching a part with a lot of colour. (Be careful with touching it! Don't destroy your work before it's fixated.)

Creation of to be or not to be: Step 8

Final result

Creation of to be or not to be: Final Result

LOGIN or REGISTER FOR FREE
to rate this guide and create your own guides.

Votes


uservoted
Seymour
IDt8r
RayTedwell
Score:
10


Comments

avatar IDt8r
IDt8r says:

You're a natural teacher. Thank you!

(5 years and 3138 days ago)