
Original image
step 1 of 16
Source vintage post card

step 2 of 16
Eagle nebulae source photo

step 3 of 16
Source angel is moved into a new canvas and writing is cloned out.

step 4 of 16
A 'pattern' was created here from the postcard sky. It will be used to fill in canvas behind the postcard and blended in with eraser and cloning tools.

step 5 of 16
Dress in made longer using the brush tools, smudge tool and cloning tool.

step 6 of 16
Telephone source is moved in, then receiver portion is chopped out and moved to angel's ear to be sized to fit. Smudge tool will be used to shape the mouthpiece to be at the right angle. Color will be dulled slightly and given slight gaussian blur to better match the slightly unfocused look of the postcard.

step 7 of 16
Here the blur has been added and a hand and arm holding the phone is brushed in. (Later I will be changing the arm and hand, but I leave it as I started it to show how changes have to be made often.)

step 8 of 16
Piece of dress on her shoulder is lassoed and moved down to skirt to be rotated and cloned onto the skirt in a number of places, then completed by blending with soft airbrush.

step 9 of 16
Star layer from Eagle Nebulae is placed on top layer and opacity reduced so that angel shows through easily. Face and head area have eraser used to keep it from becoming too cloudy.

step 10 of 16
Cloud source is inserted. Only cloud parts will be used and blue removed.

step 11 of 16
Clouds have been erased where necessary to make a cloudy 'pillow' for the angel. Some duplications were done and more layers of clouds used to create a pleasing shape toward bottom and to allow some of the cloudy look to extend up over the dress.

step 12 of 16
Telephone base is added, scaled down in size, color dulled and gaussian blur added as on receiver. Cord is duplicated and portions joined together so that it looks like the cord goes over her shoulder and down to the phone base.

step 13 of 16
Here the hand and arm have been changed with the first hand being cloned out. Finally, filters in dark red and in dark brown will be added at 10% opacity.

step 14 of 16
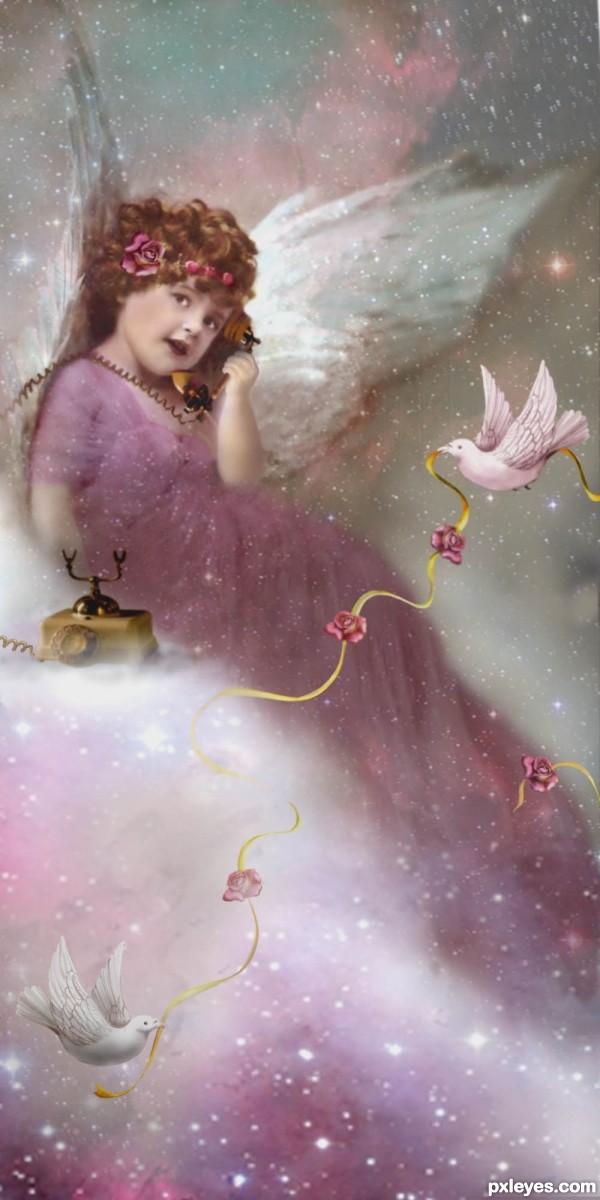
I decided to add some birds, and here are the steps to creating it with brush and smudge tools. Dodge and burn tools add shadows. Top bird is stronger than the one coming through the clouds at the bottom.

step 15 of 16
Here the rose and ribbon are sketched with brush tool, then coloring started. Dodge and burn tool add highlights and shaded areas. One rose is scaled to fit in angel's hair, others are placed with ribbons. Ribbons are faded where clouds might be slightly over them.

step 16 of 16
Source for cloudy sky

Final result
Pxleyes
Photography and photoshop contests
We are a community of people with
a passion for photography, graphics and art in general.
Every day new photoshop
and photography contests are posted to compete in. We also have one weekly drawing contest
and one weekly 3D contest!
Participation is 100% free!
Just
register and get
started!
Good luck!
Follow us:


© 2015 Pxleyes.com. All rights reserved.